
Why Paint for Concrete Steps Outside Matters for Your Home
Paint for concrete steps outside is the key to changing worn, dull concrete into a durable, attractive entrance that boosts your home’s curb appeal and safety. Here’s what you need to know:
Quick Answer: Best Paint Options
- Acrylic Latex Porch & Patio Paint – Best for most homeowners (covers 200-400 sq ft per gallon)
- Epoxy-Based Paint – Most durable option (lasts 5+ years, covers 300-500 sq ft per gallon)
- Masonry Paint – Excellent adhesion and breathability (covers 250-400 sq ft per gallon)
- Anti-Slip Paint – Built-in texture for safety (covers 80-120 sq ft per gallon)
Your concrete steps face constant punishment from foot traffic, weather, and temperature swings. Without protection, they absorb water that leads to cracking, chipping, and premature deterioration. A proper paint job doesn’t just refresh their appearance – it creates a protective barrier that extends their lifespan by years.
The good news? Painting concrete steps is a manageable DIY project that delivers impressive results. You’ll need the right paint type, proper surface preparation, and a slip-resistant finish to create steps that look great and stay safe in all weather conditions.
This guide walks you through everything from choosing the best paint to applying the final coat, so you can tackle this project with confidence and achieve professional-quality results.
, Durability (calendar showing 5+ years with strong concrete), Aesthetics (before and after comparison of gray vs. freshly painted colorful steps), and Safety (foot icon on textured non-slip surface) - paint for concrete steps outside infographic")
Choosing the Best Paint for Concrete Steps Outside
Choosing the right paint for concrete steps outside is crucial for your home’s appearance, safety, and long-term maintenance. Your steps endure harsh weather and constant foot traffic, so regular exterior house paint simply won’t last. It lacks the flexibility to handle concrete’s expansion and contraction with temperature changes, which leads to cracking and peeling. Quality concrete paints contain special binders that move with the concrete, preventing damage and keeping your steps protected through every season.
Understanding Different Paint Types
Let’s walk through the best options for paint for concrete steps outside. Each type has its own strengths, and understanding them helps you make the right choice for your home.
Acrylic Latex Porch & Patio Paint is a popular choice for homeowners. These water-based paints offer simple soap-and-water cleanup and are formulated for flexibility, allowing the paint to expand and contract with the concrete. They resist fading and scuffing well, with a gallon covering up to 400 square feet. They also hide minor imperfections and often include mold and mildew resistance—a great benefit in humid Illinois summers. They are typically available in low-luster or satin finishes for a clean, understated look.
Epoxy Paint is the top choice for maximum durability. Often associated with garage floors, its toughness is perfect for high-traffic steps, resisting chemicals, oil, and constant wear. Epoxy creates an extremely durable, long-lasting barrier, with a gallon covering 300-500 square feet. The glossy finish can last five years or more with proper care. While it requires more careful application and longer curing times, the results are worth the effort.
Masonry Paint is engineered for porous surfaces like concrete. Its key feature is breathability, which allows moisture vapor to escape, preventing peeling caused by trapped moisture. These paints offer excellent adhesion and often include waterproofing properties for extra protection. A gallon covers 250-400 square feet. While not as chemical-resistant as epoxy, its superior bonding and breathability make it a smart choice for outdoor steps. Many formulas also resist mold and mildew.
Key Features in a Quality Paint for Concrete Steps Outside
No matter which type you choose, quality paint for concrete steps outside should have certain characteristics.
High-traffic formulas are non-negotiable. Your steps see daily use, so the paint must resist scuffing and general wear. Specialized porch and patio or epoxy paints are designed for this.
Scuff resistance keeps your steps looking fresh. To avoid premature wear marks, look for paints that specifically mention scuff resistance.
Mold and mildew resistance protects your investment. In a moist outdoor environment, paints with mold and mildew-resistant additives keep your steps looking cleaner for longer.
Weather resistance is essential in our Illinois climate. The paint must withstand UV radiation, rain, snow, and freeze-thaw cycles. Quality paints are formulated to handle these challenges without breaking down.
Flexibility prevents cracking and peeling. The paint must expand and contract with the concrete, a critical feature for long-lasting results.
Finish options let you customize the look. Low-luster and satin finishes offer a subtle appearance, while epoxy paints can provide a high-gloss finish. Your choice depends on personal taste. For inspiration, explore our guide on outside house painting colour combinations.
Preparation: The Secret to a Flawless Finish
The secret to a beautiful, long-lasting finish lies in what happens before you open the paint can. When it comes to paint for concrete steps outside, thorough preparation is everything. Skipping these steps will lead to peeling and cracking within a year. Proper paint adhesion only happens when the surface is clean, sound, and properly primed. Every minute you spend preparing will save you hours of frustration later.

Cleaning and Repairing Your Steps
Start by cleaning the steps to remove all collected dirt, grime, and oil.
Power washing is the best way to blast away dirt, mildew, and debris. A garden hose with a strong nozzle and a stiff brush will also work with more effort.
Next, degrease the surface. Apply a quality concrete degreaser, scrub it in, and let it sit for 20-30 minutes. Rinse thoroughly to remove all cleaning solution, as any residue can prevent the paint from bonding.
If the steps have peeling or flaking old paint, you must remove the loose paint with a wire brush. New paint won’t stick to a failing coat. For very rough areas, a chemical paint stripper may be needed to get to solid concrete.
Now take a close look at the condition of the concrete itself. See any cracks, chips, or holes? These need to be filled with a high-quality concrete filler or epoxy mortar. For cracks up to about a quarter-inch thick, concrete resurfacers work wonderfully and can add years of life to your steps. Give these repairs a full 24 hours to dry completely—rushing this step will come back to haunt you.
Once everything’s dry, sand the patched areas smooth using an orbital sander with 120-grit sandpaper. This creates a uniform surface that helps your paint go on evenly and look professional. For more detailed information about proper surface preparation techniques, check out our guide on how to prepare a house for painting.
Priming for Maximum Adhesion
Priming is not optional when using paint for concrete steps outside. Even with “self-priming” paint, we recommend a dedicated concrete bonding primer. A quality primer creates a strong chemical bond between the concrete and your topcoat, dramatically improving adhesion and durability.
If you’re working with newly poured concrete, you’ll need to practice patience. Fresh concrete must cure for 30 to 60 days before it’s ready to paint. We know it’s tempting to rush this, but moisture trapped in new concrete will cause your paint to fail, plain and simple.
Even with older concrete, moisture is your enemy. Here’s a simple moisture test: tape a 1-foot square piece of clear plastic to one of your steps and leave it for 24 hours. Come back and check for condensation on the underside. If you see water droplets, the concrete isn’t dry enough yet. Wait a few more days and test again.
Once you’re sure the surface is dry, perform a quick porosity test. Spray some water on the concrete. If it soaks in quickly, you’re good to go. If the water beads up and sits on the surface, your concrete is sealed or non-porous. In this case, you’ll need to etch the surface with a commercial concrete etching product, following the instructions carefully, then rinse thoroughly. This opens up the concrete’s pores so the primer can penetrate and bond properly.
Now you’re ready to apply your concrete bonding primer. Start at the top step and work your way down—you don’t want to paint yourself into a corner. Apply one even coat, making sure to cover all surfaces completely. For bare, unpainted concrete, two coats of primer give you the best results. Allow one to two hours of drying time between coats, though always check your specific primer’s instructions for exact timing.
One last thing: wear a respirator mask when working with primers and paints. The fumes aren’t something you want to breathe in, especially in an enclosed area. Your lungs will thank you.
The Painting Process: A Step-by-Step Guide
With your concrete steps carefully prepared and primed, you’re ready for the exciting part: applying the paint for concrete steps outside. This is where your vision truly comes to life! After all that prep work—the cleaning, repairing, and priming—you get to see your steps transform into a beautiful, durable entrance.

Before you pop open that paint can, take a moment to gather everything you’ll need. There’s nothing worse than getting halfway through a coat only to realize you’re missing a crucial tool. Make sure you have your chosen concrete paint, a paint roller designed for rough surfaces (a 6.5-inch roller with a 1/2-inch nap works beautifully on textured concrete), an extension pole to save your back, a high-quality paintbrush for edges, a paint tray, painter’s tape for clean lines, drop cloths, and a paint respirator mask. Trust us on that last one—proper ventilation is important, even outdoors.
Applying the First and Second Coats
Essential Tools:
- Paint for concrete steps outside (your chosen type and color)
- Paint roller for rough surfaces with 1/2-inch nap
- Extension pole
- High-quality paintbrush
- Paint tray
- Painter’s tape
- Drop cloths or plastic sheeting
- Paint respirator mask
Now let’s get painting! Start by using painter’s tape to carefully mask off any surfaces you want to protect—your house foundation, siding, or the walkway beside your steps. Lay down drop cloths to catch any drips. Nobody wants colorful splatters on their landscaping.
Grab your paintbrush first and cut in the edges. This means painting along all the edges, risers, and tight corners where your roller can’t reach. This technique creates crisp, professional-looking lines and ensures you won’t miss any spots. Take your time here—it makes a big difference in the final result.
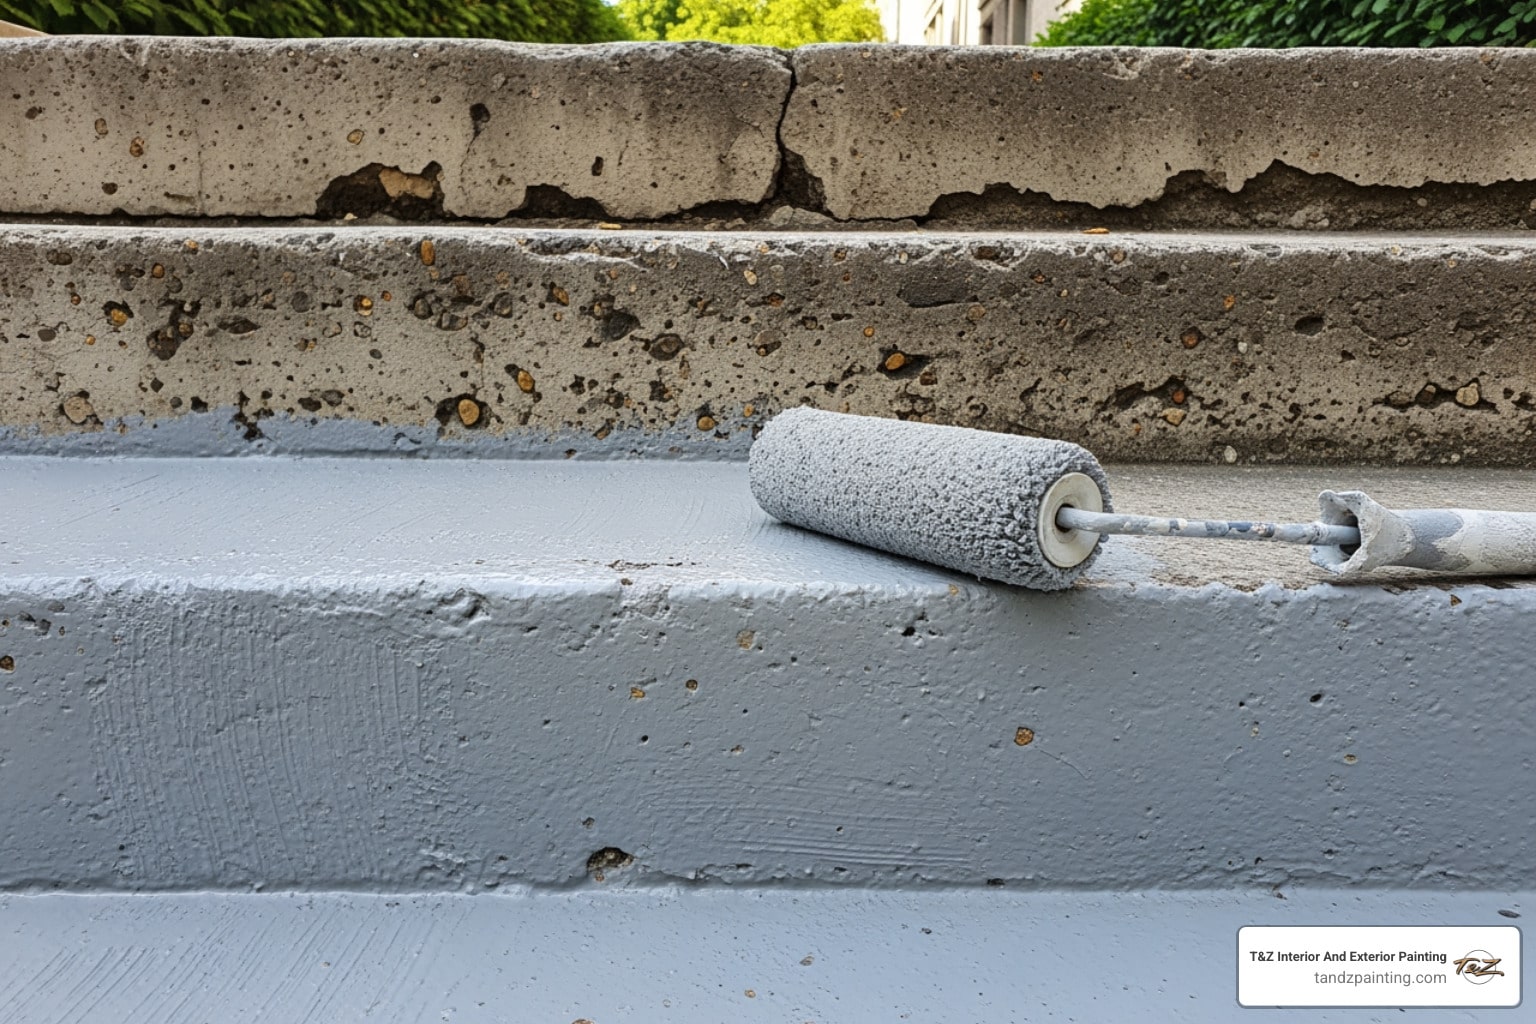
Once your edges are done, pour your paint for concrete steps outside into the paint tray and load your roller evenly. Start at the top step and work your way down (you don’t want to paint yourself into a corner or step on wet paint). Apply the paint in thin, even coats. Here’s a pro tip: maintain what painters call a “wet edge.” This means always rolling into a section you just painted while it’s still wet. This prevents those annoying lap marks and ensures a smooth, uniform finish.
For the vertical risers, use vertical strokes. For the horizontal treads, roll in the direction of the step. It might seem like a small detail, but it helps create a more professional appearance.
After you’ve applied the first coat, patience becomes your best friend. Allow the paint to dry completely—typically 4 to 6 hours, though this can vary based on temperature and humidity. We know it’s tempting to rush, but applying a second coat too soon can cause bubbling and poor adhesion. Check your paint manufacturer’s instructions for the recommended drying time in your specific conditions.
Once the first coat is dry to the touch, apply your second coat using the same careful technique. Two coats aren’t just recommended—they’re essential for outdoor concrete steps. That second coat provides the coverage, color vibrancy, and protective properties your steps need to withstand Illinois weather and constant foot traffic. Think of it as an investment in longevity.
If you used painter’s tape, remove it shortly after applying the final coat while the paint is still slightly tacky. This prevents the paint from curing to the tape and pulling off chunks of your beautiful new finish.
How to Create a Slip-Resistant Finish
Here’s something we can’t stress enough: painted concrete steps can become dangerously slippery when wet. Between our rainy springs, snowy winters, and dewy summer mornings in Lombard and Wheaton, safety needs to be a priority. The good news is that creating a slip-resistant surface is straightforward, and you have several excellent options.
The easiest approach is to use paint with built-in texture. Some specialized paints come with aggregate already mixed in, specifically designed to create a non-slip surface. These products are particularly popular for pool decks and walkways where safety is paramount. That these textured paints typically cover less area—around 80 to 120 square feet per gallon—because of the added aggregate.
If you’ve already chosen a paint without built-in texture, don’t worry. You can mix a non-slip aggregate into your final coat. These aggregates—usually fine sand or polymer beads—are available at most paint stores. Just stir the aggregate into your paint before applying the last coat. We recommend adding it only to the final coat so you get maximum coverage from your first coats. This method gives you the flexibility to use any paint for concrete steps outside you love while still ensuring safety.
For an extra layer of protection, consider applying a clear anti-slip topcoat after your paint has fully dried and cured. These clear sealers create a durable, textured surface without changing your paint color. They’re water-based, non-yellowing, and provide both safety and an additional shield against weather and wear. It’s like adding insurance to your paint job.
If you want to explore more advanced solutions, you can Learn about anti-slip concrete treatments that create microscopic treads for increased traction. These treatments offer professional-grade slip resistance and can be especially valuable if you have elderly family members or small children using the steps regularly.
A beautiful entrance isn’t worth much if it’s not safe to walk on. Taking the time to add slip resistance now will give you peace of mind for years to come.
Maintenance and Frequently Asked Questions
Once your paint for concrete steps outside has dried and cured, you’ll want to keep them looking fresh and performing their best for years to come. A little ongoing care goes a long way in preserving your investment and maintaining your home’s curb appeal. We also understand you might have lingering questions about longevity and timing, so let’s address those common concerns.

How to Maintain Your Paint for Concrete Steps Outside
Maintaining your painted concrete steps is relatively simple, but consistency makes all the difference between steps that look great for years and ones that start showing wear after just one season.
Regular sweeping is your first line of defense. Make it a habit to sweep your steps at least once a week to remove loose dirt, leaves, and debris. This might seem like a small thing, but those abrasive particles act like sandpaper when people walk on them, gradually wearing down your beautiful new finish.
For deeper cleaning, stick with mild soap and water and a soft-bristled brush or mop. You don’t need fancy cleaners—in fact, harsh chemicals or abrasive cleaners can actually damage the paint finish you worked so hard to create. After scrubbing, rinse everything thoroughly with clean water to remove any soap residue.
Here’s a word of caution about pressure washers: while they’re fantastic for the initial cleaning before painting, be careful using them on your finished steps. If you must use a pressure washer for maintenance, keep it on a low setting and hold the nozzle at least a foot away from the surface. Too much pressure can chip or peel even well-adhered paint.
Make it a point to inspect your steps a few times a year, especially after harsh winter weather or intense summer sun. Look for any signs of chipping, peeling, or fading. Catching small issues early means you can fix them with a quick touch-up rather than facing a full repaint down the road.
When you do spot minor damage, the touch-up process is straightforward. Clean the area thoroughly, lightly sand if there are any rough edges, and apply a small amount of your original paint. (This is why we always recommend keeping a bit of leftover paint stored properly for exactly this purpose!) If you used epoxy paint, regular waxing and buffing can significantly extend its lifespan and maintain that attractive gloss.
How long does painted concrete on steps typically last?
This is probably the most common question we hear, and honestly, it depends. The lifespan of paint for concrete steps outside varies based on several key factors: the type of paint you chose, how much weather exposure your steps get, the amount of foot traffic they endure, and—most importantly—how well you prepared the surface before painting.
Latex porch and patio paints, while durable and budget-friendly, generally need recoating every 2-3 years. This is especially true here in Illinois, where our steps face freezing winters, scorching summers, and everything in between. If your steps see heavy daily use—say you have a busy household with kids running in and out—you might find yourself touching up high-traffic areas even sooner.
Epoxy-based paints are the marathon runners of the concrete paint world. With proper application and maintenance, these tough coatings can last 5 years or significantly longer. Their robust nature makes them highly resistant to abrasion, chemicals, and extreme weather conditions. Yes, they require a bit more effort to apply, but if longevity is your priority, epoxy delivers impressive value over time.
If your steps needed extensive repair work, you might have used a concrete resurfacer as a base layer. While not strictly paint, these products can fill cracks and revitalize damaged concrete, with the resurfaced layer lasting up to 12 years. When you combine a quality resurfacer base with a good topcoat of paint, you’re setting yourself up for maximum durability.
The bottom line? Diligent preparation, choosing the right paint for your specific needs, and consistent maintenance will be the biggest determinants of how long your painted concrete steps will last.
When is the best time of year to paint my steps?
Timing can make or break your painting project. Working with paint for concrete steps outside requires the right weather conditions to ensure proper drying and curing—otherwise, you risk all that hard work peeling off prematurely.
The sweet spot for painting concrete is when temperatures consistently stay between 50°F and 90°F. This range allows the paint to dry and cure at the proper rate. Avoid painting in direct, intense sunlight, even if the temperature is right. When paint dries too quickly, you’ll end up with brush marks, roller lines, and potentially poor adhesion to the concrete.
Low humidity is equally important. High humidity can extend drying times dramatically and affect how well the paint cures, potentially leaving you with a less durable finish that stays tacky longer than it should.
You’ll also need to avoid rain—and not just on painting day. Check the extended forecast and make sure you have several consecutive days of dry weather for cleaning, priming, painting, and allowing sufficient cure time. A sudden downpour on wet paint can wash away your hard work or leave permanent water marks in the finish.
In our service areas like Lombard, Wheaton, and Downers Grove, late spring and early fall typically provide these ideal conditions. The air is usually drier, temperatures are moderate, and you’re less likely to encounter unexpected rain or extreme heat. Summer can work, but you’ll need to plan around those hot, humid stretches and afternoon thunderstorms.
For more insights into optimal painting conditions and how weather impacts exterior projects, check out our detailed guide on When is the Best Time to Paint the Exterior of Your Home?. Planning your project for the right time of year will set you up for success from the start.
A Fresh, Safe, and Durable Entryway
You’ve done it! By changing your outdoor concrete steps with the right paint for concrete steps outside, you’ve accomplished something that truly makes a difference. Think about everything we’ve covered together: choosing a paint type that can withstand our Illinois weather, thoroughly preparing the surface (yes, even the tedious parts), carefully applying each coat, and creating that all-important slip-resistant finish. This wasn’t just about slapping on some color—you’ve boosted your home’s curb appeal, improved safety for everyone who visits, and added a protective shield against rain, snow, and those brutal freeze-thaw cycles we know so well.
There’s something genuinely satisfying about standing back and looking at your newly painted steps. That fresh, clean appearance. The knowledge that you’ve protected your investment. The welcoming entrance that greets you and your guests every single day. It’s a project that delivers real, visible results.
Now, we also know that not everyone has the time to dedicate a weekend to this kind of work. Maybe you’re juggling work and family. Maybe you don’t have all the right tools sitting in your garage. Or perhaps you’re looking at your steps and thinking, “This is more complex than I bargained for.” That’s completely understandable, and it’s where professional help makes perfect sense.
For jobs that require specialized expertise, specific design visions, or when you simply want the peace of mind that comes with guaranteed professional results, bringing in experienced painters is often the smartest decision. At T&Z Interior And Exterior Painting, we’ve been helping homeowners throughout Lombard, Wheaton, Elmhurst, Downers Grove, and surrounding communities create beautiful, durable exteriors for years. Our teams use top-brand materials, bring the right tools and experience to every job, and we’re committed to delivering quality results that last. We understand the unique challenges of painting in our Illinois climate, and we stand behind our work.
Whether you’ve tackled this project yourself or you’re considering professional assistance for your concrete steps or other exterior painting needs, the goal is the same: a beautiful, safe, and long-lasting entrance that you’ll be proud of for years to come. Explore our professional exterior painting services and find how we can help you achieve the stunning entryway your home deserves.