
Why Crown Molding Painting Transforms Your Home
Crown molding painting is the process of applying paint to the decorative trim that runs between your walls and ceiling. Here’s what you need to know:
Key Steps for Crown Molding Painting:
- Prep the Surface – Clean, fill holes, sand, and caulk gaps
- Prime the Molding – Apply primer for better adhesion
- Choose Your Color – Match walls for modern look or contrast for classic elegance
- Paint Carefully – Use angled brush, maintain wet edge, apply thin coats
- Remove Tape – Pull away tape while paint is still tacky for clean lines
Quick Answer: Use semi-gloss or satin paint, apply two thin coats with an angled brush, and remove painter’s tape before the paint fully dries.
Paint drips on crown molding reveal themselves at the worst possible moments. Sunlight catches that missed spot during your morning coffee, or guests notice the uneven sheen during dinner parties. The truth is, crown molding adds elegance to any room, but only when painted correctly.
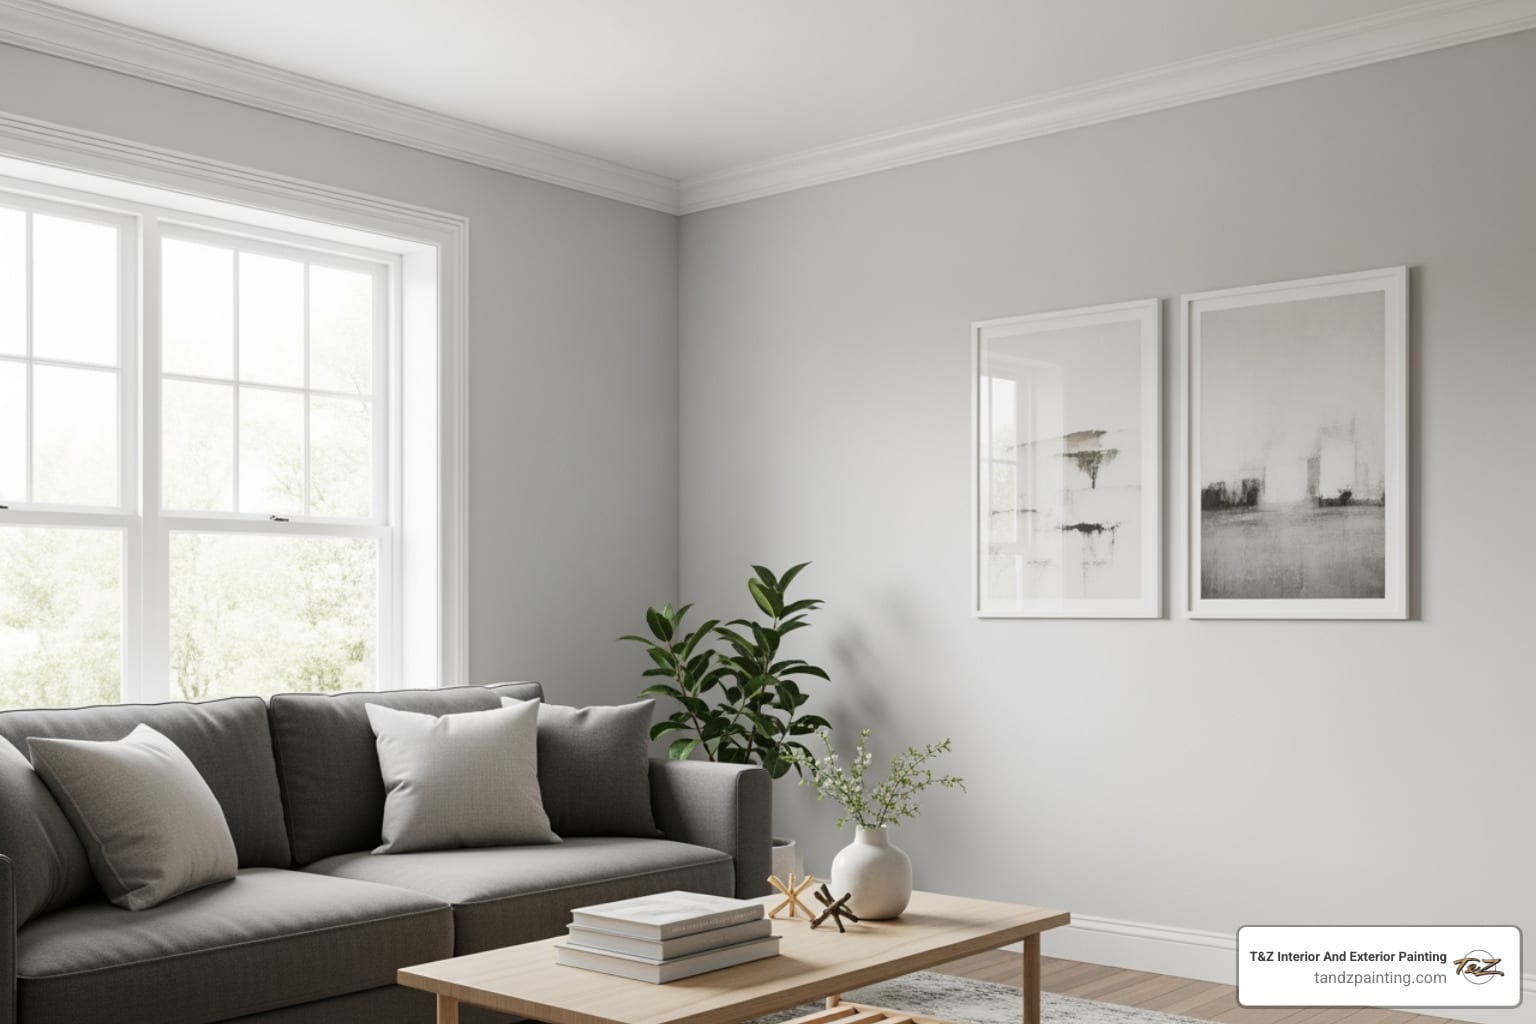
Why paint your crown molding? A fresh coat can completely transform a space. It creates a finished, refined look that lifts your entire room. You can match it to your walls for a seamless, modern feel that makes ceilings appear taller. Or contrast it with white or a bold color to add classic architectural definition.
The process isn’t complicated, but it demands precision. Most homeowners focus solely on color choice while overlooking critical factors like paint viscosity, brush technique, and proper preparation. Your molding’s complex angles and shadows demand a different approach than standard trim work.
I’m Tomasz Niemotko, and over my 13+ years with T&Z Interior And Exterior Painting Contractors, I’ve transformed countless homes through expert crown molding painting and custom interior finishes. My team and I have perfected the techniques that separate amateur attempts from professional results, and I’m here to share that knowledge with you.
, Step 2 - Prime (seal bare wood, apply quality primer), Step 3 - Paint (use angled brush, two thin coats, maintain wet edge), Step 4 - Perfect (remove tape while tacky, check for missed spots), Step 5 - Protect (allow proper cure time, avoid cleaning for 2 weeks) - Crown molding painting infographic")
The Great Debate: Choosing Your Crown Molding Color and Finish
Choosing the right color and finish for your crown molding is more than just a decorative decision; it’s a strategic move that influences the entire perception of your room. Crown molding, a decorative molding installed at the top of an interior wall, has been an architectural feature for centuries, enhancing the aesthetic of any home. When we approach crown molding painting, we consider how color theory and architectural definition can work together to either expand a space or highlight its intricate details.
For instance, a homeowner looking for a minimalist aesthetic might prefer to paint their crown molding the same color as their walls, creating an uninterrupted flow that makes the room feel larger. Conversely, someone who loves traditional design might opt for a crisp white crown molding against a darker wall, framing the room and adding architectural interest. The global market for architectural coatings, which includes paints for crown molding, is projected to reach $190.5 billion by 2027, growing at a CAGR of 4.5%, indicating the significant investment homeowners are making in their living spaces. This includes a rise in DIY home improvement projects, with many homeowners taking on painting tasks themselves.
Here’s a quick comparison to help you weigh your options:
| Feature | Matching Wall Color | Contrasting Wall Color |
|---|---|---|
| Aesthetic | Seamless, modern, minimalist, subtle | Classic, neat, defined, dynamic, statement-making |
| Room Perception | Walls appear taller, room feels larger, harmonious flow | Adds architectural definition, frames the room, visual interest |
| Design Style | Neutrals, sleek, streamlined interiors | High detail, traditional, bold, luxurious |
| Impact | Blends in, creates visual continuity | Stands out, highlights molding as a feature |

To Match or To Contrast?
This is often the first question our clients ask when considering crown molding painting. The answer largely depends on your personal style and the overall interior design you want to achieve.
For those who favor neutrals, minimalism, and sleek, streamlined interiors, matching the crown molding to the wall paint creates a subtle and sophisticated look. This approach allows the molding to blend seamlessly, making the walls appear taller and enhancing the room’s flow. It’s a modern choice that contributes to a more expansive feel. You can explore more about this seamless approach by checking out resources like this one on sleek and streamlined interiors.
On the other hand, if you appreciate classic elegance, intricate detail, and want your decorative molding to make a statement, contrasting the crown molding color with your walls is the way to go. This adds architectural definition and a dynamic feel to the space. It’s favored by those who enjoy a high-end, traditional aesthetic.
The decision also extends to how your crown molding relates to other elements like your ceiling and baseboards. We often discuss the pros and cons of painting ceilings the same color as walls with our clients, as this can significantly impact the overall look. For instance, for low ceilings, painting the crown molding the same color as the walls (in satin or semi-gloss) and the ceiling in a flat finish can actually make the ceiling appear higher. In rooms with high ceilings, painting the crown molding white in a semi-gloss finish and the ceiling the same white color but in a flat finish is a popular choice. Regardless of whether you match or contrast, a fresh coat of paint can make your molding and baseboards feel more consistent and unified.
Selecting the Perfect Paint Sheen
Once you’ve decided on your color scheme for crown molding painting, the next crucial step is choosing the right paint sheen. The finish you select impacts not only the aesthetic appeal but also the durability and ease of cleaning for your crown molding.
A semi-gloss finish is often the most popular choice for crown molding due to its excellent durability and ease of cleaning. It offers a subtle shine that helps the molding stand out, reflecting light just enough to highlight its architectural details without being overly reflective. Semi-gloss is highly resistant to scuffs and moisture, making it ideal for high-traffic areas in homes across Lombard, Wheaton, and Chicago.
Satin finish is another excellent option, offering a slightly softer sheen than semi-gloss. It provides good durability and is still easy to clean, making it a versatile choice for various rooms. For a more modernized look, using the same matte or satin finish on both walls and molding can create a seamless, contemporary feel.
While flat or matte finishes are preferred for ceilings and low-traffic areas due to their ability to hide imperfections and non-reflective nature, they are generally not recommended for crown molding. Flat paint lacks the “kick” or visual impact of higher gloss paints and is less durable and harder to clean. For interiors, high-gloss finishes are the most durable, making them suitable for very high-traffic areas like entryways or commercial spaces where extreme durability and washability are paramount.
The right paint finish significantly impacts both the practical longevity and the visual aesthetic of your crown molding. For a deeper dive into these options, you might find this guide on common paint finishes for crown molding helpful.
Gearing Up: Tools and Essential Prep Work for Crown Molding Painting
Achieving a flawless crown molding painting job starts long before we even open a can of paint. Proper preparation is the cornerstone of any successful painting project, especially when dealing with the intricate details of crown molding. It ensures paint adhesion, a smooth finish, and protects your surrounding walls and ceilings. We always emphasize that thorough cleaning, repairs, and priming are essential for crown molding surface preparation. Years of accumulated dust, cobwebs, and airborne oils can create a barrier between the paint and the surface, leading to poor adhesion and a less-than-perfect result. For a comprehensive guide on preparing your home for painting, check out our tips on how to prepare a house for painting.

Your Toolkit for Success
Having the right tools is half the battle when it comes to crown molding painting. Here’s a list of essential items we recommend for a professional-looking finish:
- Angled Sash Brush (2-2.5 inches): This is your workhorse for the main trim surfaces. Its angled bristles are perfect for “cutting in” clean lines.
- Detail Brush (1-1.5 inches): For intricate details, corners, and tight spots where a larger brush won’t fit.
- Painter’s Tape: High-quality tape, preferably with edge-lock technology, is crucial for masking off adjacent surfaces and achieving crisp lines.
- Drop Cloths or Plastic Sheeting: To protect your floors and furniture from spills and drips.
- Masking Paper: For more extensive protection of floors or walls.
- Sandpaper (100 & 180-grit): For smoothing imperfections and deglossing surfaces.
- Wood Filler: To fill nail holes, dents, and minor imperfections.
- Caulk (Paintable): For sealing gaps between the molding and the wall/ceiling.
- Primer: Essential for bare wood, new molding, or surfaces that need a fresh base.
- Paint Tray with Liners: For easy paint management and cleanup.
- Extension Pole: For reaching high crown molding without constantly moving a ladder.
- Paint Shield: A handy tool to prevent paint from getting on adjacent surfaces if you’re not using tape.
We’ve found that investing in quality brushes pays off. Brushes designed specifically for molding, with flagged tips and tapered edges, hold more paint and facilitate smoother application with fewer brush strokes.
How to Prepare the Molding Surface
Preparation is where the magic truly begins for crown molding painting. Skipping these steps will compromise the finish and durability of your paint job.
- Cleaning Surfaces: Start by thoroughly cleaning the crown molding. Years of dust, cobwebs, and airborne oils create a barrier. We recommend using a TSP (trisodium phosphate) solution to cut through this buildup. After cleaning with TSP, rinse the molding thoroughly with clean water and allow it to dry completely.
- Filling Nail Holes and Imperfections: Inspect your crown molding for any nail holes, dents, or minor imperfections. Fill these with appropriate wood filler. Once the filler is dry, sand the entire surface until it’s smooth.
- Sanding: For bare wood molding, sand with 100-grit sandpaper to smooth the surface, then wipe away dust with a tack cloth. If you’re painting over an existing gloss finish, lightly sand with 180-grit sandpaper to “degloss” the surface and improve paint adhesion. You can also use a deglosser product for this step.
- Applying Caulk for Seamless Gaps: This step is critical for a professional finish. After priming (or sometimes before, depending on the caulk type), use paintable caulk to fill any gaps between the crown molding and the wall or ceiling. Painter’s caulk is typically white and dries to a gloss or semi-gloss finish, so it will need to be painted over, even if your molding will be white, to ensure a uniform sheen.
- Priming Bare Wood: If your crown molding is new, bare wood, or if you’ve made significant repairs, priming is non-negotiable. A high-quality wood primer, like a good water-based primer, seals the surface, prevents stains from bleeding through, and provides an ideal base for your topcoats. Apply primer with long, even strokes, ensuring full coverage. If your molding comes pre-primed, this step significantly reduces your painting process time.
Proper preparation ensures that the paint adheres beautifully, giving you a smooth, even, and long-lasting finish that truly lifts your home’s aesthetic in areas like Woodridge, Elmhurst, and Glenview.
The Main Event: A Step-by-Step Guide to Crown Molding Painting
Now that your crown molding is prepped and primed, it’s time for the most exciting part: the actual crown molding painting. This is where your careful preparation pays off, allowing you to achieve stunning, professional results. Our team at T&Z Interior And Exterior Painting prides itself on mastering these techniques to deliver a flawless finish every time. You can always see our work in the Gallery to get a glimpse of the changes we’ve achieved.
Mastering the Brush: Best Techniques for Crown Molding Painting
Painting crown molding effectively requires precision and a systematic approach. Here’s how we tackle it:
- Start in a Corner: Always begin painting from one corner of the room and work your way across the wall. This allows you to maintain a consistent flow and avoid starting and stopping in noticeable areas.
- Tackling Details First: Crown molding often has intricate profiles, curves, and deeper edges. Use your detail brush to paint these smaller, more complex sections first. This ensures they are fully covered before you move to larger surfaces.
- Long, Even Strokes: Once the details are done, switch to your angled sash brush for the broader surfaces of the molding. Apply paint using long, even strokes, moving in the direction of the molding. This minimizes brush marks and creates a smooth finish.
- Maintaining a Wet Edge: This is a crucial technique to prevent lap marks, which are visible lines where wet paint overlaps partially dried paint. Work in manageable sections, ensuring that as you apply new paint, it slightly overlaps the previous section while it’s still wet. This creates a seamless transition. Keep a consistent pace from corner to corner to maintain that wet edge.
- Painting Curves and Corners: For curves, use the natural bend of your angled brush to follow the contour. For corners, expert cutting-in techniques are essential. If you’re not using painter’s tape, a steady hand and a quality angled brush are your best friends. More experienced painters can achieve clean lines by “cutting in” directly, but for most DIY painters, tape is your ally. You can find more insights on expert cutting in techniques to refine your skill. Paint viscosity also plays a role; thin paint with water or solvent for smoother application, but don’t overdo it.
Applying Primer and Paint Coats
The number and type of coats you apply are just as important as your brush technique for a durable and rich finish.
- Importance of Primer: If you haven’t already, ensure your crown molding is properly primed. Primer is especially important for bare wood or if you’re making a significant color change. A quality primer seals the surface, promotes adhesion, and provides a uniform base for your topcoats. Some primers also offer stain-blocking properties, which are invaluable if you’re dealing with existing stains or knots in wood molding.
- Applying Two Thin Coats: We always recommend applying two thin coats of paint rather than one thick coat. Thin coats dry more evenly, are less prone to drips and runs, and provide a much richer, more durable color. Applying two thin coats also improves the richness of the color and allows for better hide, especially with lighter shades or when covering a darker existing color.
- Drying Time Between Coats: Always allow adequate drying time between coats, as specified by the paint manufacturer. This is typically found on the paint can label. Rushing this step can lead to a tacky finish, uneven coverage, or even peeling. While some primers dry in as little as an hour, paint coats often require several hours to be dry to the touch and ready for recoating.
By following these steps, you’ll ensure your crown molding painting project in places like Downers Grove, Carol Stream, or La Grange achieves a beautiful, long-lasting finish.
Achieving a Flawless Finish: Pro Tips and Mistakes to Avoid
The final details can make all the difference in crown molding painting, elevating your work from good to truly professional. Achieving clean lines and knowing when to remove your tape are critical steps that prevent common frustrations and ensure a stunning result.
How to Get Clean Lines and Prevent Bleed
The bane of many DIY painters is paint bleed under the tape. Here’s how we ensure crisp, clean lines:
- Using Quality Painter’s Tape: Not all painter’s tape is created equal. Invest in quality blue painter’s tape, preferably one with edge-lock technology. These tapes are designed to prevent paint from seeping underneath.
- Securing the Tape Edge: Apply the tape firmly along the line where the molding meets the wall or ceiling. Press down along the entire edge of the tape with a putty knife or your fingernail to create a tight seal. Even a tiny gap can lead to bleed.
- Sealing Tape with Caulk or Base Paint (Pro Tip): For an extra layer of protection, particularly if your walls or ceilings have texture, apply a very thin bead of clear caulk along the edge of the tape that touches the crown molding. Smooth it out with your finger. Once dry, this creates a sealed barrier. Alternatively, you can paint a thin coat of the wall or ceiling color over the edge of the tape first. If any paint bleeds, it will be this matching color, which won’t be noticeable. Once dry, proceed with your crown molding paint.
When to Remove Tape and Other Common Mistakes
Knowing when to remove painter’s tape is almost as important as applying it correctly.
- Removing Tape While Paint is Tacky: The golden rule is to remove the tape while the paint is still slightly tacky, but not completely dry. If the paint is too wet, it can smudge. If it’s too dry, it can bond to the tape and peel off with it, ruining your clean line. For most latex paints, this window is usually within an hour or two of the final coat. Pull the tape at a 45-degree angle, slowly and steadily, away from the freshly painted surface.
- Avoiding Paint Peeling: If you wait too long, the paint can form a film over the tape. Scoring the edge of the tape with a utility knife before pulling can help prevent peeling, but it’s best to catch it in the tacky stage.
Common Mistakes to Avoid:
- Skipping Prep Work: This is the most significant pitfall. Not cleaning, sanding, filling, or priming adequately will lead to a subpar finish that won’t last.
- Using the Wrong Brush: A cheap, straight-edged brush will make achieving clean lines much harder and leave more brush marks. Invest in quality angled sash and detail brushes.
- Applying Thick Coats: Thick coats lead to drips, runs, and uneven drying. Always opt for two thin coats instead.
- Painting in Poor Lighting: Poor lighting can hide imperfections and missed spots, only for them to become glaringly obvious later. Ensure your workspace is well-lit.
- Not Maintaining a Wet Edge: As discussed, this leads to visible lap marks and an unprofessional finish.
- Ignoring Environmental Conditions: Painting in extreme temperatures or humidity can affect drying times and paint adhesion.
By paying attention to these details, you can ensure your crown molding painting project rivals professional work, leaving you with beautifully defined architectural features in your home, whether you’re in Addison, Elmhurst, or Schaumburg.
Frequently Asked Questions about Painting Crown Molding
We often get questions from homeowners in Chicagoland about the best practices for painting their crown molding. Here are some of the most common ones:
Should I paint crown molding before or after it’s installed?
This is a great question with a nuanced answer. Painting before installation is often easier, especially if you plan to spray paint, as it allows you to cover all angles without having to tape off walls and ceilings. You can lay the molding flat, which is more comfortable and efficient. However, painting after installation is necessary for touch-ups and ensures that any caulk used to fill gaps between the molding and the wall/ceiling is covered for a seamless, unified look. If you paint before, you’ll still need to do some touch-up painting after installation and caulking. For DIYers, painting after installation allows you to match the existing wall and ceiling lines perfectly.
What is the most durable paint finish for crown molding?
A semi-gloss or satin finish is widely considered the most durable and popular choice for crown molding. These sheens are resistant to scuffs, chips, and moisture, making them much easier to clean than flat or matte finishes. Their slight sheen also helps to highlight the architectural detail of the molding. While high-gloss is even more durable, it can show imperfections more readily, so semi-gloss strikes a great balance of durability, ease of cleaning, and aesthetic appeal.
How do I fix drips or brush marks on my painted molding?
Drips and brush marks are common, even for experienced painters, but they are fixable!
- If the paint is still wet: You can usually smooth out a drip or brush mark with your brush by gently feathering it out. Work quickly before the paint starts to set.
- If the paint has dried: You’ll need to lightly sand the drip or mark until the surface is smooth and flush with the rest of the molding. Use fine-grit sandpaper (around 220-grit). Wipe away any dust with a tack cloth. Then, apply a new, thin coat of paint to the area, blending it carefully into the surrounding paint. Sometimes, two thin coats might be necessary to achieve a seamless repair.
Lift Your Home with Perfectly Painted Molding
The aesthetic impact of well-executed crown molding painting is undeniable. It’s an architectural embellishment that can transform an ordinary room into a space of architectural elegance, making it feel more refined, complete, and thoughtfully designed. Whether you opt for a subtle blend with your wall color to create an illusion of height or a striking contrast to define your space, the power of a fresh coat of paint on your crown molding is immense.
While many homeowners enjoy the satisfaction of a DIY home improvement project, achieving a truly professional finish on crown molding can be challenging due to its intricate details and overhead work. We understand that your home in Lombard, Wheaton, Lemont, Downers Grove, Carol Stream, La Grange, Lockport, Plainfield, Addison, Elmhurst, Glenview, Wilmette, Woodridge, Chicago, or Schaumburg deserves the best.
At T&Z Interior And Exterior Painting, we deliver quality, stunning results through our experienced teams, top-brand materials, and excellent customer service. Our expertise in crown molding painting ensures clean lines, smooth finishes, and a change that lifts your entire home.
Ready to transform your space with perfectly painted crown molding? Explore our Interior Painting Services or Contact Us today for any questions. Let us help you lift your home with elegance and precision.