
Why Spray Painting Interior Doors Beats Hand Painting
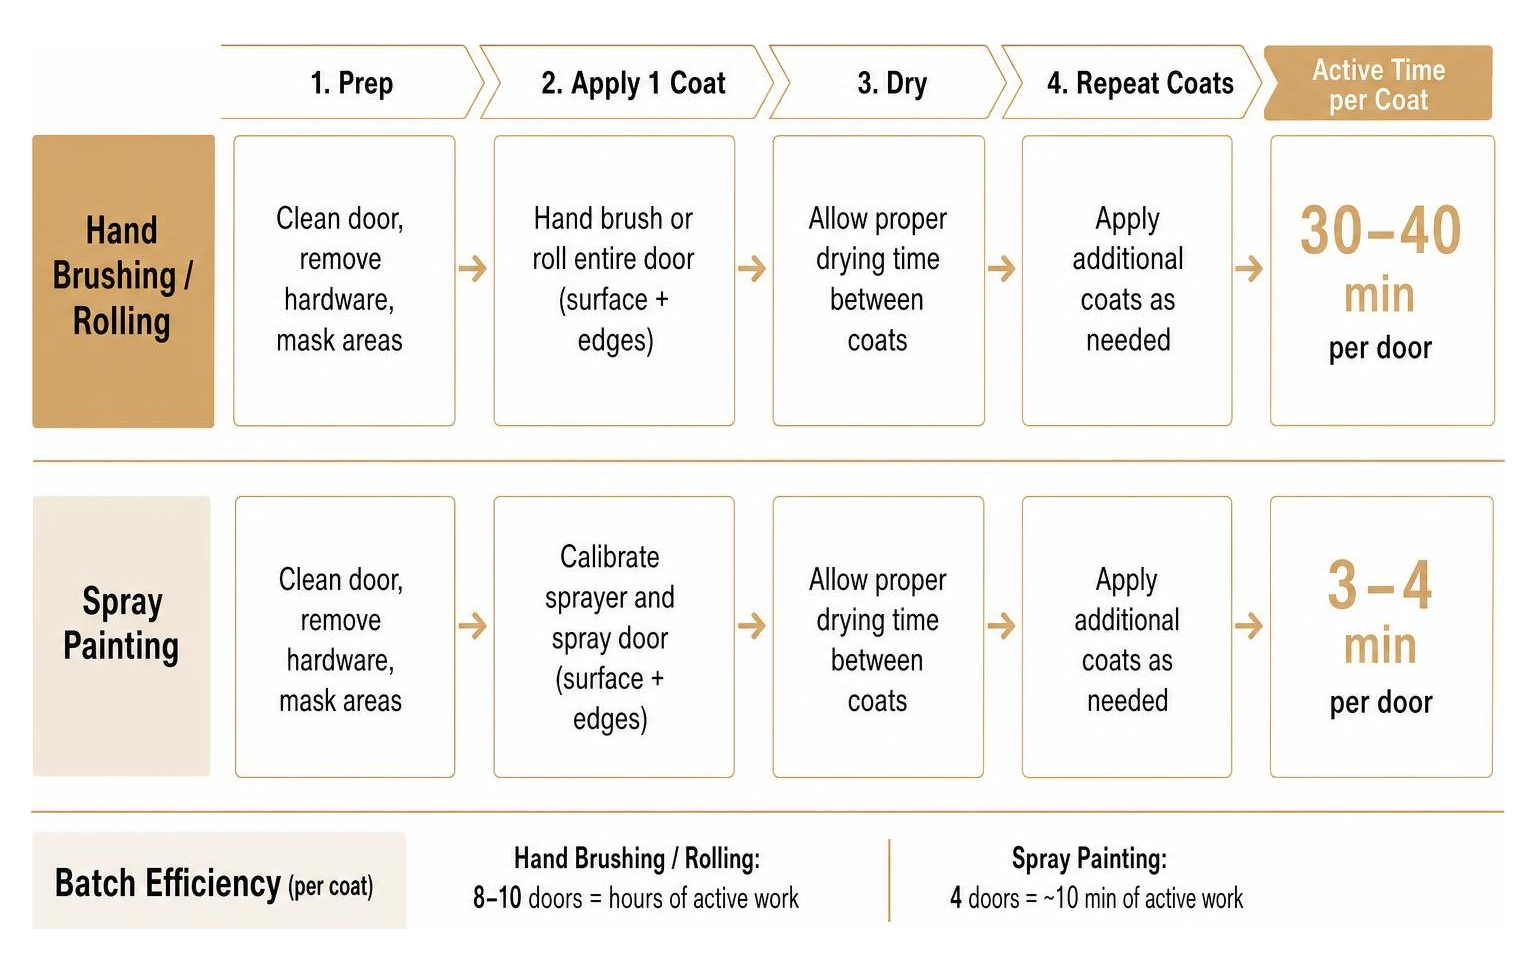
When transforming a home, updating interior doors makes an immediate visual impact. However, traditional hand brushing can quickly become physically draining. Hand painting a single interior door with a brush often requires 30 to 40 minutes of active labor per coat. Multiply that across a house with eight to ten doors, and you are looking at continuous hours of meticulous brushwork that can easily cause hand fatigue—or what DIYers humorously call “the claw.”
In contrast, spray painting interior doors drastically reduces active application time. Once the sprayer is calibrated, applying a single coat to a door takes just 3 to 4 minutes of hands-on time. Spraying a batch of four doors takes approximately 10 minutes per coat, allowing painters to complete active application in short bursts while relying on proper drying intervals between passes.
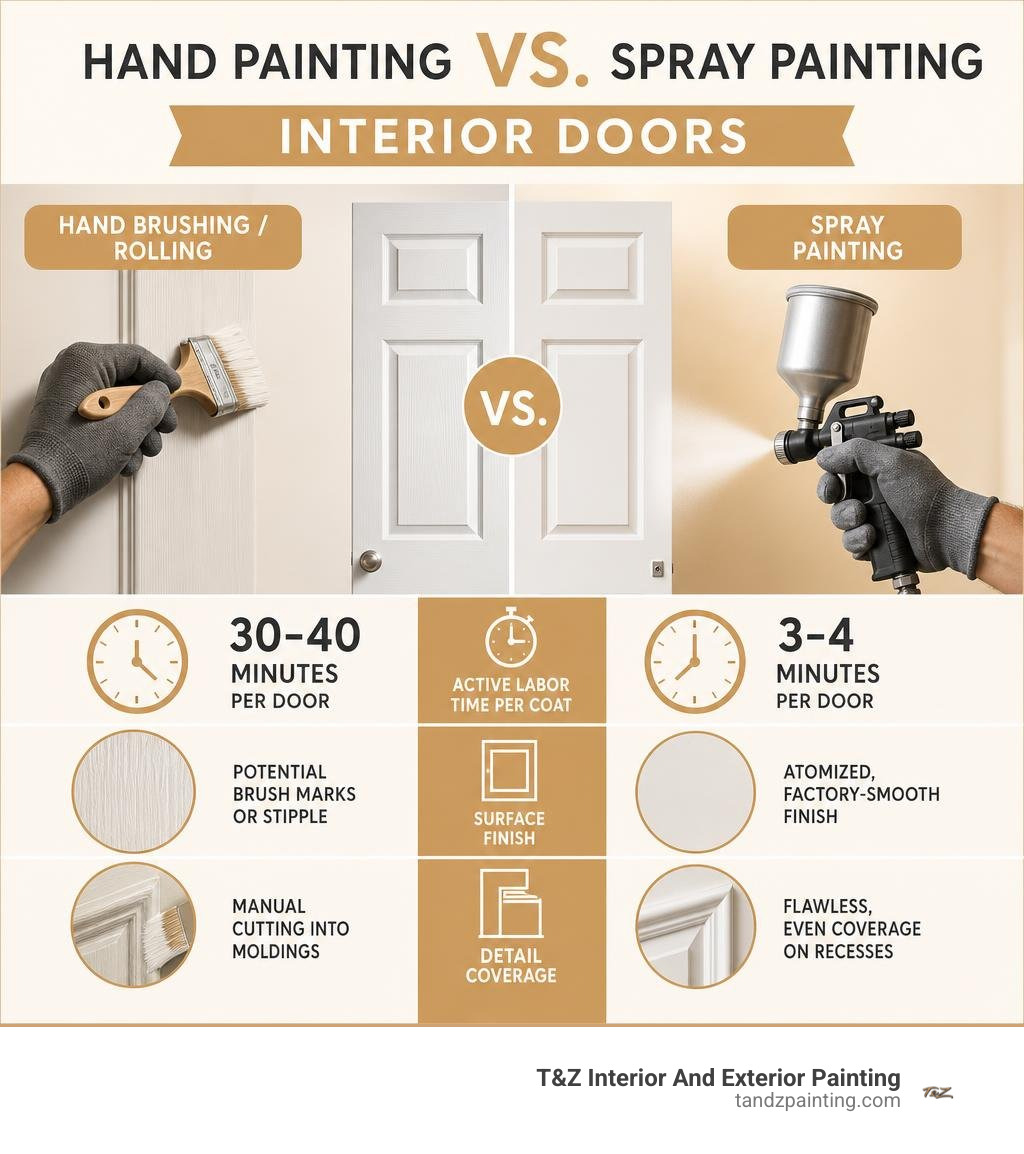
| Feature | Hand Brushing / Rolling | Spray Painting |
|---|---|---|
| Active Labor Time Per Coat | 30–40 minutes per door | 3–4 minutes per door |
| Surface Finish | Potential brush marks or stipple | Atomized, factory-smooth finish |
| Detail Coverage | Manual cutting into moldings | Flawless, even coverage on recesses |
| Prep & Setup Effort | Minimal masking required | Detailed masking & spray area setup |
| Batch Processing | High physical strain | Exceptional speed and efficiency |
Beyond sheer speed, spray equipment atomizes paint into a ultra-fine mist, eliminating unsightly brush strokes and roller stipple. This process ensures smooth, uniform coverage across intricate moldings, recessed panels, and flat edges. To explore how professional spraying transforms homes cleanly, read our guide on how to spray internal doors like a pro without the mess.
Key Prep and Tools Before Painting

Achieving a durable finish that resists daily scuffs, oily fingerprints, and mechanical latches starts with choosing the right materials and prepping the surface thoroughly. High-touch surfaces demand specialized paint formulations rather than standard wall paint.
Recommended Paints and Coatings
- Paint Types: Hard-drying urethane alkyd enamels or premium acrylic cabinet and trim enamels are ideal for interior doors. Urethane alkyd paints deliver the toughness and leveling properties of traditional oil-based coatings while maintaining easy water cleanup.
- Sheen Selection: Semi-gloss and satin finishes are the top choices. A semi-gloss sheen offers high moisture resistance and cleans up easily, while satin provides a sophisticated, low-luster look that still withstands routine wiping.
- Primers: High-adhesion bonding primers are essential when coating slick laminates, wood veneers, or transitioning from dark to light colors. Stain-blocking primers prevent old wood tannins from bleeding through fresh topcoats.
Essential Tools and Cleaning Supplies
Proper prep requires liquid deglossers, trisodium phosphate (TSP) cleaner, tack cloths, 220-grit sandpaper, quality painter’s tape, heavy-duty drop cloths, and plastic containment sheeting.
Essential Prep for Spray Painting Interior Doors
Skipping preparation leads directly to peeling paint and visible surface flaws under raking light. Every successful project follows these steps:
- Hardware Removal and Numbering: Remove all knobs, handles, strike plates, and hinges using a screwdriver. Label each door panel and its corresponding frame on the hinge edge using painter’s tape. This prevents hanging pre-fitted doors out of sequence later.
- Surface Cleaning: Wash the entire door with a degreasing cleaner or TSP to eliminate accumulated skin oils and grime. Treat molded areas with a liquid deglosser to break down slick factory clear coats.
- Scuff Sanding: Lightly sand all surfaces with 220-grit sandpaper or a medium-grit sanding sponge. This creates microscopic grooves (a mechanical profile) so the fresh paint adheres firmly.
- Dust Removal: Thoroughly wipe down the door with a tack cloth to capture hidden wood dust and airborne particles before painting.
- Masking and Containment: If any hardware or decorative glass remains attached, mask it securely with painter’s tape and paper, trimming precise edges with a sharp utility knife. Cover adjacent work zones completely with drop cloths.
Door Setup: Hinges vs. Sawhorse Removal
Homeowners often ask whether doors should remain hanging on their hinges or be removed for painting.
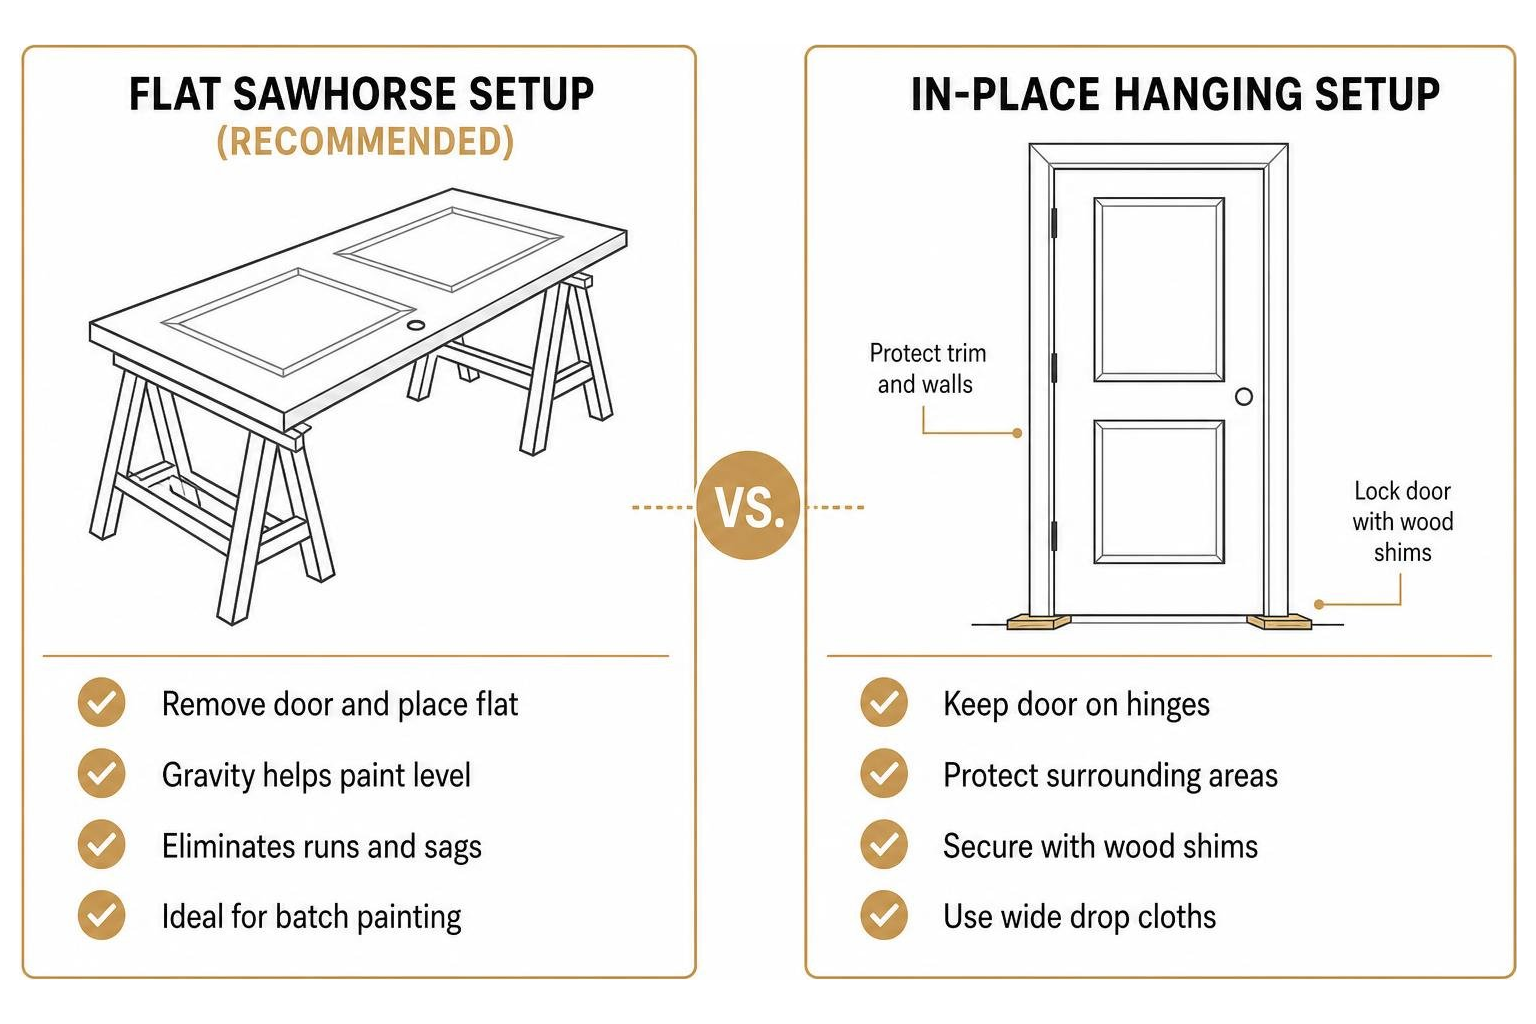
- Flat Sawhorse Setup (Recommended): Removing doors and laying them horizontally across two stable sawhorses or a workbench is superior for spray application. Gravity works in your favor, allowing paint to level out naturally while eliminating the risk of vertical sags or runs. Setting up an assembly line in a garage or workspace allows you to batch-process doors efficiently.
- Spraying in Place: If doors must remain hanging, protect the surrounding trim and flooring with wide plastic drop cloths. Lock the door panel securely in place using wood shims underneath both sides to prevent unwanted movement while spraying.
Step-by-Step Guide to Spraying Interior Doors
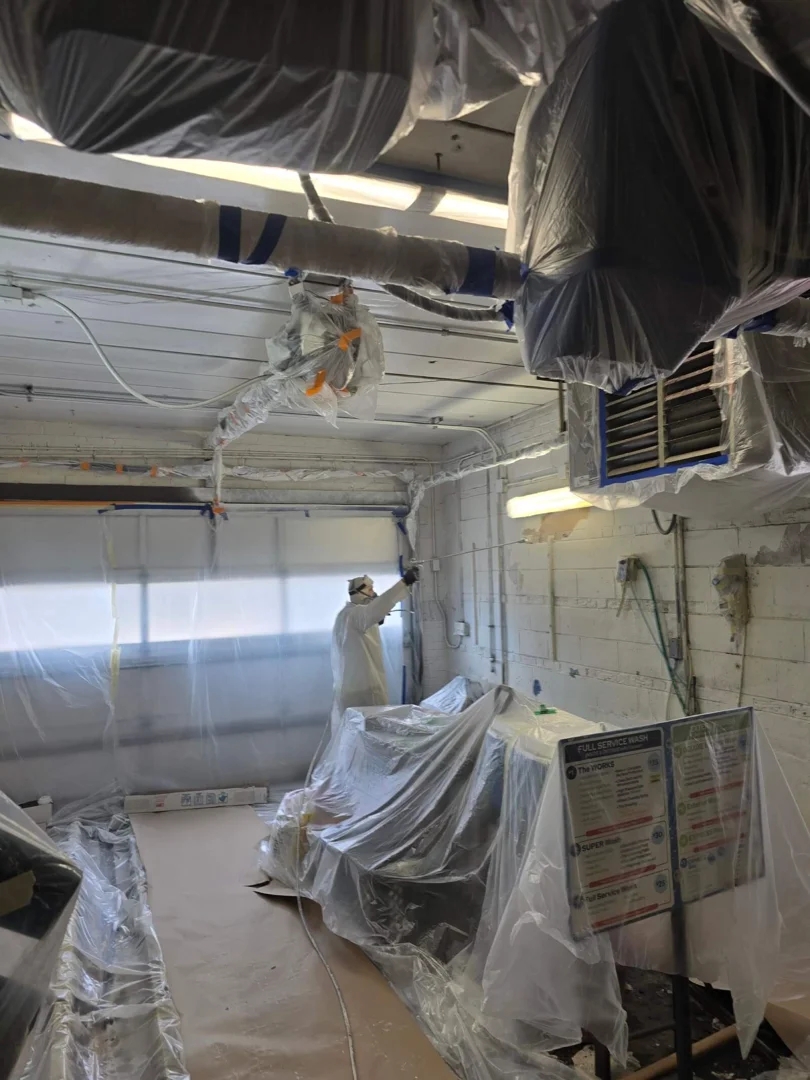
Executing proper technique ensures a factory-grade result free of heavy buildup, runs, or overspray texture.
- Calibrate the Equipment: Select a narrow 6- to 8-inch spray fan pattern, ideal for control on narrow surfaces. Strain paint through a mesh filter bag before filling the sprayer cup to prevent tip clogs. Test your spray pattern on scrap cardboard to adjust fluid pressure.
- Maintain Proper Distance: Hold the spray tip roughly 12 inches away from the door surface. Keep the gun perpendicular to the panel at all times—avoid tilting or sweeping the gun in an arc, which creates uneven paint thickness.
- Master the Pass: Begin moving the spray gun slightly off the side of the door before pulling the trigger. Sweep across the surface in a continuous, smooth pass, releasing the trigger only after passing the opposite edge. Overlap each successive spray pass by 50% for seamless coverage.
- Manage Application Coats: Apply 2 to 3 thin coats rather than one thick layer. Thin coats dry faster, bond better, and eliminate sags. Allow approximately 30 minutes of dry time between coats, or follow product label guidelines.
- Observe Full Cure Requirements: While paint may feel dry to the touch within 1 to 2 hours, hard enamels require a full cure time of 24 to 72 hours (and up to 30 days for maximum hardness) before undergoing heavy handling or aggressive cleaning.
To learn more about coordinating your doors with surrounding trim, review our dedicated guide on door trim painting.
Spray Painting Interior Doors: Paneled vs. Flat Slab Doors
Technique varies slightly depending on whether you are finishing a six-panel wood door or a modern flat slab door.
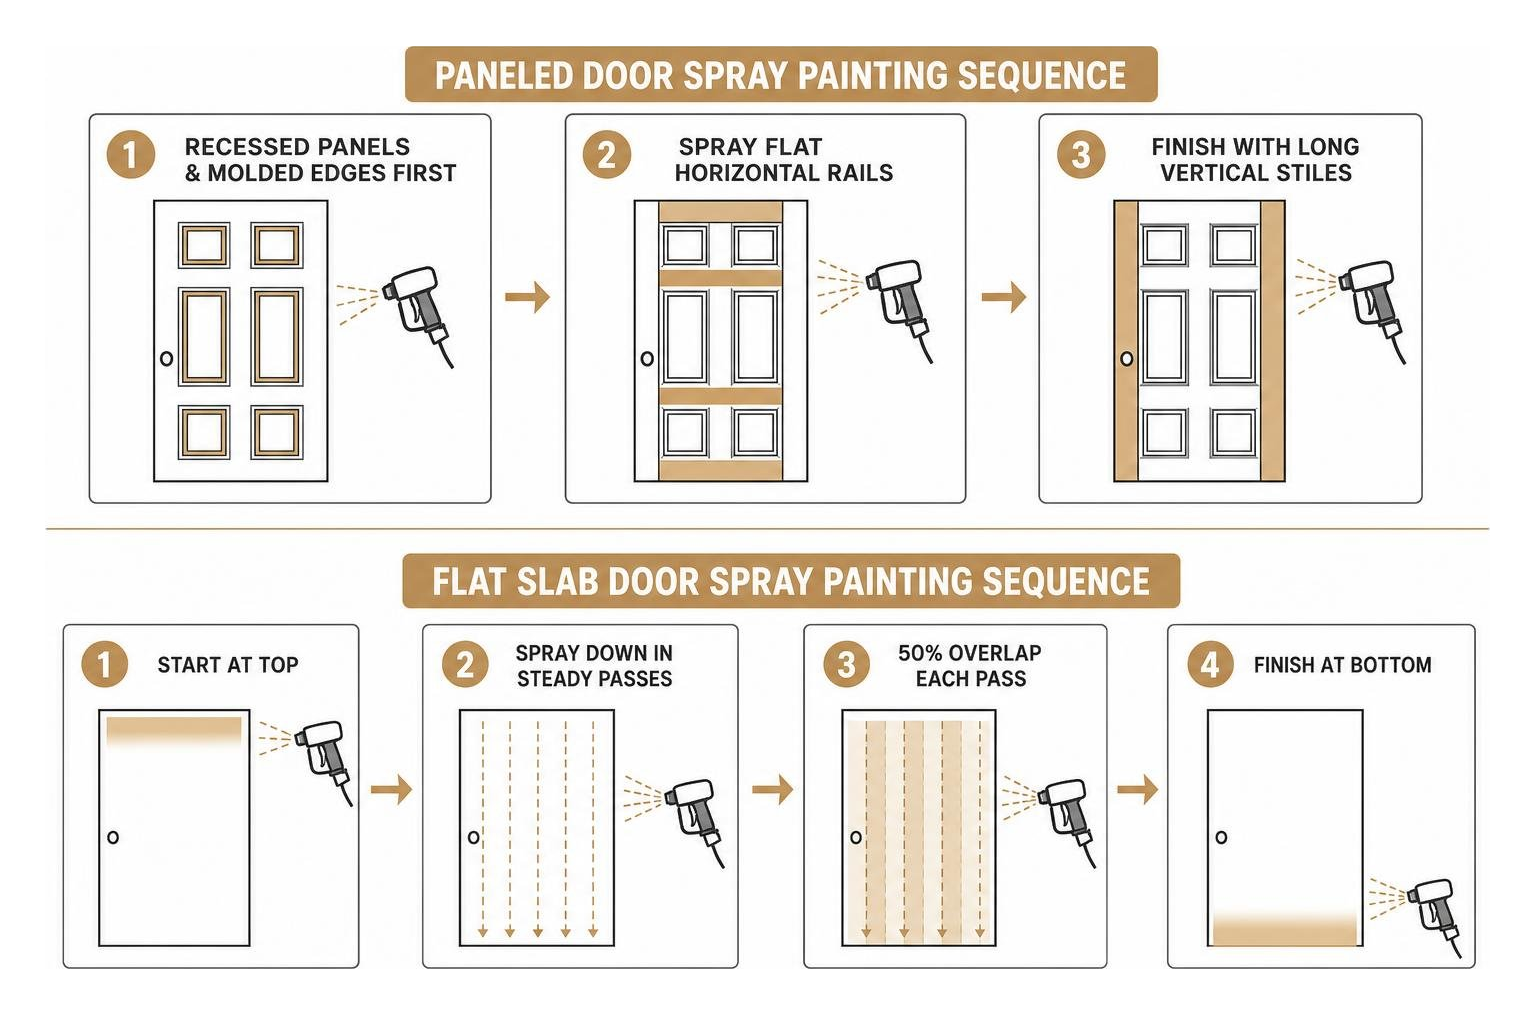
- Paneled Doors: Always spray the recessed panel details and molded edges first. Holding the gun at a slight angle ensures coverage inside deep grooves. Next, spray the flat horizontal rails, and finish with long vertical passes down the outer stiles. This sequence prevents wet paint from pooling inside the corners.
- Flat Slab Doors: Flat doors present one large, continuous surface that easily highlights lap lines or uneven spray density under side lighting. Maintain steady speed and consistent 50% overlapping passes from top to bottom across the entire slab without pausing mid-surface.
Common Mistakes to Avoid When Spraying Doors
- Stopping Mid-Pass: Halting your spray sweep directly over the door panel deposits a excess paint, resulting in immediate drips. Always start and end passes beyond the outer edges.
- Premature Rehanging: Installing doors before the paint cures causes fresh enamel to stick to frame stops or tear off under the pressure of hardware screws. Allow a minimum of 24 to 48 hours of drying time.
- Skipping Surface Sanding: Applying paint over glossy, un-sanded finishes leads to chipping and peeling along high-touch edges. Always scuff-sand glossy surfaces before painting.
- Neglecting Top and Bottom Edges: Unsealed top and bottom edges absorb ambient humidity, causing doors to swell or stick in their frames over time. Always seal all six sides of every door panel.
- Ignoring Sprayer Tip Hygiene: Dried paint flecks on spray nozzles cause spitting, uneven spray patterns, and spatters. Keep a damp rag nearby to wipe tip guards regularly during application.
Frequently Asked Questions About Spray Painting Interior Doors
How long does paint take to cure before rehanging?
Paint is typically dry to the touch within 1 to 2 hours, but full cure (maximum hardness and scratch resistance) takes between 24 and 72 hours for high-durability enamels. Avoid installing hardware or closing painted doors tightly against frame stops until this cure window has passed.
Can I spray paint doors without taking them down?
Yes, doors can be sprayed in place, provided surrounding walls, floors, and casing are completely sealed behind plastic drop cloths and painter’s tape. Place wood shims beneath the bottom edge to lock the door firm and prevent swinging during spraying.
What type of paint finish is best for interior doors?
Semi-gloss and satin urethane alkyd enamels are the best finishes for interior doors. They provide exceptional impact resistance, withstand frequent handling, and allow easy cleaning without dulling or altering the finish sheen.
Conclusion
Mastering spray painting interior doors comes down to four basic steps: thorough surface prep, proper setup, thin and overlapping spray passes, and adequate cure time. By eliminating brush strokes and shortening active labor, spraying turns what could be a tedious chore into a rewarding home upgrade.
When you want flawless, factory-smooth results across every room in your home, professional execution makes all the difference. At T&Z Interior And Exterior Painting, our licensed and insured teams bring over 15 years of industry experience, a 5.0 Google Reviews rating, and clean jobsite standards to residential properties throughout Lombard, IL and neighboring communities, including Itasca, Addison, Glen Ellyn, and Oak Brook.
Whether you are refinishing single doors, updating whole-house trim, or exploring large-surface spray applications, we deliver craftsmanship that stands up to daily living. Discover how our experienced painters elevate home interiors by visiting our page on spray painting services.