
How to Spray Paint a Metal Fence
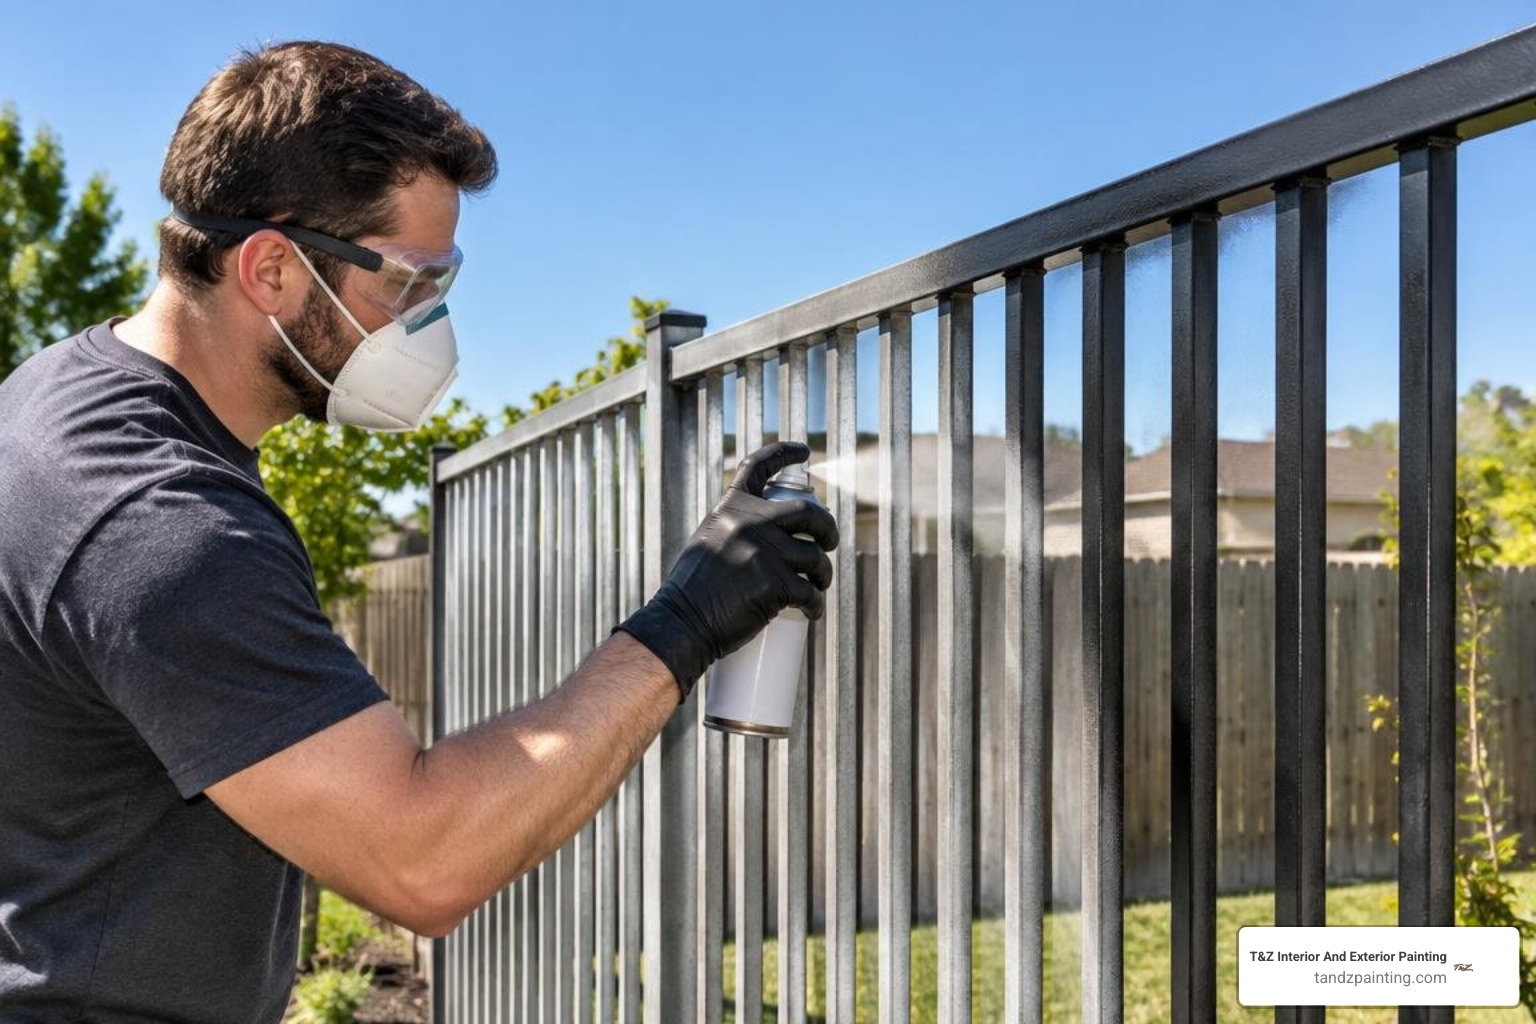
For spray painting metal fence sections, clean and dry the metal, remove loose paint and rust, then apply a primer suited to the fence material. Spray two thin coats of exterior metal paint, covering both sides. Keep the sprayer moving to prevent drips, and follow the product label for drying time between coats.
I’m Tomasz Niemotko, owner and founder of T&Z Interior And Exterior Painting, a licensed and insured painting contractor founded in 2009 and based at 1101 S Columbine Ave, Lombard, IL 60148. My over 15 years of experience with exterior and spray painting informs this guide to spray painting metal fence sections.
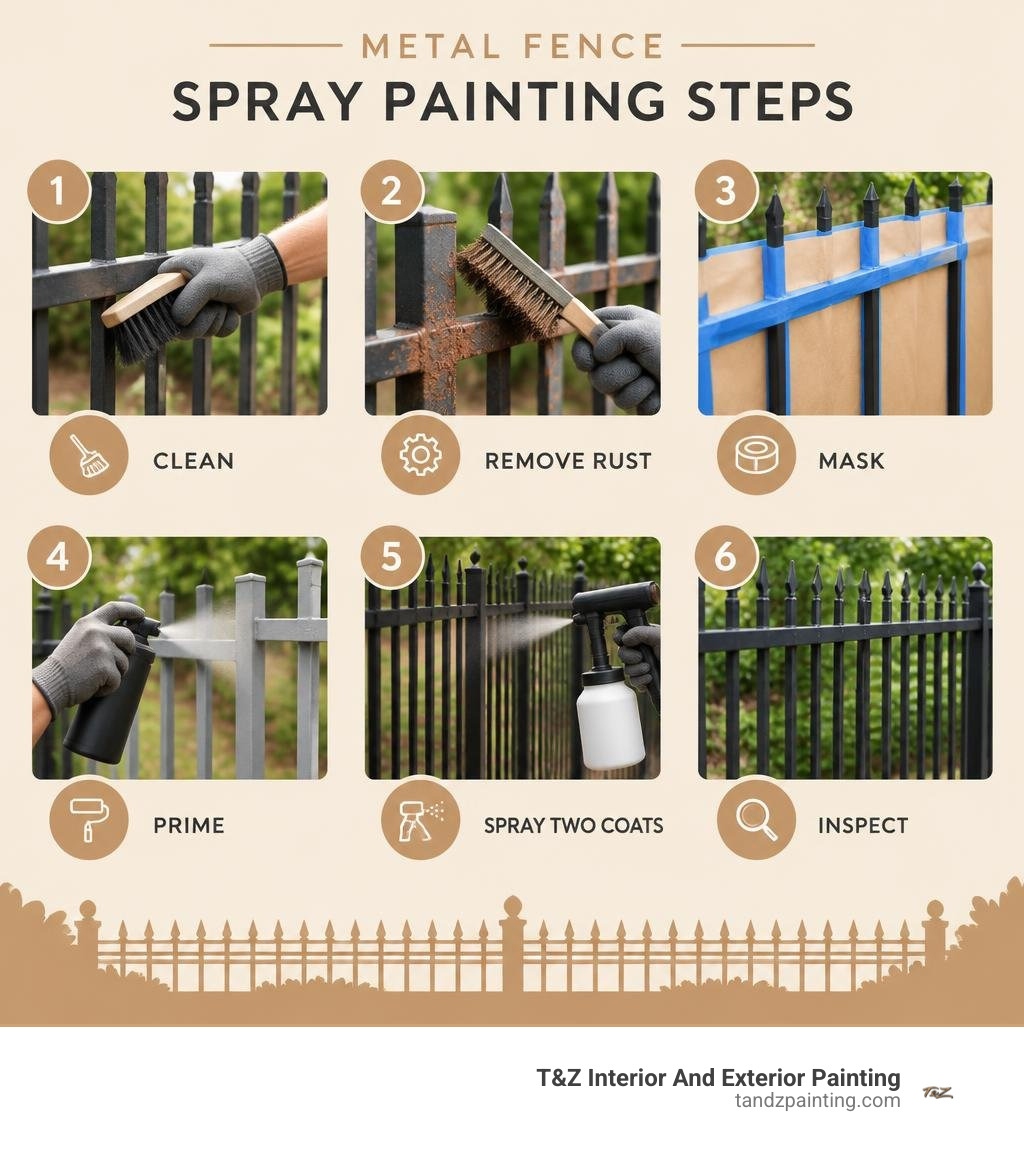
Key terms for spray painting metal fence:
Equipment and Paint Selection for Spray Painting Metal Fence Projects
Choosing the right equipment and coating system is the foundation of a successful finish when spray painting metal fence panels. Traditional brush application on intricate pickets and ornamental scrollwork often leads to runs, heavy brush marks, and hours of tedious labor. Spray application atomizes the paint into fine droplets, wrapping around curved surfaces and reaching tight crevices where moisture tends to gather and cause rust.
| Equipment Type | Best Application | Transfer Efficiency | Setup and Cleanup Effort |
|---|---|---|---|
| Aerosol Spray Cans | Small gates, spot repairs, finial touch-ups | Low (High overspray risk outdoors) | Very Low (No machine cleaning) |
| HVLP Turbine Sprayers | Wrought iron railings, ornamental pickets | High (65% to 85% paint on target) | Moderate (Thorough gun breakdown) |
| Airless Paint Sprayers | Long perimeter runs, flat steel panels | Moderate (Higher overspray velocity) | High (Hose flushing and line priming) |
When selecting paints, understand the chemical behavior of different formulas on outdoor metalwork. Direct-to-Metal (DTM) acrylic coatings have advanced significantly, offering flexible films that expand and contract during seasonal temperature swings without cracking. Industrial oil-based enamels provide a rock-hard, moisture-impermeable barrier that cures to a classic gloss or satin sheen. Following established guidelines, such as the Krylon guide on spray painting metal, helps ensure your chosen paint chemically bonds to the prepared surface.
Equipment Setup for Spray Painting a Metal Fence
High Volume Low Pressure (HVLP) sprayers are widely considered the ideal tool for ornamental metalwork because their lower air pressure creates a soft spray pattern with minimal bounce-back. For fine metal pickets, an HVLP system fitted with a 1.3 mm to 1.5 mm needle and nozzle set delivers smooth atomization for standard enamels. If you are using an airless sprayer for large continuous runs, select a fine-finish tip (such as a 310 or 312) to limit paint volume and avoid heavy buildup on narrow vertical slats.
Before spraying your fence, set up a test board using scrap cardboard. Adjust your fluid flow and air controls until the pattern produces an even, oval fan without heavy fingers or spatter at the edges. Practicing your trigger timing on cardboard ensures you maintain consistent gun speed before coating bare metal.
Matching Primer and Paint to Metal Substrates
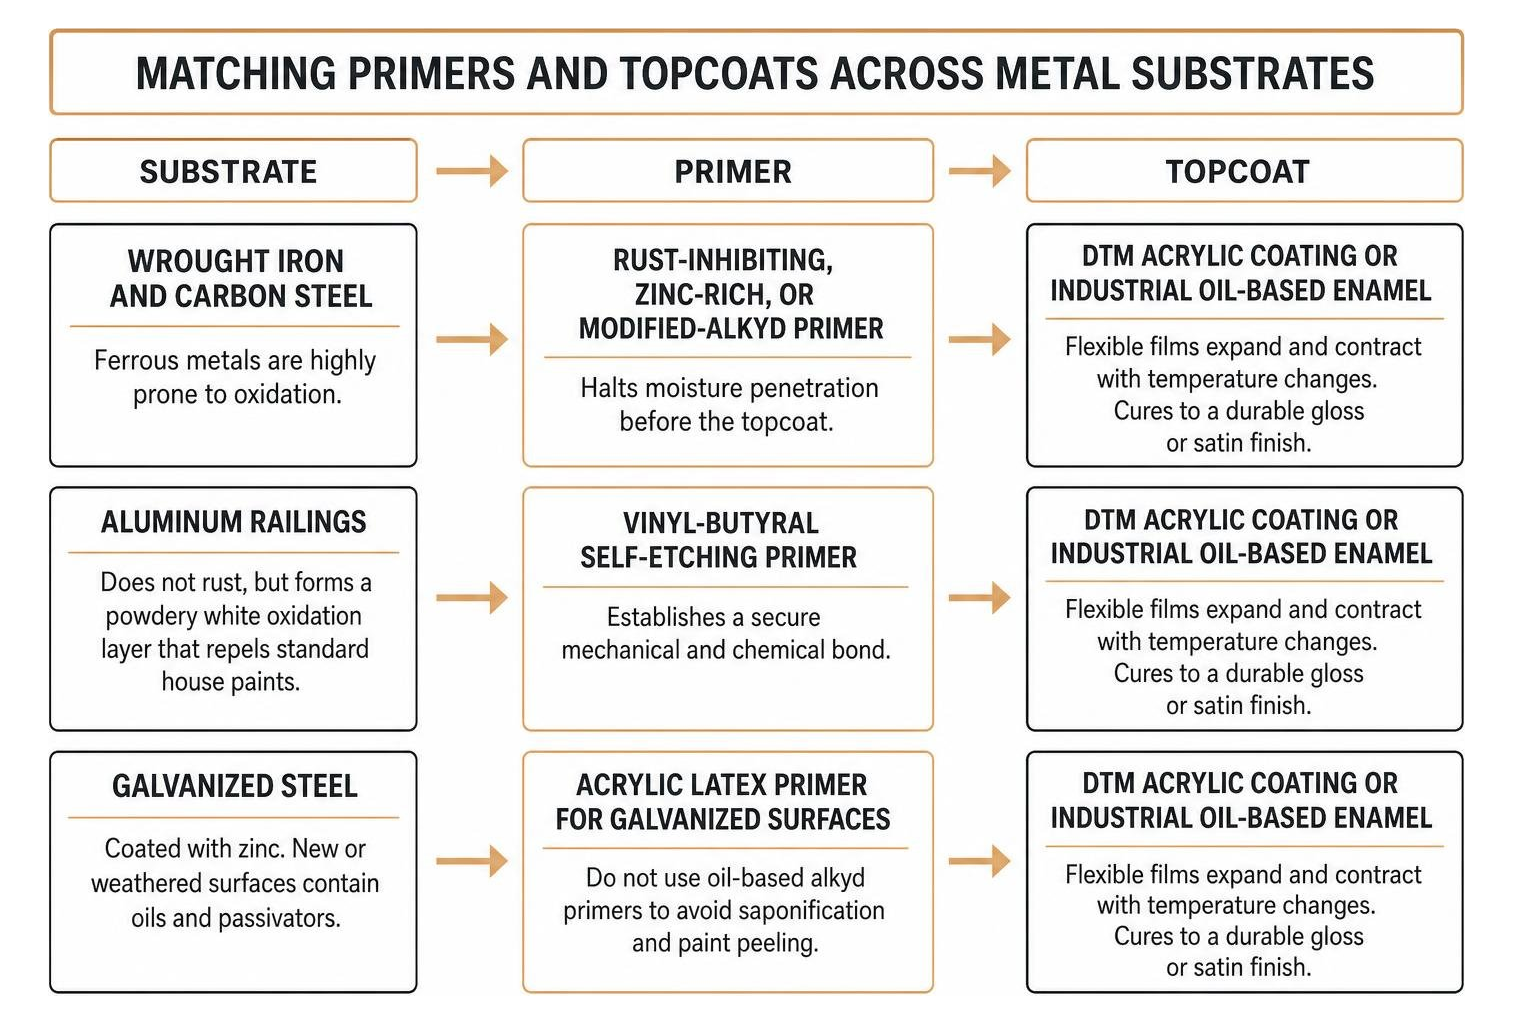
Different metals react distinctively to outdoor moisture and chemical coatings:
- Wrought Iron and Carbon Steel: These ferrous metals are highly prone to oxidation. They require a dedicated rust-inhibiting, zinc-rich, or modified-alkyd primer to halt moisture penetration before you apply your topcoat.
- Aluminum Railings: Aluminum does not rust, but it forms a powdery white oxidation layer that repels standard house paints. Sand the surface lightly and apply a vinyl-butyral self-etching primer to establish a secure mechanical and chemical bond.
- Galvanized Steel: Coated with a protective zinc layer, new or weathered galvanized metal contains oils and passivators. Never apply oil-based alkyd primers directly over galvanized zinc, as the chemical reaction (saponification) creates a soapy residue that causes complete paint peeling. Use an acrylic latex primer formulated specifically for galvanized surfaces.
Essential Surface Preparation and Rust Encapsulation
No spray paint can overcome poor surface preparation. Outdoor metal is constantly exposed to moisture, airborne pollutants, soil splashback, and ultraviolet radiation. Applying fresh paint over loose rust, mill scale, or flaking layers traps air and moisture underneath, accelerating corrosion behind your new finish.
To assess the structural stability of older metal, use a small hammer to lightly tap along the bottom rails, post bases, and picket joints. Solid steel produces a clear, resonant ring, while severely corroded or hollowed metal yields a dull thud, signaling sections that require structural repair or welding before finishing. To learn more about restoring aged steel, review our guide on reviving rusty metal surfaces.
Removing Flaking Paint and Active Corrosion
Begin surface preparation by stripping away peeling paint and heavy, stratified rust scale. Coarse wire hand brushes and stiff putty knives work well for flat faces, but a rotary wire wheel or braided cup brush mounted in a cordless drill or angle grinder speeds up work around welded corners, finials, and decorative hinges.
- Mechanical Abrasion: Sand all firm, intact paint transitions with 80-grit to 120-grit aluminum oxide sandpaper to feather sharp paint edges smooth.
- Rust Conversion: For deep rust pits that cannot be ground to bare, shiny metal without thinning the steel, apply a phosphoric acid-based rust converter or encapsulator. This converts iron oxide into a stable, black iron phosphate barrier.
- Solvent Degreasing: Wipe the entire fence down with clean cotton rags soaked in mineral spirits or denatured alcohol to lift metal dust, grease, and residue. Let the solvent flash off completely before priming.
When dealing with zinc-coated barriers, take time to learn how to prepare galvanized metal properly to prevent early coating failure.
Protecting Surrounding Landscaping and Hardscapes
Spray painting outdoors carries the risk of paint drift. Fine atomized paint can travel on gentle thermal air currents, settling on nearby siding, brick paver patios, windows, and manicured shrubs.
- Ground Shielding: Lay heavy canvas drop cloths along the base of the fence line. Canvas stays anchored in light breezes better than lightweight plastic sheeting, which tends to billow into wet paint.
- Backdrop Shields: Cut a wide, 3-foot by 4-foot panel of corrugated cardboard to use as a mobile hand-held spray shield. Position the shield behind individual pickets as you spray to catch overspray while defining crisp borders.
- Vegetation Management: Tie back low-hanging perennials, vines, and shrubs using soft garden twine and stakes, creating at least 18 inches of clearance around all fence surfaces.
Step-by-Step Technique to Spray Paint Metal Fence Sections
Mastering the physical technique of spray application prevents runs, sags, and uneven dry textures. Professional painters maintain a constant distance between the spray tip and the workpiece, using their entire arm to guide the stroke rather than pivoting from the wrist.
Step-by-Step Application for Spray Painting a Metal Fence
When spray painting a metal fence, work methodically in manageable sections of three to five pickets at a time to maintain control of your wet edge.
- Maintain Distance and Angle: Keep your spray gun nozzle between 8 and 12 inches away from the metal. Holding the gun too close floods the narrow surface with wet paint, causing sags, while holding it too far causes the paint droplets to dry mid-air, leaving a rough, dusty texture.
- Trigger Sequence: Pull the trigger slightly before your stroke aligns with the picket edge, sweep smoothly across or down the metal, and release the trigger just after passing the opposite edge. This prevents heavy puddles of paint at the ends of your passes.
- Top-to-Bottom Flow: Begin with the top decorative finials and upper horizontal rail. Once the top structure is coated, spray the vertical pickets using straight, vertical passes, overlapping each stroke by 50 percent. Finish each section along the bottom rail.
- Wrap the Profiles: Metal pickets are three-dimensional. Spray the front face at a slight 45-degree angle from the left, then repeat from the right. This angle wraps paint evenly around the sides of the square or round bar without requiring separate passes on every edge.
Managing Recoat Windows and Multi-Coat Curing
Achieving high exterior durability requires at least two thin, uniform topcoats over your primer rather than a single heavy application. Thick coats trap curing solvents beneath a dry surface skin, leading to soft paint films, wrinkling, and premature chipping.
Allow your primer to dry for two to four hours depending on ambient temperature and product instructions. If you notice dust nibs or minor imperfections, scuff the primed surface lightly with a 220-grit sanding sponge, wipe away the dust, and apply your first topcoat. Water-based DTM coatings are typically ready for a second coat within 2 to 4 hours, whereas traditional oil-based alkyd enamels may require a full 24 hours of curing before recoating. For comprehensive exterior protection, explore our specialized fence and deck painting options.
Fence Inspection, Curing, and Ongoing Maintenance
Once your final coat has been applied, inspect the fence thoroughly under varying light conditions. Bright midday sun can cast sharp shadows across ornamental scrollwork, masking missed spots on underside surfaces. Re-inspect the fence in the softer light of late afternoon, using a matching color aerosol can to lightly blend any light patches or hard-to-reach joints.
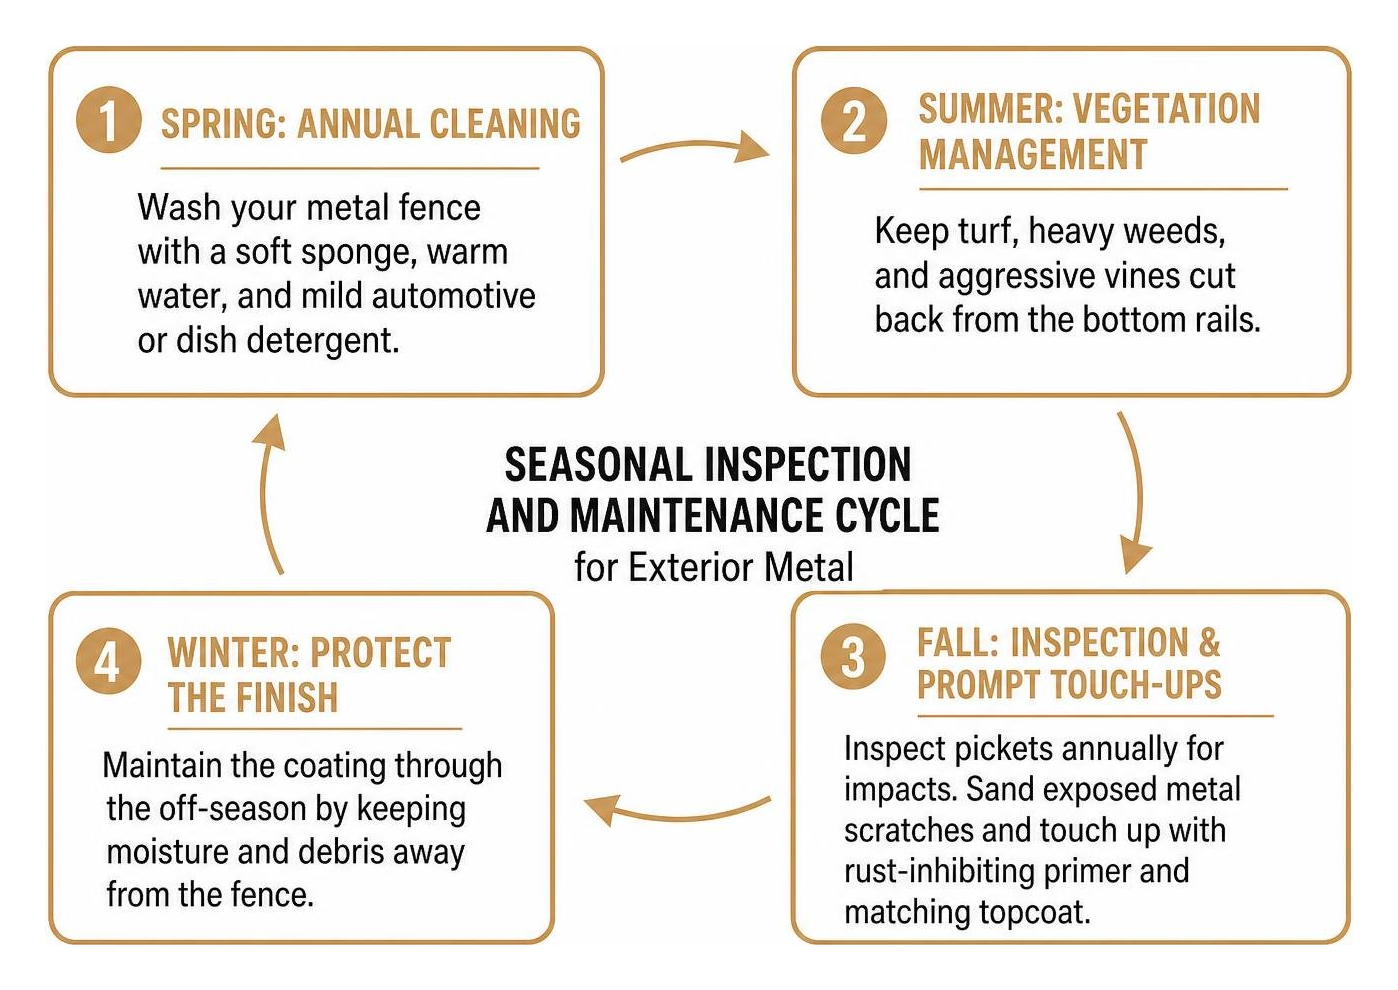
Preserve your new finish with simple, ongoing maintenance:
- Annual Cleaning: Wash your metal fence each spring using a soft sponge, warm water, and a mild automotive or dish detergent to remove road salts, pollen, and grime.
- Vegetation Trimming: Keep turf, heavy weeds, and aggressive vines cut back from the bottom rails. Plant material traps dew and sprinkler water against the metal, creating continuous moisture pockets that wear down coatings.
- Prompt Touch-Ups: Inspect pickets annually for physical impacts from lawnmowers or string trimmers. Sand down any exposed metal scratches immediately and touch them up with a dab of rust-inhibiting primer and matching topcoat before oxidation spreads beneath surrounding paint.
Frequently Asked Questions
How long does a spray-painted finish last on an exterior metal fence?
When an exterior metal fence is thoroughly cleaned, wire-brushed, primed with a rust-inhibiting base, and topcoated with two layers of high-grade exterior enamel, the finish typically lasts between 4 and 7 years before needing repainting. Longevity depends heavily on local weather conditions, sun exposure, and proximity to sprinkler spray.
What weather conditions are ideal for spray painting outdoor metal?
The ideal conditions for spray painting outdoor metal are dry, calm days with temperatures between 50°F and 85°F and relative humidity below 70 percent. Avoid painting in direct, intense sunlight, as hot metal causes paint solvents to evaporate too quickly, leading to blistering and poor adhesion. Never spray when wind speeds exceed 8 to 10 mph, which scatters atomized paint and deposits airborne dust onto wet coatings.
Can you spray paint directly over existing rust?
You should never spray paint directly over loose, flaky, or scaling rust, as the paint will peel away as the rust detaches. However, tightly adhered, structural surface rust can be coated if it is first treated with a phosphoric acid rust converter or an encapsulating primer specifically formulated to seal stable rust and prevent oxygen from fueling further corrosion.
Conclusion
Restoring an exterior metal fence with a spray application improves your property’s curb appeal while creating a durable shield against the elements. Taking the time to properly remove loose rust, degrease the metal, prime the bare substrate, and apply thin, overlapping coats delivers a smooth, uniform finish that protects your outdoor investment for years to come.
When you want flawless, professional results without spending your weekends handling equipment setups and extensive masking, our team is ready to help. T&Z Interior And Exterior Painting is a locally owned, licensed, and insured painting contractor based in Lombard, Illinois, with over 15 years of dedicated exterior craftsmanship. We hold a BBB accreditation, maintain a 5.0 Google rating across 85+ customer reviews, and back all our work with a dependable 2-year warranty.
Contact Tomasz Niemotko and the crew at T&Z Interior And Exterior Painting today by calling (224) 240-0054 or visit tandzpainting.com to schedule your free estimate for professional spray painting across Lombard and our surrounding Chicagoland communities.