
Your Guide to a Kitchen Change
Cabinet painting is the process of applying a fresh coat of paint to kitchen or bathroom cabinets to update their appearance without the expense of full replacement. Here’s what you need to know:
Quick Answer:
- Cost: Professional cabinet painting averages $3,900 for a small-to-medium kitchen, compared to $25,000+ for replacement.
- Time: Professionals complete most projects in 5-7 days; DIY can take 1-2 weeks.
- Best Paint: Water-based enamel or hybrid paints with self-leveling properties.
- Durability: Properly painted cabinets last 5+ years with minimal maintenance.
- Key Steps: Clean, sand/degloss, prime, paint (2-3 coats), and seal.
Painting your kitchen cabinets is one of the smartest ways to transform your home on a budget. Instead of spending tens of thousands on a full tear-out, a fresh coat of paint can completely change how your kitchen looks and feels.
The process works on most cabinet types, from wood to laminate, and can be done professionally or as a DIY project. Professionals use specialized techniques like spray finishing to achieve factory-quality results, while modern paints have made DIY methods more accessible.
Whether you’re updating dark oak cabinets to bright white or trying a trendy two-tone look, cabinet painting delivers impressive results. This guide will walk you through everything from prep work and paint selection to professional techniques and cost considerations, so you can achieve a smooth, durable finish that makes your kitchen feel brand new.
 Remove and label doors/hardware 2) Clean and degloss surfaces 3) Apply stain-blocking primer 4) Paint 2-3 thin coats with sanding between 5) Apply protective topcoat 6) Reassemble. Includes cost comparison showing $3,900 average for painting vs $25,000 for replacement, and durability timeline showing 5+ year lifespan with proper application. - cabinet painting infographic infographic-line-5-steps-colors")
Step 1: Essential Prep Work for a Flawless Finish
Proper prep work is the secret to professional cabinet painting. It’s the difference between a finish that chips in six months and one that looks beautiful for years. Painting over dirty, glossy cabinets simply won’t last. This guide covers the essential preparation steps for a durable, flawless finish.

Gathering Your Tools and Supplies
Before you begin, gather the right supplies to avoid interruptions.
- Degreaser: A heavy-duty cleaner like Krud Kutter or TSP is crucial for removing cooking grease that regular cleaners miss.
- Sandpaper/Deglosser: Use 220-grit sandpaper for initial scuffing and 320-grit for smoothing between coats. For a faster alternative, a liquid deglosser chemically dulls the old finish.
- Primer: A stain-blocking primer like Zinsser BIN Advanced Primer is non-negotiable. It ensures adhesion and prevents wood tannins from bleeding through.
- Brushes and Rollers: Invest in quality soft paint brushes to avoid bristle marks. For flat surfaces, use a 4″ mohair roller or a small foam roller kit.
- Other Essentials: You’ll also need painter’s tape, drop cloths, wood filler, tack cloths, screwdrivers, and painter’s pyramids to lift doors for easier painting.
Preparing Your Cabinets and Kitchen
Proper prep ensures a professional result. Take your time here.
- Remove and Label: Remove all cabinet doors, drawer fronts, and hardware. Label each door and its corresponding hardware in bags to simplify reassembly.
- Clean Thoroughly: This is the most critical step. Use a degreaser to scrub every surface being painted. Kitchens accumulate an invisible layer of grease that will cause paint to fail. Scrub until your rag comes away clean.
- Fill and Repair: Use wood filler to patch any dings, scratches, or old hardware holes. Once dry, sand the filler smooth.
- Scuff Sand or Degloss: Lightly sand all surfaces with 220-grit sandpaper or wipe them with a liquid deglosser. This step dulls the old finish, giving the new primer a surface to grip. You are not trying to strip the finish, just remove the shine.
- Clean and Protect: Wipe away all sanding dust with a tack cloth. Use drop cloths and painter’s tape to protect your floors, countertops, and walls from paint.
This prep work is what makes cabinet painting look professional and last for years.
Step 2: Choosing the Right Paint and Application Method
With your cabinets prepped, the next step is selecting the right paint and application method. These choices determine the final look, durability, and overall success of your cabinet painting project.
The Best Types of Paint for Kitchen Cabinets
Kitchen cabinets require paint that can withstand daily use, splashes, and cleaning. Standard wall paint is not durable enough.
Professional-grade cabinet paints are formulated for this environment. The best options are water-based or hybrid enamels, which offer the hardness of oil-based paint without the harsh fumes and difficult cleanup. A key feature to look for is self-leveling properties, which help minimize brush and roller marks for a smoother finish.
- General Finishes Milk Paint: A premium acrylic that is extremely durable when paired with General Finishes High-Performance Top Coat. It can last over 5 years in busy kitchens.
- Fusion Mineral Paint: A great choice with a built-in topcoat, requiring minimal prep (light scuffing, no primer) and proven to last over 3 years.
- DecoArt Satin Enamel: Allows for cabinet painting without sanding or priming after a thorough cleaning, and its self-leveling formula helps ensure a smooth finish.
- Enamel Latex Paints: High-quality versions dry to a hard, shell-like finish that is durable and easy to clean, delivering a professional look.
Choosing a Sheen
Sheen affects both appearance and practicality. For most kitchens, satin or semi-gloss finishes are ideal, as they offer the best balance of durability, cleanability, and aesthetic appeal.
- Satin: Offers a subtle shine, is durable, and easy to clean.
- Semi-Gloss: Provides more shine and even greater durability, reflecting light and making kitchens feel brighter.
- Flat/Matte: Hides imperfections but is less durable and harder to clean, making it unsuitable for most kitchens.
- High-Gloss: Delivers a sleek, modern look but shows every flaw and is best applied by professionals with spray equipment.
Application Methods: Brush, Roller, or Sprayer?
How you apply the paint is as important as the paint itself.
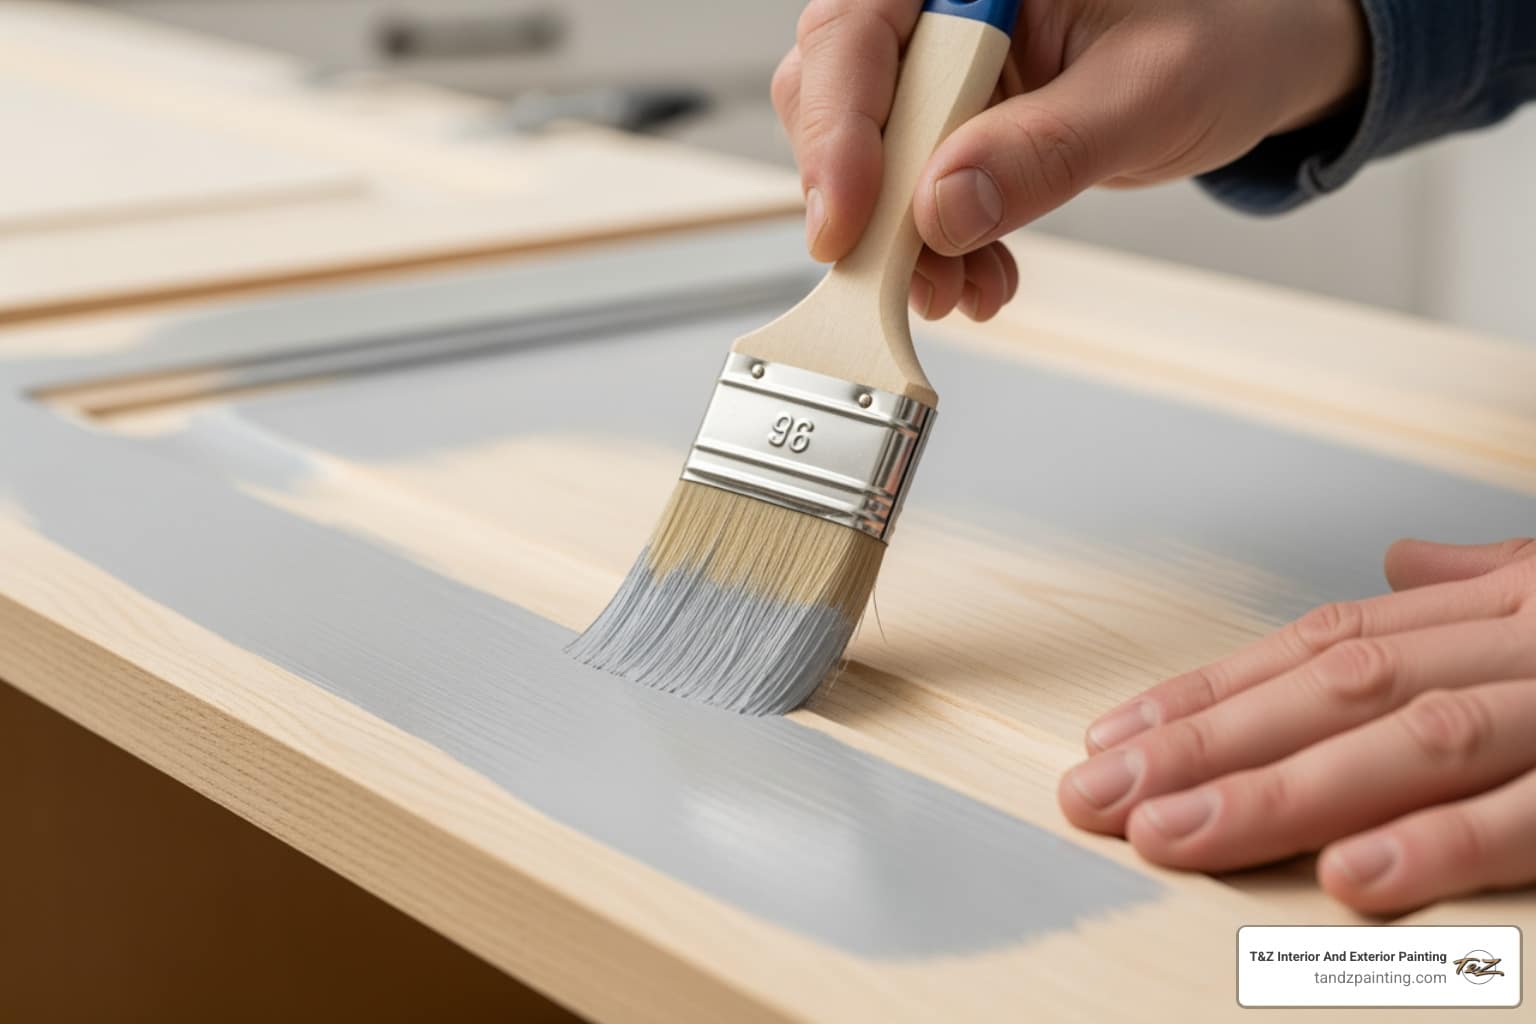
- Brushes: Essential for detail work, cutting in edges, and painting intricate profiles. Use high-quality soft paint brushes to avoid leaving marks. Brushing is slower for large, flat areas.
- Rollers: Ideal for smooth, even coverage on flat surfaces like door panels. A 4″ mohair roller or a small foam paint roller kit works well. Rollers cannot reach into tight corners.
- Sprayers: Deliver the fastest, most flawless factory-like finish. However, they require extensive masking to control overspray and have a steep learning curve, making them best suited for professionals.
To achieve a smooth finish, always apply multiple thin, even coats instead of one thick coat. Lightly sand with 320-grit sandpaper between coats and wipe away dust with a tack cloth. For a true factory-like finish, professional spraying in a controlled environment is best, which is a cornerstone of our cabinet painting services at T&Z Painting.
The Ultimate Guide to Professional Cabinet Painting
While DIY cabinet painting is popular, achieving a truly professional, long-lasting finish requires expert techniques. At T&Z Interior And Exterior Painting, we’ve perfected our process to deliver stunning results for homeowners in Lombard, Wheaton, Elmhurst, and our surrounding service areas.

Key Steps for Professional Cabinet Painting
Our approach combines meticulous prep with advanced application for a finish that lasts.
- Priming for Success: After cleaning and deglossing, we apply a high-quality, stain-blocking primer like Zinsser BIN Advanced Primer. This critical step ensures strong adhesion, blocks stains from woods like oak, and creates a uniform base for the topcoat.
- Applying Thin Coats: We apply multiple thin coats of paint rather than one thick coat. This prevents drips and runs, improves adhesion, and builds a more durable, richer color.
- Sanding Between Coats: We lightly sand with fine-grit (320-grit) sandpaper between each coat. This step, often skipped by DIYers, removes minor imperfections and creates a silky-smooth surface.
- Allowing Proper Drying Time: We strictly follow the manufacturer’s recommended drying times between coats and before reassembly. Rushing this compromises the final finish.
- Applying a Durable Top Coat: For maximum longevity, we apply a protective topcoat like General Finishes High-Performance Top Coat. This seals the paint and protects it from the wear and tear of daily kitchen use.
- Utilizing Specialized Tools: We use tools like painter’s pyramids to paint both sides of doors efficiently and professional spray equipment for the ultimate smooth finish.
Common Mistakes to Avoid
Avoiding these common pitfalls is key to a successful project.
- Skipping Prep Work: Inadequate cleaning or sanding is the #1 cause of paint failure. There are no shortcuts to good prep.
- Using Low-Quality Paint: Cheap paint won’t withstand the demands of a kitchen. Invest in paint specifically designed for cabinet painting.
- Rushing the Process: Not allowing proper drying and curing time will result in a soft, easily damaged finish. Patience is essential.
- Visible Brush Strokes: This is often caused by thick coats or improper tools. Use quality brushes and self-leveling paint for a smooth look.
- Improper Curing: Paint needs several weeks to fully harden. Be gentle with newly painted cabinets during this period to avoid damage.
- Ignoring Wood Grain: Paint will not fill prominent wood grain like that found on oak cabinets. While a flat topcoat can minimize its appearance, grain fillers are needed to eliminate it completely.
Cost, Durability, and Advanced Scenarios
Let’s cover the practical side of cabinet painting: the investment, the longevity, and how to handle tricky existing finishes. These are the key questions homeowners ask when considering a kitchen update.

Understanding the Cost of Cabinet Painting
The average cost for professional cabinet painting is around $3,900 for a small-to-medium kitchen. When compared to the $25,000+ cost of full cabinet replacement, the value is undeniable.
Several factors influence the final price:
- Kitchen Size: More cabinets mean more labor and materials.
- Cabinet Condition: Extensive repairs or filling old hardware holes will add to the cost.
- Choice of Materials: We use premium paints and primers that cost more but deliver a superior, long-lasting finish.
- Complexity: A simple, single-color job costs less than a two-tone look or other specialized finishes.
Our professional labor ensures the job is done efficiently and correctly, providing exceptional value. See examples of our work in our Cabinet Painting Naperville portfolio.
Durability and Special Finishes
“How long will it last?” is a crucial question. Properly painted cabinets are incredibly durable. When using high-quality systems like General Finishes Milk Paint with a top coat, you can expect 5+ years of beautiful performance even with heavy use. Fusion Mineral Paint has proven its durability for 3+ years with only minor touch-ups needed.
High-traffic areas, like the trash pull-out, may show minor wear sooner, but these spots are easily touched up. This ease of maintenance helps keep your kitchen looking fresh for years.
Can you paint over existing finishes?
Yes! Cabinet painting is a versatile solution for many surfaces.
- Laminate Cabinets: These can be painted successfully. The key is using a specialized primer designed for slick surfaces to ensure proper adhesion.
- Polyurethane or Varnish: These finishes are excellent candidates for painting. After a thorough cleaning, we scuff sand or use a liquid deglosser to dull the surface, then apply a high-quality primer to create a solid foundation for the new paint.
If you’re wondering about your specific situation, our guide Can You Paint Kitchen Cabinets provides more in-depth information.
Frequently Asked Questions about Cabinet Painting
Homeowners often have questions about cabinet painting, and we’re happy to share our expertise. Here are answers to the most common questions we receive from clients in Lombard, Wheaton, and our surrounding service areas.
How long does it take to paint kitchen cabinets?
A professional cabinet painting project typically takes 5 to 7 days. This timeline includes all steps: removal, prep, priming, painting, top-coating, and reassembly. Our experienced teams work efficiently to minimize disruption to your home.
A DIY project will likely take 1 to 2 weeks or more, depending on your schedule and the scope of work. The process requires 2-3 coats of paint and 1-3 coats of topcoat, with adequate drying time between each. That while paint may feel dry in hours, it takes several weeks to fully cure and reach maximum hardness.
Is painting kitchen cabinets a good idea?
Absolutely. Cabinet painting is one of the most cost-effective home improvements you can make. The average professional project costs around $3,900, while a full cabinet replacement can easily exceed $25,000. You get a dramatic change for a fraction of the cost.
Painted cabinets also significantly increase your home’s value and aesthetic appeal. A dated kitchen can feel bright, modern, and new in a matter of days, without the cost and disruption of a full remodel. Whether you plan to sell or simply want to enjoy your space more, it’s a smart investment. For more details, read our post: Kitchen Cabinet Painting Is It A Good Idea.
How do you get a smooth finish without brush marks?
Achieving a factory-like finish without brush marks comes down to four key elements: tools, paint, technique, and sanding.
- Use Quality Tools: High-quality, soft-bristle brushes and fine-finish foam or mohair rollers are essential. Cheap tools leave streaks and shed bristles.
- Choose Self-Leveling Paint: Professional cabinet enamels are formulated to flow out and smooth over as they dry, naturally minimizing brush and roller marks.
- Apply Thin, Even Coats: Never apply one thick coat. Multiple thin coats provide a more durable and smoother finish. Always brush in the direction of the wood grain.
- Sand Lightly Between Coats: After each coat dries, gently sand the surface with 320-grit sandpaper to remove any minor imperfections. Wipe away all dust with a tack cloth before applying the next coat.
Combining these strategies is how professionals deliver a beautifully smooth and durable finish every time.
Get Your Dream Kitchen with Expert Cabinet Painting
Your kitchen is the heart of your home, and cabinet painting is a powerful way to revitalize it. We’ve covered the essential steps, from prep and paint selection to understanding the cost and durability of a professional finish.
Instead of living with outdated cabinets or facing the high cost of replacement (often $25,000+), you can achieve a stunning change for a fraction of the price. A professional paint job, averaging around $3,900, delivers incredible value and can last for 5+ years with proper care.
At T&Z Interior And Exterior Painting, we have mastered the art of cabinet painting. Our meticulous process—from thorough degreasing to applying a durable topcoat—ensures a beautiful, long-lasting result. Our experienced teams serve homeowners throughout Lombard, Wheaton, Elmhurst, Naperville, and surrounding communities with a commitment to quality and customer satisfaction.
Your dream kitchen is closer and more affordable than you think. Let us show you what professional cabinet painting can do for your home.