
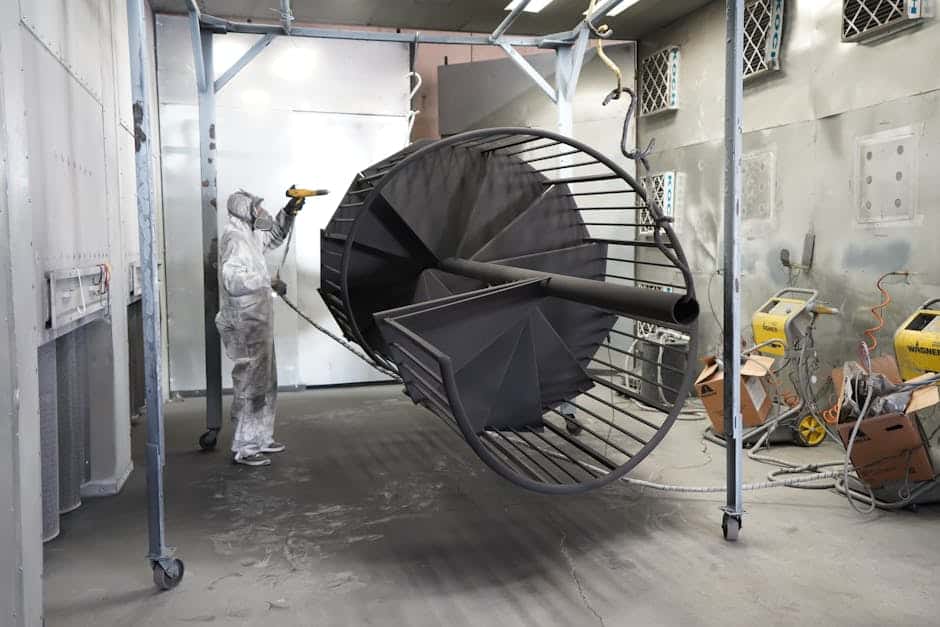
Why Metal Spray Painting Can Make or Break Your Project
Metal spray painting is one of the most effective ways to restore, protect, and transform metal surfaces — from patio furniture and railings to garage doors and decorative fixtures.
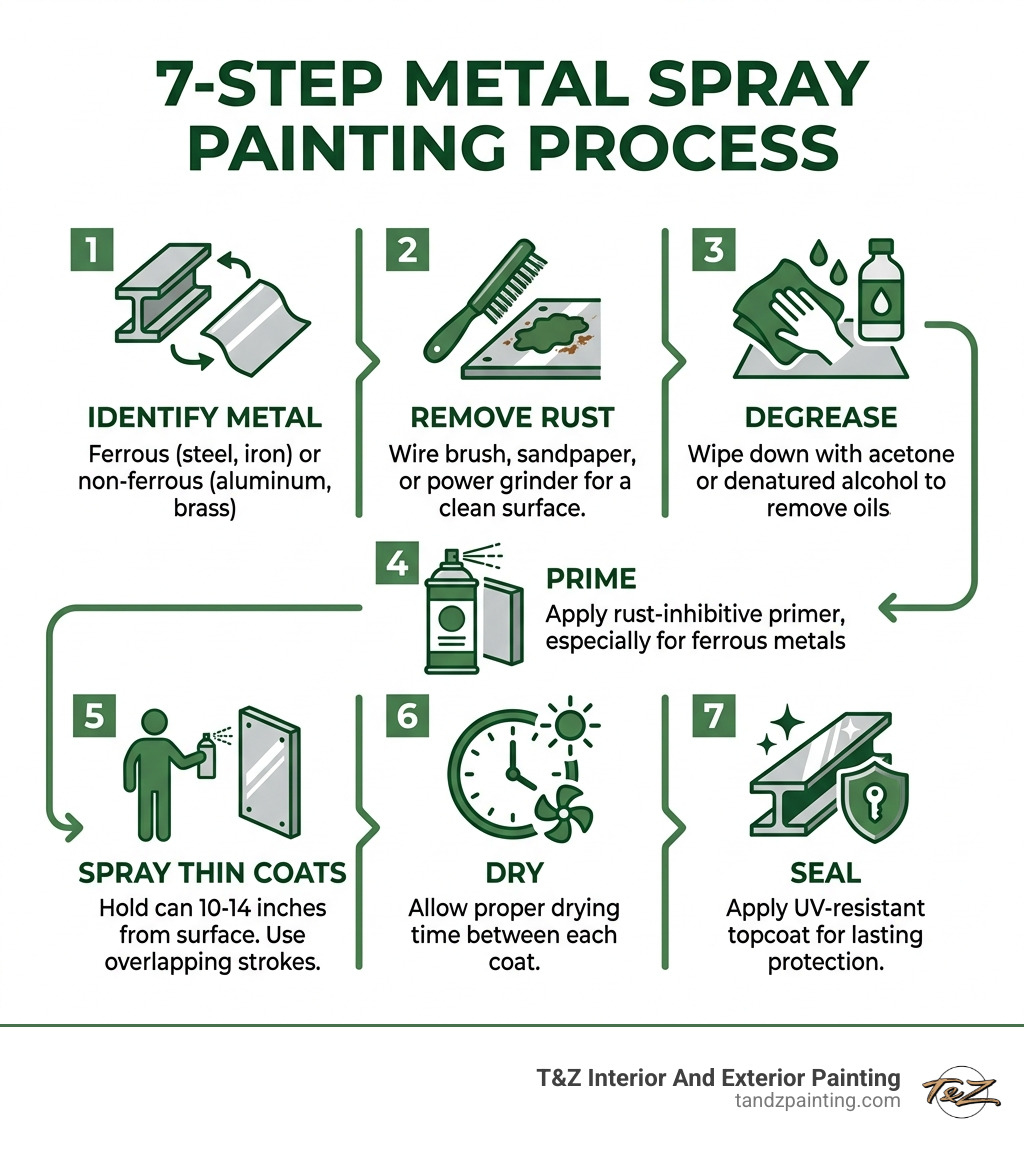
Here’s a quick overview of how to do it right:
- Identify your metal — ferrous (iron/steel) or nonferrous (aluminum, brass, etc.)
- Remove rust and old paint — use a wire brush, sandpaper, or power grinder
- Clean and degrease — wipe down with acetone or denatured alcohol
- Apply primer — use a rust-inhibitive primer for ferrous metals
- Spray in thin, even coats — hold the can 10–14 inches from the surface
- Allow proper drying time — between every coat
- Seal and maintain — apply a UV-resistant topcoat for lasting protection
Done well, a spray-painted metal surface doesn’t just look great — it can last for years, even outdoors. Done poorly, it peels, bubbles, and rusts within months.
That gap in results almost always comes down to preparation, technique, and conditions. Most DIYers skip steps or rush the process, and the finish shows it.
In this guide, we’ll walk you through the 7 key changes that separate a flaking disappointment from a finish that holds up through Chicago-area winters and summer heat alike.
I’m Tomasz Niemotko, owner of T&Z Interior And Exterior Painting in Lombard, IL, and with over 15 years of hands-on experience in residential and commercial metal spray painting, I’ve seen what works and what doesn’t. Let’s get into it.
Essential Preparation for Metal Spray Painting
If there is one thing we’ve learned over 15 years in the industry, it is that the “painting” part of metal spray painting is only about 20% of the job. The other 80% is preparation. Metal is a notoriously difficult substrate because it is non-porous and prone to chemical reactions like oxidation. Without a proper “profile”—a slightly roughened surface for the paint to grab onto—your beautiful new finish will simply slide off or peel in sheets.
According to Krylon’s guide on spray painting metal, preparation is the absolute cornerstone of adhesion. Whether you are figuring out how to give your old metal shelves a fresh new look or refinishing an industrial staircase, the steps remain the same: remove the bad stuff, clean the surface, and create a bond.
Identifying Your Metal Surface
Before you even pick up a can of paint, you need to know what you’re working with. Metals are generally categorized into two groups: ferrous and nonferrous.
- Ferrous Metals: These contain iron (think wrought iron, steel, and cast iron). They are magnetic and highly susceptible to rust. If a magnet sticks to your project, it’s ferrous. These require specialized rust-inhibitive primers to prevent the “orange monster” from eating through your new paint.
- Nonferrous Metals: These include aluminum, copper, brass, and bronze. They don’t rust, but they do corrode or tarnish. Interestingly, nonferrous metals often don’t require heavy priming if you sand away the shiny oxidation layer, but they do need a very clean surface for the paint to stick.
- Galvanized Steel: This is steel coated in a layer of zinc. It’s tricky because the zinc can react with certain oil-based paints (a process called saponification), leading to a sticky, peeling mess. Knowing these industrial spray painting coating and finishing solutions helps us choose the right chemical bond for each unique substrate.
Removing Corrosion and Old Finishes
You cannot paint over loose rust. Well, you can, but it’s like building a house on shifting sand. To get a professional result, you must remove all loose paint and corrosion.
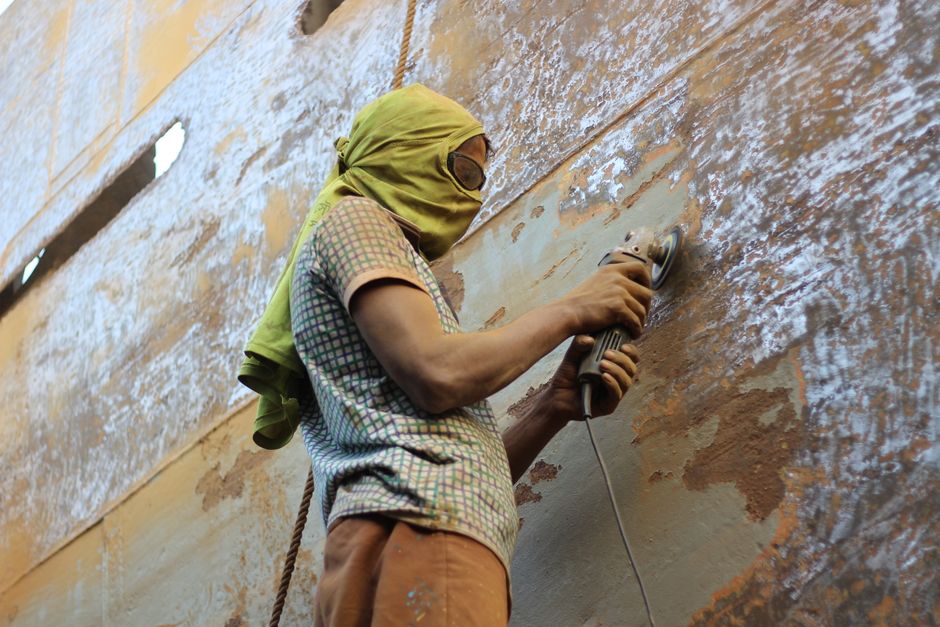
For light rust, a wire brush and some elbow grease usually do the trick. For heavier jobs, we use power grinders or sandblasting to get down to “white metal.” It is also vital to sand down the edges of any remaining old paint. If you can feel a “ridge” with your fingernail where the old paint meets the bare metal, that ridge will show up in your final finish. This is especially true in on-site component repair and spraying, where we aim for a seamless, “factory-new” look.
Once the rust is gone, degreasing is mandatory. Even the oils from your skin can ruin a paint job. We recommend wiping the surface down with denatured alcohol or acetone. This removes any lingering residues and ensures the metal is chemically ready for the primer.
Professional Techniques for a Flawless Finish
The difference between a “DIY” look and a “Pro” look is usually found in the thickness of the paint. Beginners often try to get full coverage in one heavy coat. This leads to the “three horsemen” of bad painting: drips, runs, and sags.
As a professional metal spray painter, we use a specific set of motions to ensure atomization—the process of breaking the liquid paint into tiny, uniform droplets—is consistent across the entire surface.
| Feature | Thin Coats (Professional) | Heavy Coats (DIY Mistake) |
|---|---|---|
| Drying Time | Fast and uniform | Slow; traps solvents inside |
| Appearance | Smooth, “factory” finish | Drips, runs, and “orange peel” |
| Durability | High; better adhesion | Low; prone to peeling/cracking |
| Coverage | Built up gradually | Immediate but uneven |
Mastering the Metal Spray Painting Motion
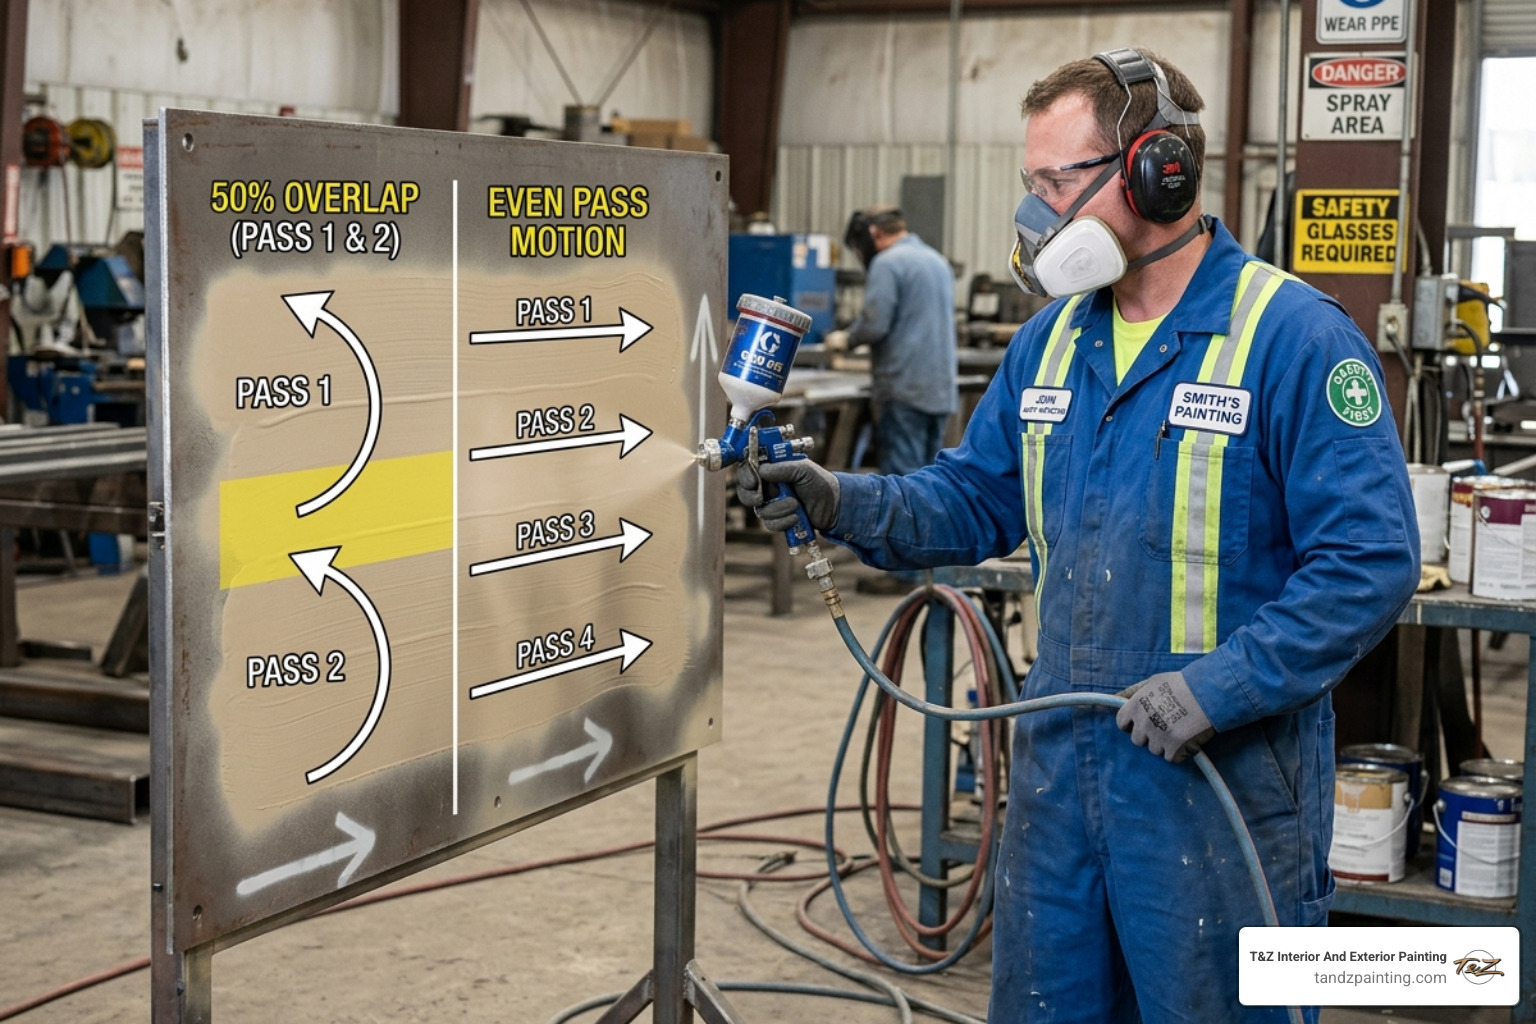
To avoid those dreaded drips, keep the can or spray gun moving at all times. The golden rule is to start your spray off the object, sweep across it in a steady motion, and stop the spray after you’ve passed the other side. This prevents the “puddle” that occurs when you start or stop the trigger while pointing directly at the metal.
Maintain a distance of 10 to 14 inches. If you’re too close, the paint will run. If you’re too far, the paint will dry in mid-air and land as a dusty, sandpaper-like texture. Much like professional cabinet spraying, the goal is a uniform film that levels out perfectly as it dries.
Achieving Depth with Multiple Coats
In May 2026, the trend for metal finishes has moved toward high-depth metallics and deep satins. You cannot achieve this depth with one pass. We recommend a minimum of three coats, though for premium projects, we often apply five or six very thin layers.
Wait for the “flash time”—the point where the paint is no longer wet but not yet fully cured—before applying the next coat. This is usually 10–20 minutes depending on the brand. This guide to finding quality metal spray painting services emphasizes that patience is the most important tool in your kit. Between coats, if you notice any dust nibs, a very light sanding with 400-grit sandpaper will keep the finish glass-smooth.
Environmental Conditions and Safety Protocols
You could have the best paint and the best technique, but if the weather in Lombard or Chicago isn’t cooperating, your project is in trouble. Metal is a thermal conductor; if the metal is too cold, the paint won’t bond. If it’s too hot, the paint will “flash dry” before it can level out, leaving a bumpy finish.
Creating a Controlled Metal Spray Painting Environment
The biggest enemy of a fresh spray job is dust. Even in a clean garage, the airflow from a spray can can kick up settled dust that lands right in your wet paint. To combat this, we often set up temporary spray booths using plastic sheeting.
If you’re working at home, a large cardboard box can serve as a miniature booth for smaller items. For larger projects, our commercial spray painting services utilize high-volume air filtration to ensure a dust-free environment. Always remember to protect your surroundings; overspray is a fine mist that can travel much further than you think, settling on cars, windows, or your neighbor’s fence.
Optimal Timing for Outdoor Projects
For outdoor metal spray painting, the “Goldilocks Zone” is a temperature between 50°F and 90°F with humidity below 85%. In the Chicago suburbs, we keep a close eye on the dew point. If the humidity is too high, moisture can get trapped under the paint film, leading to blistering.
Avoid direct sunlight when possible. Sunlight can bake the surface of the paint while the bottom layer is still wet, causing “alligatoring”—a series of cracks that look like reptile skin. Our guide to spraying large surfaces suggests timing your work for early morning or late afternoon when the sun is less intense.
Safety Check: Never skip the PPE. Spray paint contains Volatile Organic Compounds (VOCs) that are harmful if inhaled. At a minimum, you need:
- A respirator mask (N95 is for dust; you need one rated for organic vapors/paint).
- Safety goggles to prevent “paint mist” from entering your eyes.
- Nitrile gloves to keep solvents off your skin.
Primers and Coatings for Long-Lasting Durability
Choosing the right “juice” for the job is where the science of professional painting services really shines. Not all spray paints are created equal. Some are designed for “brilliant metallic” looks, while others are “industrial-grade” workhorses.
Selecting the Right Primer for Metal
Primer is the bridge between the metal and the paint. For ferrous metals, we use rust-inhibitive primers containing zinc or other corrosion blockers. For nonferrous metals like aluminum, a “self-etching” primer is often best because it contains a tiny amount of acid that microscopically eats into the surface to create a bond.
Whether we are performing a stunning kitchen makeover with spray painters or reviving furniture with local spray painting services, we match the primer to the specific metal type.
- Rust-Oleum Professional Metallic Spray is a fantastic choice for ferrous metals, offering coverage of about 10-12 sq. ft. per can.
- Krylon COLORmaxx provides excellent rust protection and a huge variety of on-trend colors with coverage up to 25 sq. ft.
- Specialty Coatings: For high-heat items like grills or engine parts, you must use a high-heat rated spray, or the paint will literally smoke and peel the first time it gets hot.
Maintenance and Aftercare Tips
Once your project is dry to the touch (usually 20–60 minutes), it still needs time to “cure.” Total curing can take anywhere from 24 hours to a week. During this time, the paint is still soft and susceptible to scratches.
To extend the life of your finish:
- UV Sealing: If the item will be in the sun, a clear UV-resistant topcoat is a must. UV rays break down the binders in paint, leading to “chalking”—that white powder that rubs off on your hands.
- Regular Cleaning: Wash your spray-painted metal with mild soapy water. Avoid harsh chemicals or abrasive pads which can dull the finish.
- Inspections: Every spring, check for small chips. If you find one, sand it lightly and hit it with a touch-up pen or a small burst of the original spray paint to prevent rust from getting a foothold. This is a standard part of our exterior painting maintenance in Downers Grove.
Frequently Asked Questions about Metal Spraying
How many coats of paint should be applied to metal?
For a professional, durable finish, we recommend one coat of primer and at least three thin coats of paint. For high-use items like chairs or railings, five coats will provide much better abrasion resistance. It is always better to do five thin coats than two thick ones.
Can you spray paint over rusted metal?
Yes, but with a major caveat: you must remove all loose or “flaking” rust first. You can use a product like Krylon Rust Tough or a rust-reformer that chemically converts stable rust into a paintable surface. However, for a 5.0-star result, removing the rust entirely is always the superior method.
What is the best temperature for spray painting metal?
The ideal range is 50°F to 90°F (10°C to 32°C). If it is colder than 50°F, the paint may take days to dry or fail to bond. If it is hotter than 90°F, the paint can dry before it hits the metal, creating a rough, uneven texture.
Conclusion
Metal spray painting is a powerful tool for any homeowner or business owner in the Lombard and Chicago area looking to refresh their property. By identifying your metal, preparing the surface with clinical precision, and mastering the “sweep and overlap” technique, you can achieve results that look like they came straight from the factory.
At T&Z Interior And Exterior Painting, we’ve spent over 15 years perfecting these techniques. From residential furniture to large-scale commercial metal structures, our team brings expert craftsmanship and a commitment to quality to every project. We are proud of our 5.0-star Google rating and our reputation for being the most reliable painters in the Western Suburbs.
If you have a metal project that feels a bit too big for a spray can, or if you want that flawless, professional finish that only industrial-grade equipment can provide, we are here to help. Whether you are in Wheaton, Elmhurst, or right here in Lombard, we can transform your drab metal into something fab.
Ready to start your transformation? Check out our full range of spray painting services and let’s get your project scheduled!