
Should You Paint or Spray Cabinets? Pros and Cons Compared
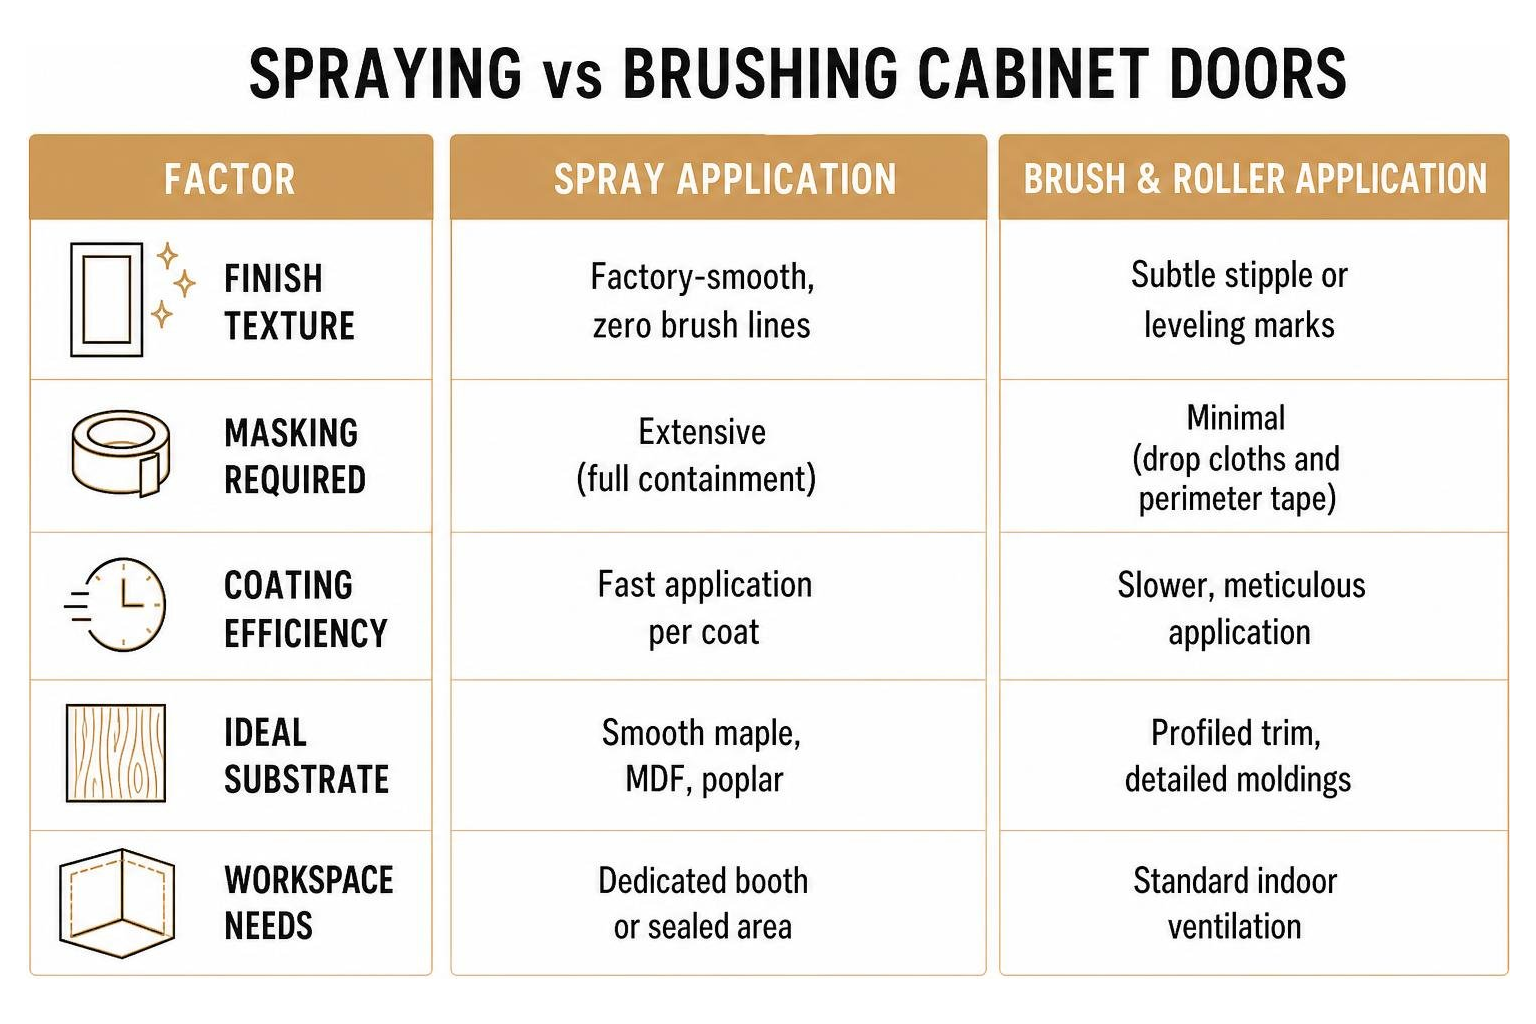
Choosing how to coat your cabinetry comes down to balancing texture, workspace containment, and labor. While an experienced brush hand can produce great results, a properly atomized spray coating provides a glass-smooth surface that mimics brand-new, factory-manufactured cabinetry.
To help you decide between methods, our cabinet painting complete guide breaks down the essential factors:
| Feature | Spray Application | Brush & Roller Application | Hybrid Method (Spray Doors / Roll Boxes) |
|---|---|---|---|
| Finish Texture | Factory-smooth, zero brush lines | Subtle stipple or leveling marks | Smooth doors, low-texture frames |
| Masking Required | Extensive (full containment) | Minimal (drop cloths and perimeter tape) | Moderate (garage or booth containment) |
| Coating Efficiency | Fast application per coat | Slower, meticulous application | Balanced production schedule |
| Ideal Substrate | Smooth maple, MDF, poplar | Profiled trim, detailed moldings | Standard residential cabinetry |
| Workspace Needs | Dedicated booth or sealed area | Standard indoor ventilation | Temporary mobile booth or garage setup |
Finish Quality and Texture When You Paint or Spray Cabinets
The primary reason homeowners lean toward professional cabinet spraying is the tactile, ultra-smooth result. When top-grade waterborne alkyd or polyurethane enamels are atomized through a fine-finish tip, the droplets lay out into an unbroken film. This eliminates the brush dragging and stipple roller texture that can trap kitchen grease and dust over time.
Hand-applied finishes depend on the paint’s natural leveling additives. While premium self-leveling enamels settle out well, they still retain subtle brush or roller tracks if worked over too long. For modern slab doors or high-sheen designs, spraying ensures a clean, uniform sheen without lap marks.
Labor and Time Factors: Deciding to Paint or Spray Cabinets
Manual application on a kitchen with 40 doors and drawer fronts often requires roughly 70 hours of hands-on labor across prep, priming, and multi-coat hand painting. Spraying reduces the actual coating time to just a few hours.
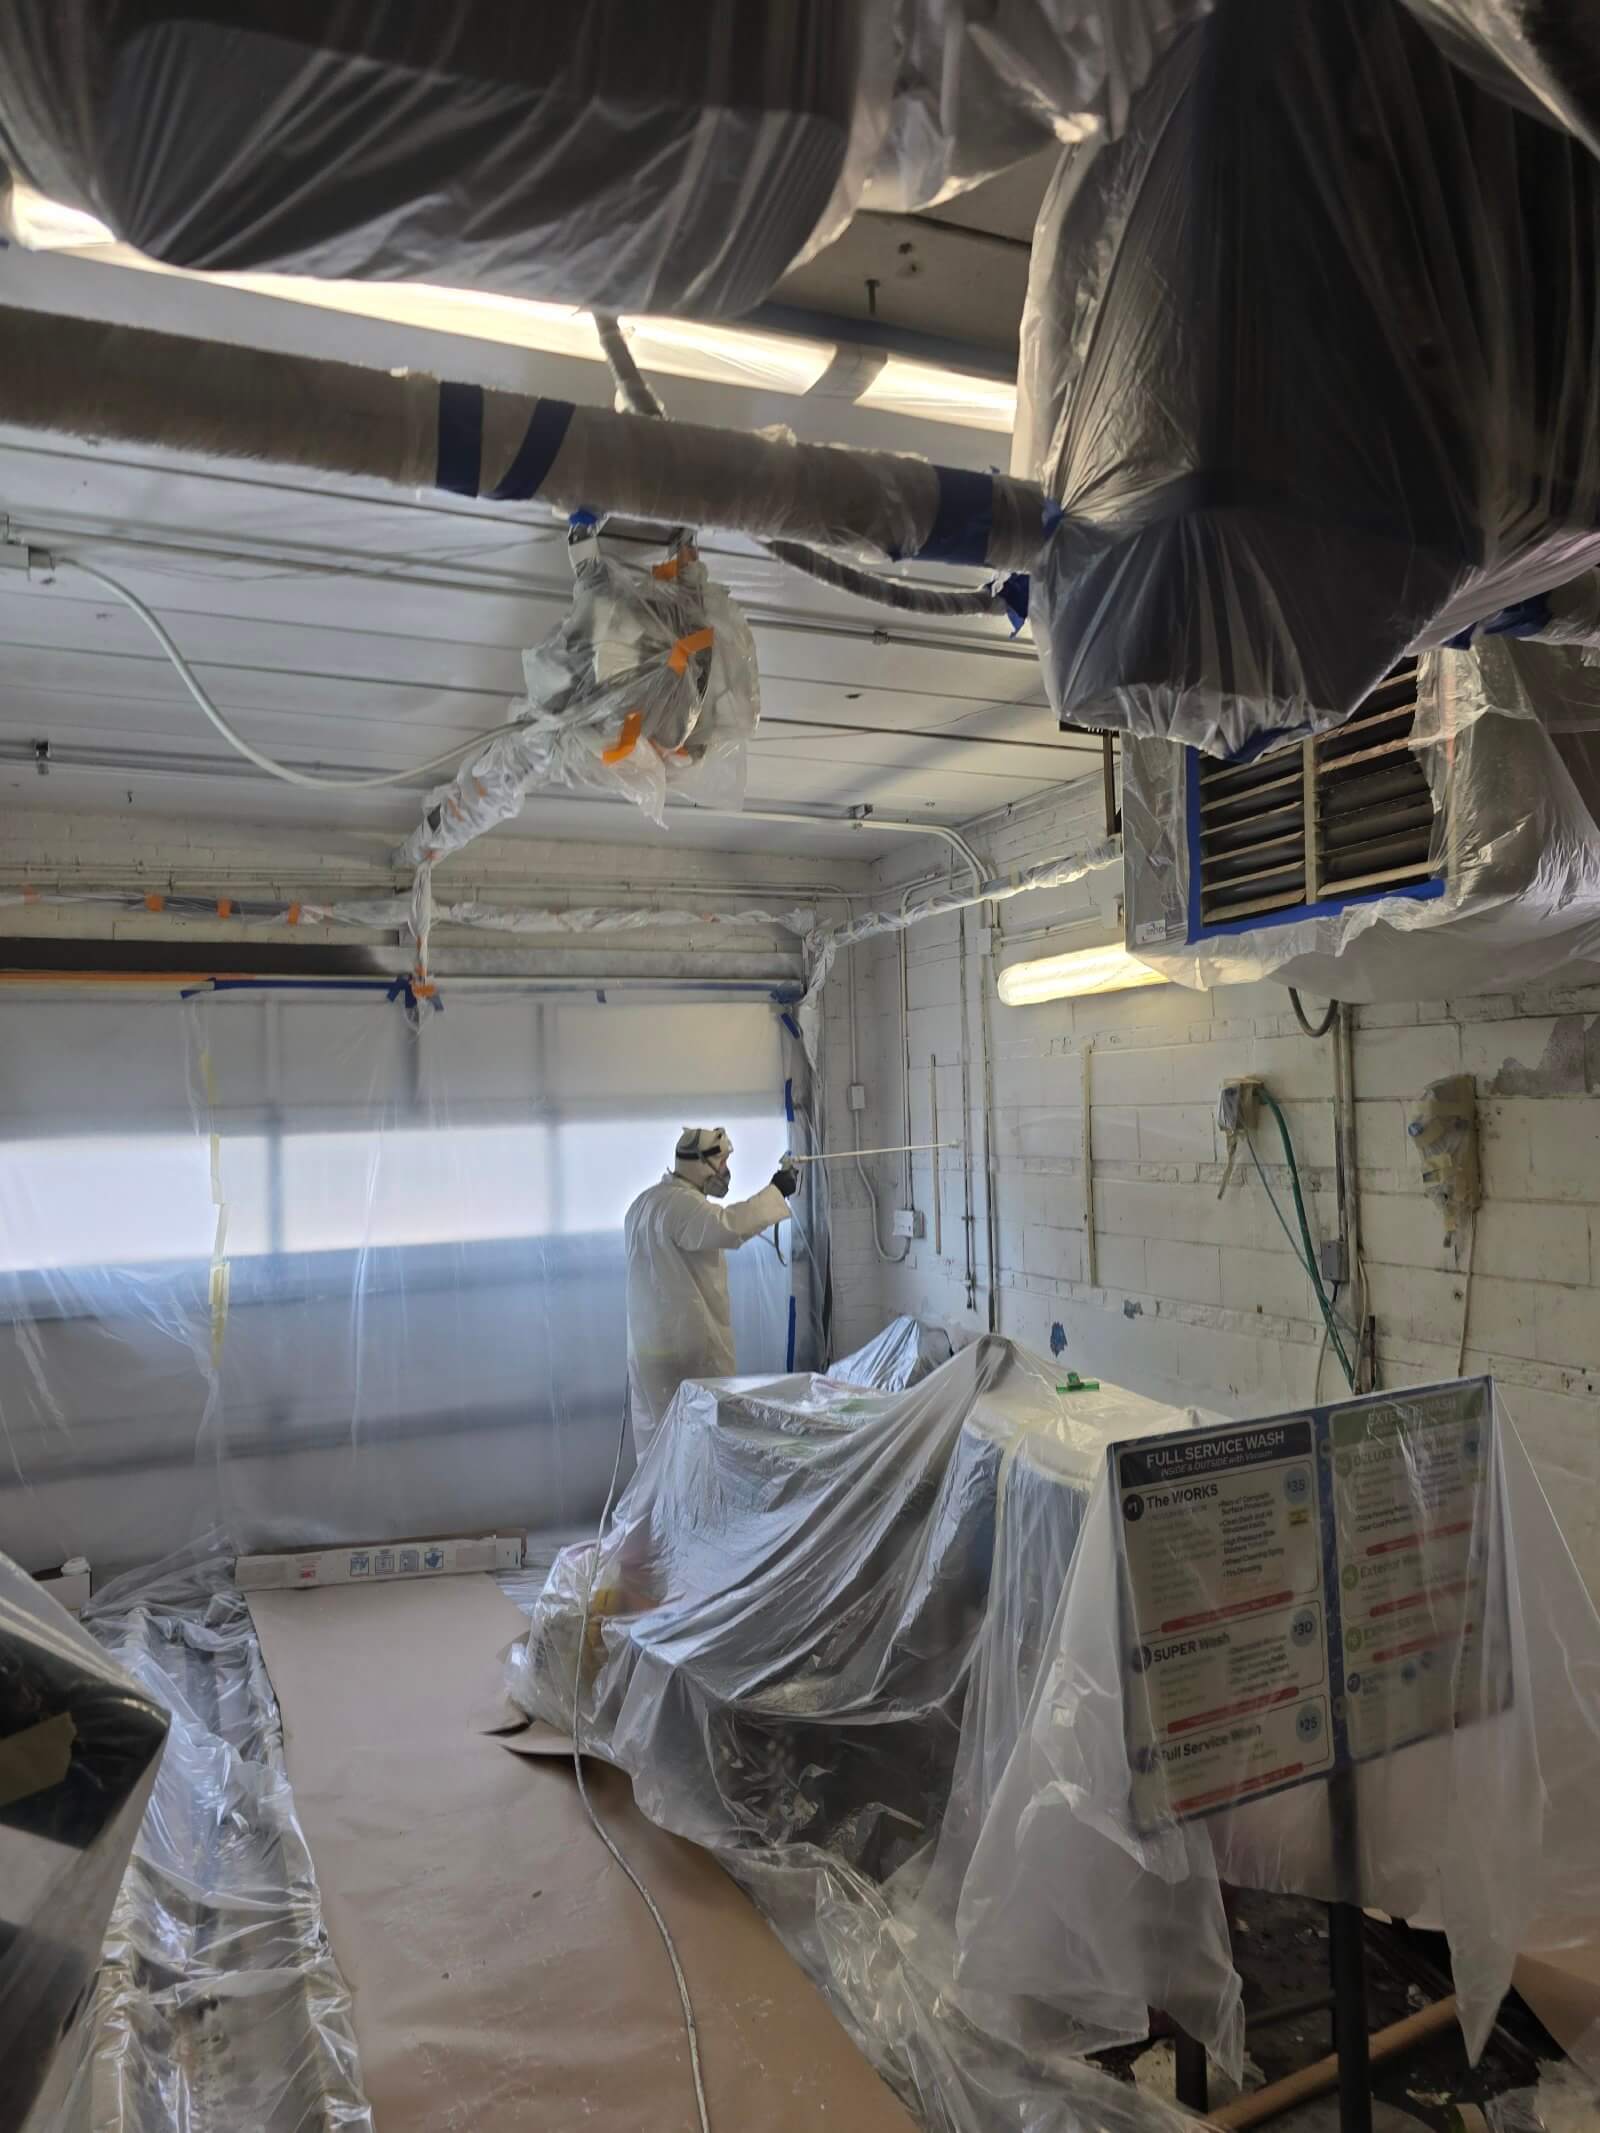
However, spraying shifts that labor into site protection. Masking walls, floors, ceilings, and appliances requires thorough taping and plastic sheeting. When weighing your options, consider project turnaround and lifestyle disruption across the entire schedule. In an active household, reducing the days your kitchen remains non-functional is often the deciding factor.
Essential Equipment and Setup for Spraying vs. Brushing Cabinets
High-grade finishes require proper application tools, filtration, and containment systems to manage overspray.
Choosing the Best Paint Sprayer and Settings
Two types of sprayers dominate fine architectural woodwork: High-Volume Low-Pressure (HVLP) turbines and Airless sprayers equipped with Fine Finish Low Pressure (FFLP) tips.
- HVLP Turbine Sprayers: Provide maximum atomization control and produce very soft overspray, making them exceptional for precision door finishing. Match your coating viscosity to the proper fluid nozzle (typically 1.5mm to 1.8mm for waterborne cabinet enamels).
- Airless Sprayers with FFLP Tips: Outstanding for production speed and handling thicker coatings without excessive thinning. A 311 or 210 fine-finish tip produces a soft, 4- to 6-inch fan pattern that prevents heavy buildup on narrow cabinet rails and stiles.
- Sprayer Calibration: Set your pressure only as high as necessary to achieve complete atomization without tails or fingers at the edges of the spray fan. Adjust the directional pickup straw inside the paint cup—point it forward when spraying downward at doors, or backward when spraying upward.
If you choose a traditional application method instead, selecting the best paint brush for cabinets—such as a firm 2-inch angled synthetic sash brush—helps maintain sharp edge control.
Creating a Safe Workspace and Spray Booth
Containing overspray keeps the rest of your home clean and protected. When spraying on-site, a portable unit like The PaintLine Portable Jobsite Spray Booth™ (PJSB) sets up inside a garage or open utility area to create an isolated work zone with disposable, light-filtering walls.
For fixed cabinet boxes inside the home:
- Isolate the kitchen using heavy-duty plastic sheeting hung from floor-to-ceiling zip poles.
- Cover all flooring with durable builder’s paper and seal perimeter seams with low-tack painter’s tape.
- Establish negative air pressure by mounting an explosion-proof exhaust fan in a window, drawing air through intake filters like those found on industrial systems such as the ASS Cabine series.
- Organize drying space using vertical systems like The PaintLine ProDryingRack SD (PSDR), which holds up to 50 cabinet doors vertically along an 18-foot drying line, keeping wet surfaces away from airborne dust.
Personal safety is critical during spray operations. Always wear a properly fitted NIOSH-approved half-mask cartridge respirator rated for organic vapors and particulates, wrap-around eye protection, and nitrile gloves.
Step-by-Step Preparation Process for Cabinet Refinishing
Flawless paint adhesion relies entirely on thorough substrate preparation.
Cleaning, Degreasing, and Sanding Cabinets
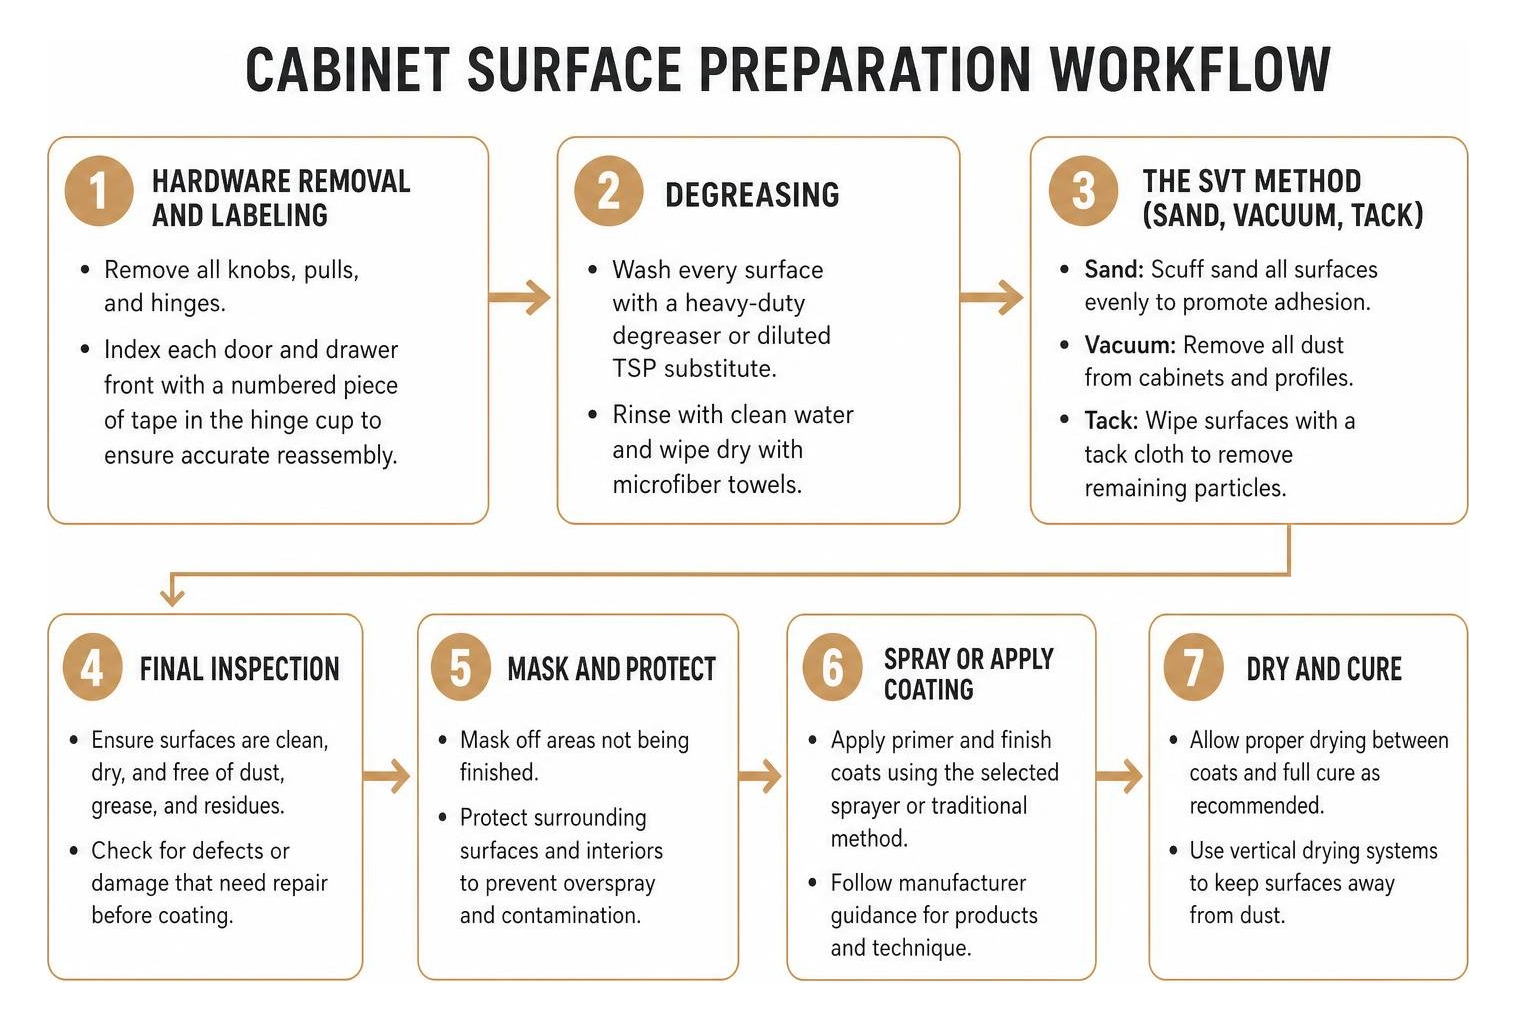
- Hardware Removal and Labeling: Remove all knobs, pulls, and hinges. Index each door and drawer front with a numbered piece of tape in the hinge cup to guarantee everything returns to its original opening.
- Degreasing: Wash every surface thoroughly with a heavy-duty degreaser or diluted trisodium phosphate (TSP) substitute. Cooking grease and skin oils prevent coatings from bonding properly. Rinse with clean water and wipe dry with microfiber towels.
- The SVT Method (Sand, Vacuum, Tack):
- Sand: De-gloss the existing clear coat or paint using 220-grit sandpaper or medium-grit sanding sponges. Profile the surface evenly without rounding off sharp structural edges.
- Vacuum: Clean up all accumulated dust from profiles, grooves, and surrounding work areas using a HEPA vacuum.
- Tack: Wipe down every square inch with a lint-free microfiber cloth or tack rag to remove microscopic particles. Our team outlines more essential prep strategies in our cabinet finishing advice resource.
Priming and Coating Different Cabinet Materials
Different substrates require specialized priming strategies before topcoating:
- Oak and Open-Grain Hardwoods: Oak features deep cellular pores that capture tannins and create an uneven texture under paint. Apply a solvent-based or premium synthetic stain-blocking primer to lock in oils. To create a uniform surface, work the first primer coat into the pores using a high-density foam roller before final spraying.
- MDF (Medium-Density Fiberboard): MDF faces take paint evenly, but the machined edges are porous and absorbent. Seal raw MDF edges with an escalating dry-film primer coat or specialty solvent-based sealer, followed by light sanding with 320-grit paper once dry.
- Close-Grained Hardwoods (Maple, Poplar, Birch): These stable woods accept high-adhesion waterborne bonding primers readily. Review our guide to paint-grade cabinet wood for substrate-specific finishing characteristics.
Explore our comprehensive breakdown of kitchen cabinet primers to ensure long-term durability.
Professional Application Technique: Spraying and Painting Steps

Achieving consistent film thickness requires steady body mechanics and reliable overlap habits.
- Maintain Proper Distance: Keep the spray gun perpendicular to the surface at an exact 10- to 12-inch standoff distance. Avoid arching your wrist at the start or finish of a pass, which causes thin edges and heavy centers.
- Overlap Pattern: Overlap each consecutive spray stroke by 50%. Trigger the gun just before the edge of the door and release the trigger immediately after clearing the opposite edge.
- Layer Sequence: Coat the outer edges of the door first, then spray the interior panel profile, and finish with full-length passes across the face.
- Manage Film Thickness: Apply multiple thin coats rather than one heavy layer. Two coats of primer and two coats of a durable topcoat—such as our recommended semi-gloss cabinet paints—deliver exceptional resilience.
- Intercoat Sanding: Allow every coat to cure according to manufacturer specifications (typically 4 to 24 hours). Sand lightly between coats using 320-grit paper or fine abrasive pads, followed by HEPA vacuuming and tacking.
Mastering the Hybrid Method: Spray Doors and Roll Boxes
For many occupied homes, the hybrid application method offers the best balance of speed and convenience.
- Doors, drawer faces, and removable decorative panels are taken down and sprayed inside an on-site portable spray enclosure or dedicated workshop.
- The fixed cabinet boxes and face frames inside the kitchen are cleaned, primed, and hand-coated using a fine 4-inch micro-flock foam roller and angled sash brush.
- This approach cuts down kitchen masking requirements and eliminates interior overspray concerns while delivering a factory-smooth finish across all cabinet faces. Local kitchen spray painters frequently rely on this technique to deliver premium results with minimal household disruption.
Troubleshooting Common Finish Defects
Keep your project on track by identifying and correcting these common finishing issues:
- Paint Spattering: Often caused by a clogged tip, dirty nozzle assembly, or paint drying along the fluid needle. Keep a damp rag nearby to clear the tip orifice regularly.
- Runs and Sags: Caused by spraying too close, moving the gun too slowly, or applying the coat too thick. If a run occurs while wet, immediately feather it out with a fine artist brush. Once fully cured, sand the area smooth with 400-grit paper and re-spray.
- Orange Peel: Results from improper paint viscosity, low air pressure, or spraying in high temperatures that dry the coating before it levels. Adjust fluid thinning and pressure settings on test cardboard before spraying doors.
- Sprayer Maintenance: Flush waterborne equipment with clean water and specialized cleaning solutions, or use mineral spirits for solvent-based primers. Disassemble and clean all filters and fluid tips to maintain spray quality. For comprehensive maintenance practices, consult our guide on sprayer maintenance.
Frequently Asked Questions About Cabinet Painting
What time savings does spraying cabinets provide compared to hand painting?
Spraying reduces the actual coating time on a standard 40-piece kitchen from roughly 70 hours of manual brushing down to just a few hours of trigger time. While spraying requires additional setup and masking time upfront, the overall process is significantly faster and delivers a smoother, more durable finish.
What is the best primer to use when spraying oak or MDF cabinets?
For oak cabinets, use a high-adhesion, stain-blocking primer to prevent natural wood tannins from bleeding through the topcoat. For MDF, use a high-solids primer that seals porous, machined edges and prevents moisture absorption.
Is it necessary to remove cabinet doors before spraying or painting?
Yes. Professional cabinet refinishing requires removing all doors, drawer fronts, and hardware. Painting doors while hanging causes runs along hinge plates, leaves unpainted gaps around edges, and risks paint bonding the doors shut to the face frames.
Conclusion
Deciding whether to paint or spray cabinets depends on your workspace, timeline, and desired finish. Spraying provides an exceptionally smooth, factory-grade look that elevates modern kitchen cabinetry, while brushing and rolling offer controlled application with minimal setup requirements. For many homeowners, a hybrid approach delivers the ideal combination of a pristine finish and practical project logistics.
Transforming your kitchen cabinetry requires precision preparation, premium materials, and experienced application techniques. At T&Z Interior And Exterior Painting, our licensed and insured team brings over 15 years of hands-on experience and a consistent 5.0 Google Reviews rating to every project. We take pride in delivering clean, dependable craftsmanship to homeowners throughout Lombard, Itasca, Addison, Glen Ellyn, Oak Brook, and the surrounding communities.
Contact our team today to explore our professional cabinet painting services and schedule a consultation for your home.