
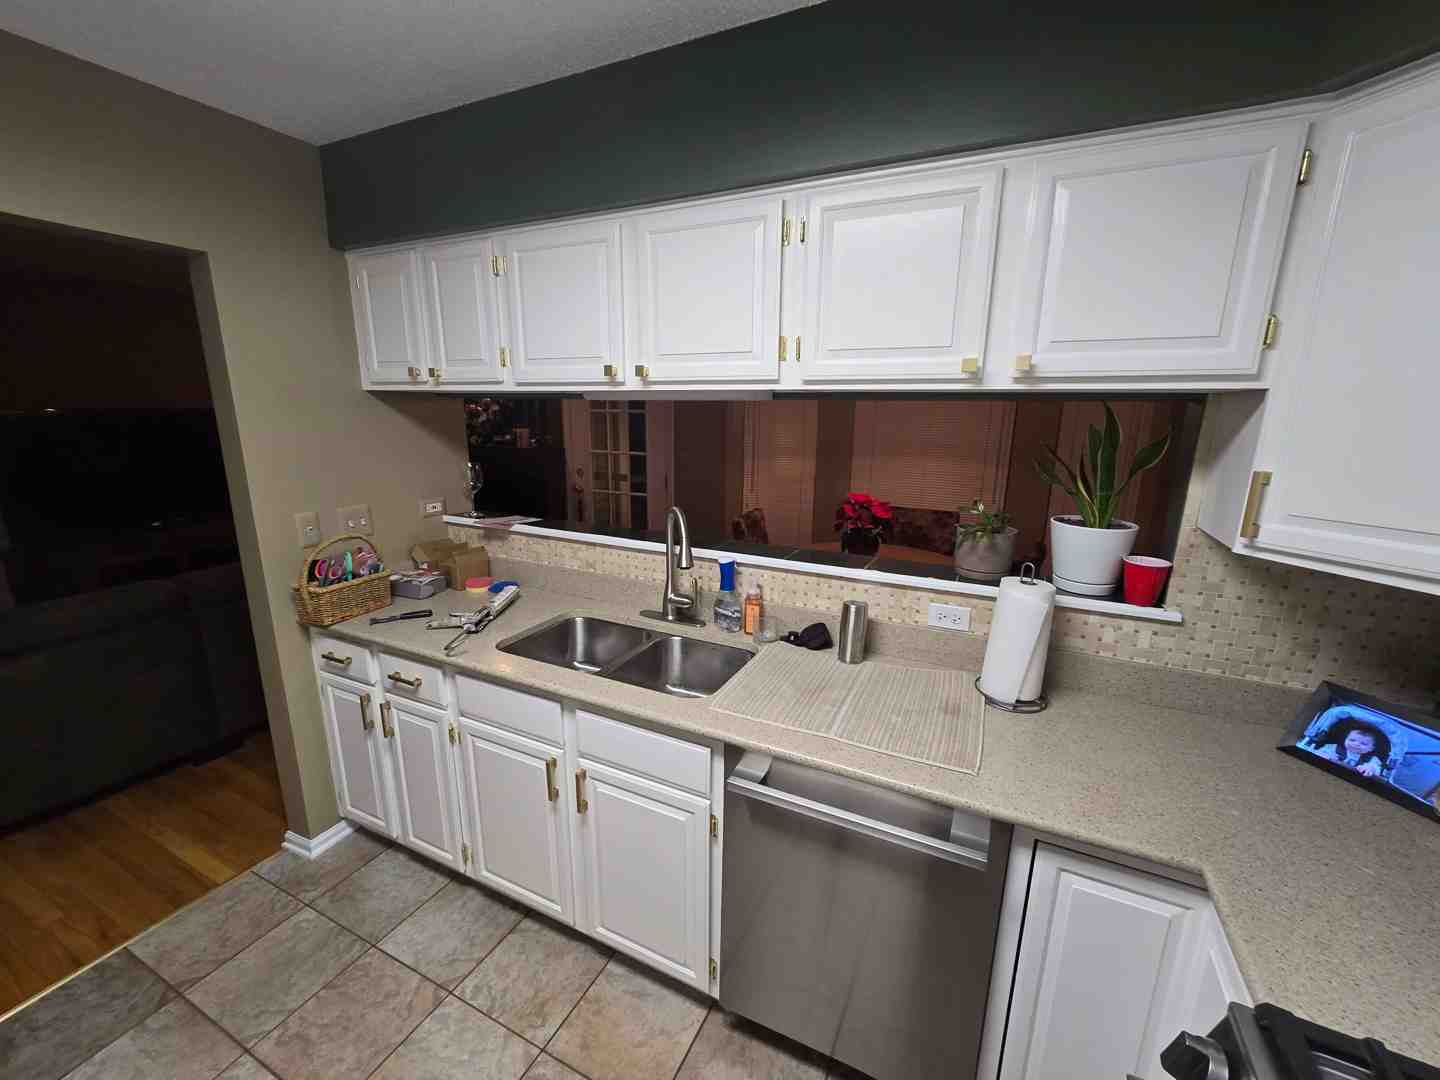
Kitchen Cabinet Spraying: The Path to a Smoother Finish
For a smooth cabinet finish, remove and label the doors and hardware, clean off cooking grease, sand the surfaces, and apply a suitable primer. Then spray thin, even coats of cabinet paint, letting each coat dry as directed before sanding lightly and spraying again. Keep dust and overspray contained, and give the paint time to cure before heavy use. Spraying can avoid the brush marks left by hand painting, but the prep work matters just as much as the spray technique.
I’m Tomasz Niemotko of T&Z Interior And Exterior Painting. Through our cabinet painting and refinishing work around Lombard, I’ve seen how careful prep and controlled kitchen cabinet spraying help create a clean, lasting finish.
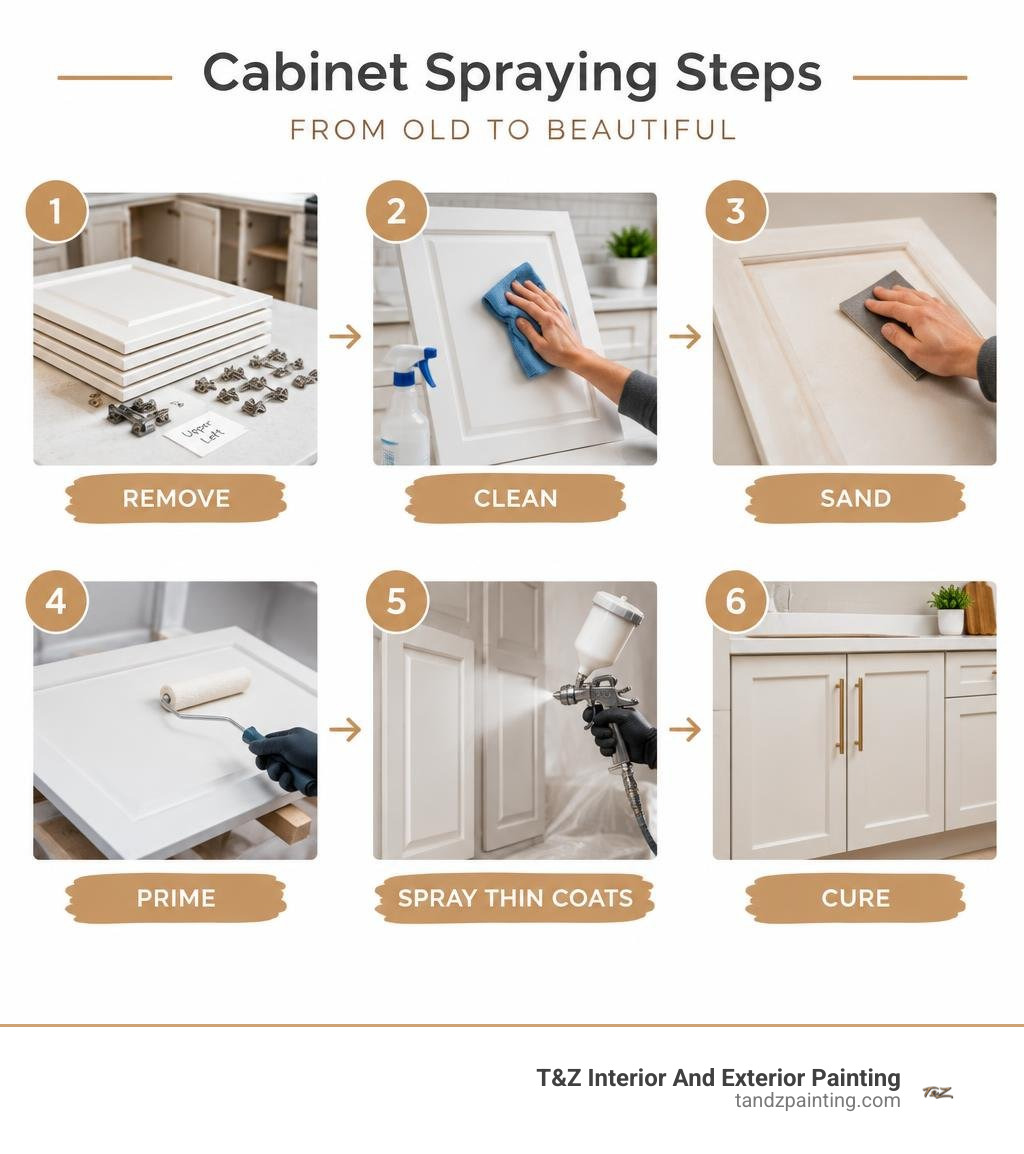
Kitchen cabinet spraying word list:
Spraying vs. Hand Painting: Achieving an Ultra-Smooth Finish
When refreshing your kitchen woodwork, the application method dictates the final look, feel, and durability of your surfaces. Homeowners often weigh the differences between traditional bristle work and mechanical atomization. To understand how each technique functions in detail, review the complete guide to paint vs spray cabinets.
Spraying breaks coating materials into microscopic droplets that settle across cabinet profiles as a continuous, unified wet film. Hand painting relies on physical bristles or woven roller sleeves pushing paint across surfaces. While advanced waterborne enamels contain leveling agents that reduce surface tension, brush work inherently leaves minor striations along intricate profiles. Spraying yields the seamless look typically found on factory-built cabinetry.
| Feature / Metric | Spray Application | Traditional Hand Painting |
|---|---|---|
| Surface Smoothness | Ultra-smooth; zero stipple or bristle marks | Mild stipple with rollers; directional brush ridges |
| Film Uniformity | Exact, measured mil thickness per coat | Variable thickness, potential heavy edges or thin spots |
| Application Speed | Very rapid once masked (minutes per door) | Slower, manual strokes requiring repeated cross-brushing |
| Coating Consistency | Flawless on intricate trim, rails, and panels | Prone to paint pooling in detailed grooves and corners |
| Setup & Containment | Extensive masking and containment required | Minimal masking; drop cloths and standard edging tape |
Comparing Application Methods for Factory Results
Traditional rollers leave a textured pattern known as roller stipple, and brushes can pull on partially dried coatings, creating lap marks. A factory-grade finish requires consistent wet-film thickness across every square inch. When choosing the right cabinet finish, higher sheen levels like satin or semi-gloss highlight surface irregularities. Spraying atomizes the material so it lays down uniformly, ensuring that light reflects evenly without distortion.
Why Kitchen Cabinet Spraying Eliminates Brush Marks and Lap Lines
Spraying eliminates brush marks by replacing mechanical friction with fluid atomization. As the finish passes through a precision-machined nozzle, air pressure breaks it into a fine mist. When these droplets land on a horizontal surface, they coalesce into an unbroken layer.
By applying paint horizontally to detached doors, gravity helps the coating level itself out without creating runs or sags. High-performance urethane enamels maintain an open wet edge long enough to fuse together seamlessly, delivering the smooth feel homeowners expect from professional cabinet spraying.
Essential Equipment and Setup for Kitchen Cabinet Spraying
Achieving professional results requires the right equipment matched to your coating viscosity. High Volume Low Pressure (HVLP) turbine systems and fine-finish airless sprayers are the standard tools for cabinet finishing. Understanding paint sprayer containment strategies protects non-target surfaces while establishing optimal airflow for fast, even drying.
Selecting the Right Sprayer and Tip Sizes
HVLP systems introduce high volumes of air at low pressures (usually 4 to 10 PSI at the air cap), producing minimal overspray and high transfer efficiency. Airless sprayers use hydraulic pressure (1,500 to 2,500 PSI) with fine-finish tips to atomize thicker coatings with minimal thinning.
- HVLP Fluid Sets: Tip and needle pairings between 1.4mm and 1.8mm provide the best atomization for waterborne cabinet enamels and primers.
- Airless Fine-Finish Tips: Reversible tips labeled 208, 310, or 312 spray tight 4-to-6-inch patterns that distribute paint evenly without overloading vertical surfaces.
- Viscosity Management: Always strain paints through a fine mesh filter before filling the hopper or gravity-feed cup to prevent tip clogs.
Workspace Containment, Ventilation, and Overspray Management
Roughly 30 percent of paint applied with a sprayer can turn into overspray. Containment is essential for both off-site booths and inside the home. Detailed guidance on spraying technique and booth setup highlights how proper air management keeps the workspace clean and safe.
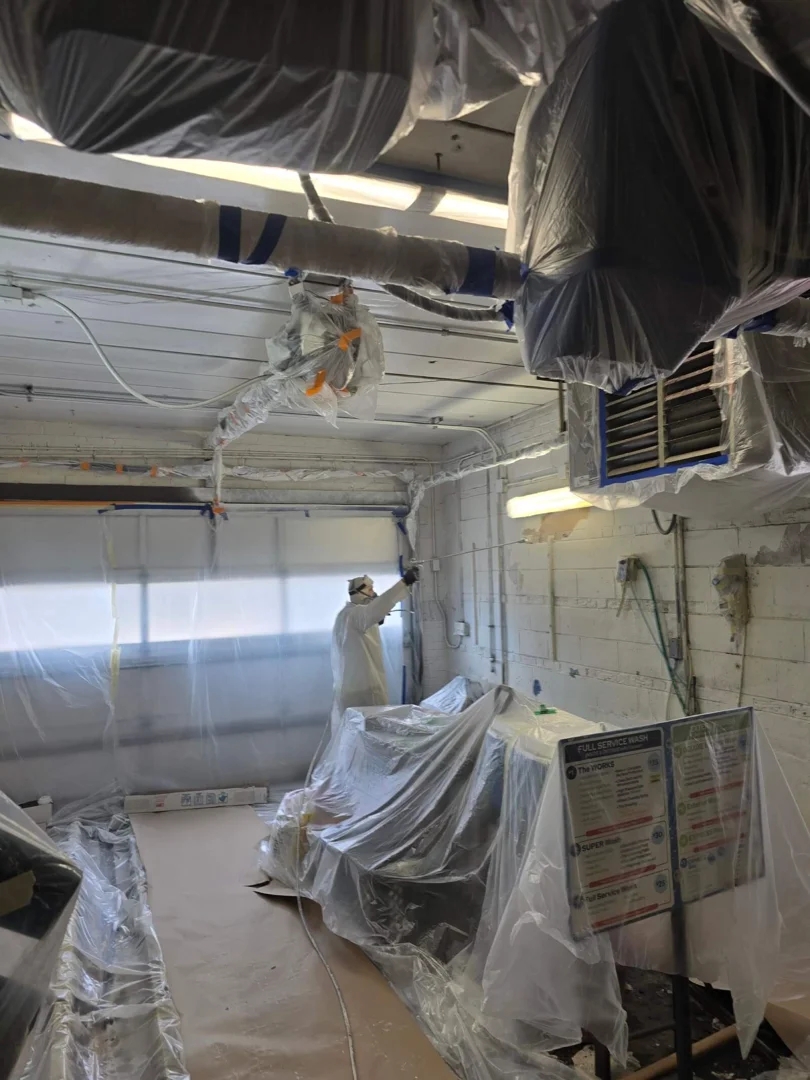
- Enclose the Space: Build a dedicated spray area using heavy-duty plastic sheeting or a portable pop-up spray tent with static-charged masking film that pulls airborne mist directly to the walls.
- Control Airflow: Position an intake fan fitted with a furnace filter to supply clean air, along with an exhaust fan venting out a window to pull airborne overspray away from freshly coated doors.
- Safety Gear: Wear a dual-cartridge organic vapor respirator, wrap-around eye protection, and disposable coveralls.
- Drying Setup: Place drying racks or riser blocks inside the enclosed area so finished doors can cure flat, away from airborne dust.
Step-by-Step Preparation and Priming Protocol
Experienced professional painters spend 60 to 70 percent of their total project time on preparation—not spraying. Paint cannot bond properly to grease, oils, or slick factory clears. Reviewing proper wood cabinet primer selection ensures strong adhesion and prevents tannin bleed-through.
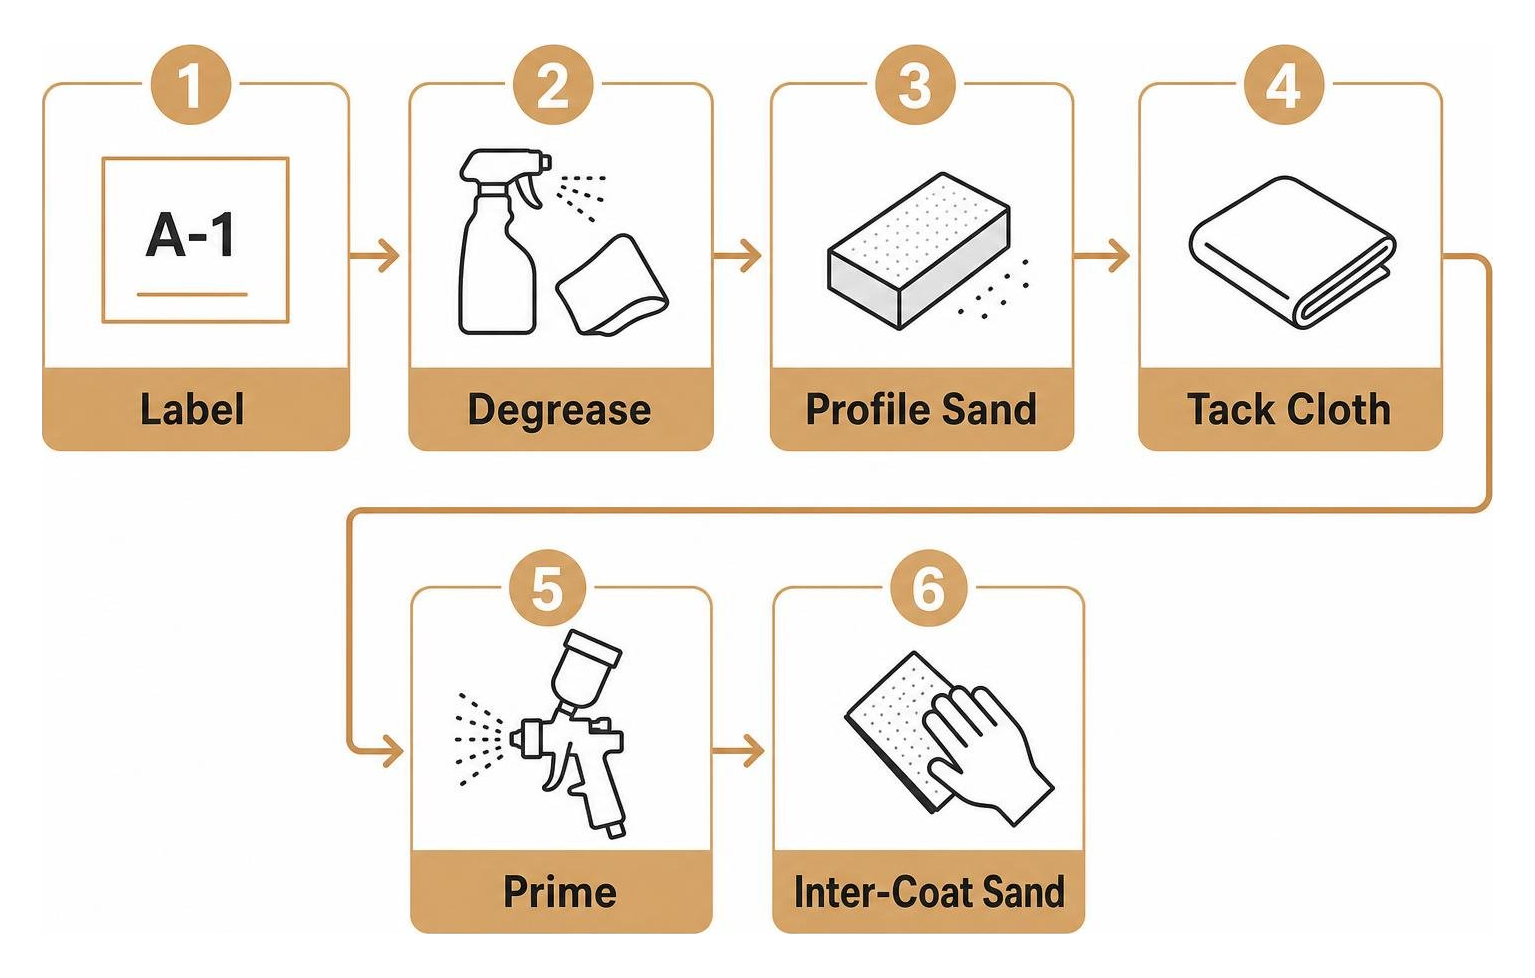
Labeling, Hardware Removal, and Deep Degreasing
Systematic organization prevents alignment issues during final reassembly:
- Create a Numbered Map: Assign every door, drawer face, and frame opening a unique number. Write this number inside the hinge cup hole or beneath protective painter’s tape on the door’s unexposed edge.
- Bag All Hardware: Place hinges, knobs, drawer pulls, and mounting screws into labeled sealable bags corresponding to each opening.
- Degrease Completely: Kitchen surfaces accumulate aerosolized oils. Wash all millwork using a heavy-duty degreaser or TSP substitute. Scrub corners with non-abrasive pads, then wipe everything down twice with fresh water and clean microfiber towels.
Sanding Sequence and Stain-Blocking Primers
Effective mechanical adhesion relies on creating a consistent profile for the primer to grip:
- Scuff Sanding: Sand every profile using 120-grit to 150-grit sandpaper or medium-grit sanding sponges. The goal is to dull the factory clear coat without cutting through wood veneers.
- Open-Grain Oak Treatment: For prominent wood grain (such as oak), apply an acrylic grain filler across the face frames and door panels. Sand it flat to create a smooth surface before priming.
- Apply Bonding Primer: Spray an initial full-thickness coat of high-adhesion shellac or stain-blocking bonding primer. This seals deep tannins and locks down grease residues.
- Smooth the Primer: After the primer cures, lightly sand all surfaces using 220-grit sandpaper to remove raised wood fibers, then vacuum the dust and wipe with a clean tack cloth. This technique is standard in fine cabinet furniture refinishing.
Mastering Spray Application and Long-Term Curing
Once primed and sanded smooth, cabinet surfaces are ready for topcoating. Modern waterborne alkyd enamels and urethane acrylics provide the rock-hard durability of traditional oil-based paints while drying quickly and maintaining low VOC levels.
Perfecting the Kitchen Cabinet Spraying Technique on Doors and Frames
Proper gun movement guarantees an even finish across complex raised-panel profiles:
- Gun Distance and Angle: Hold the spray tip perpendicular to the surface at a distance of 8 to 12 inches. Tilting the gun creates uneven coating thicknesses across the spray pattern.
- Trigger Sequence: Start moving the spray gun before pulling the trigger, and release the trigger after the spray fan clears the opposite edge. Never stop moving the gun while the trigger is engaged.
- Pass Overlap: Overlap each subsequent stroke by 50 percent to maintain a consistent wet film build without dry streaks.
- Door Spraying Pattern: Spray the outer edges first, followed by the inner profile recesses, then the center panel, and finally the outer face rails and stiles using long, uninterrupted horizontal passes.
Inter-Coat Sanding, Reassembly, and Long-Term Maintenance
Achieving a clean finish requires careful attention between coats and proper cure times:
- Inter-Coat De-nibbing: Allow the first topcoat to dry fully according to manufacturer instructions. Sand lightly using ultra-fine 320-grit paper or fine ceramic abrasives to remove dust nibs, then wipe down with a tack cloth before applying the second coat.
- Drying and Curing Windows: While modern enamels feel dry to the touch in 2 to 4 hours, avoid handling them for 24 hours. Wait 72 hours before reattaching doors, drawers, and hardware. To keep everything operating smoothly, learn how to say goodbye to sticky doors with the best paint for kitchen cabinets.
- Full Cure Care: Waterborne urethanes require a full 30 days to reach maximum hardness. Clean surfaces with mild dish soap and soft cloths, avoiding harsh chemical cleaners or abrasive scouring pads. When completed with proper preparation and application, your updated cabinetry can last 8 to 15 years.
Frequently Asked Questions About Cabinet Finishes
Can I spray cabinet boxes indoors without getting paint through the house?
Yes. Professional cabinet painters build a containment zone around the kitchen using heavy-duty plastic sheeting and zip-wall poles. By sealing off doorways, masking flooring, wrapping countertops and appliances, and running an exhaust fan to create negative air pressure, all overspray remains safely contained within the kitchen work zone.
How long must spray-painted cabinets cure before reinstalling hardware?
Cabinet doors can typically be handled carefully after 24 hours, but we recommend waiting at least 72 hours before installing hinges, knobs, and pulls. Adding clear silicone bumpers to the back corners of doors and drawer fronts helps protect the coating while it completes its 30-day curing cycle.
What causes orange peel during spraying and how is it prevented?
Orange peel is an uneven, bumpy texture caused by paint drying before it flows out flat. It usually occurs when paint viscosity is too thick, spray gun air pressure is set too low, the tip is held too far from the cabinet face, or the room temperature is too warm. You can prevent it by thinning the coating as recommended, balancing your air and fluid pressures, and spraying in a temperature-controlled space (ideally 65°F to 75°F).
Conclusion
Spraying kitchen cabinets transforms worn, dated woodwork into clean, durable surfaces with a smooth, factory-grade finish. While the spraying process itself is fast, long-lasting results depend on careful preparation: thorough degreasing, systematic scuff sanding, high-adhesion priming, and clean containment.
At T&Z Interior And Exterior Painting, our team brings over 15 years of dedicated residential experience to every project. As a fully licensed and insured contractor holding a 5.0 Google Reviews rating, we focus on detailed preparation, clean containment, and reliable craftsmanship backed by our 2-year labor warranty. If you are looking for dependable residential painting in Lombard, IL, or neighboring communities including Itasca, Addison, Glen Ellyn, and Oak Brook, reach out to our team to explore our expert spray painting services and refresh your home today.