
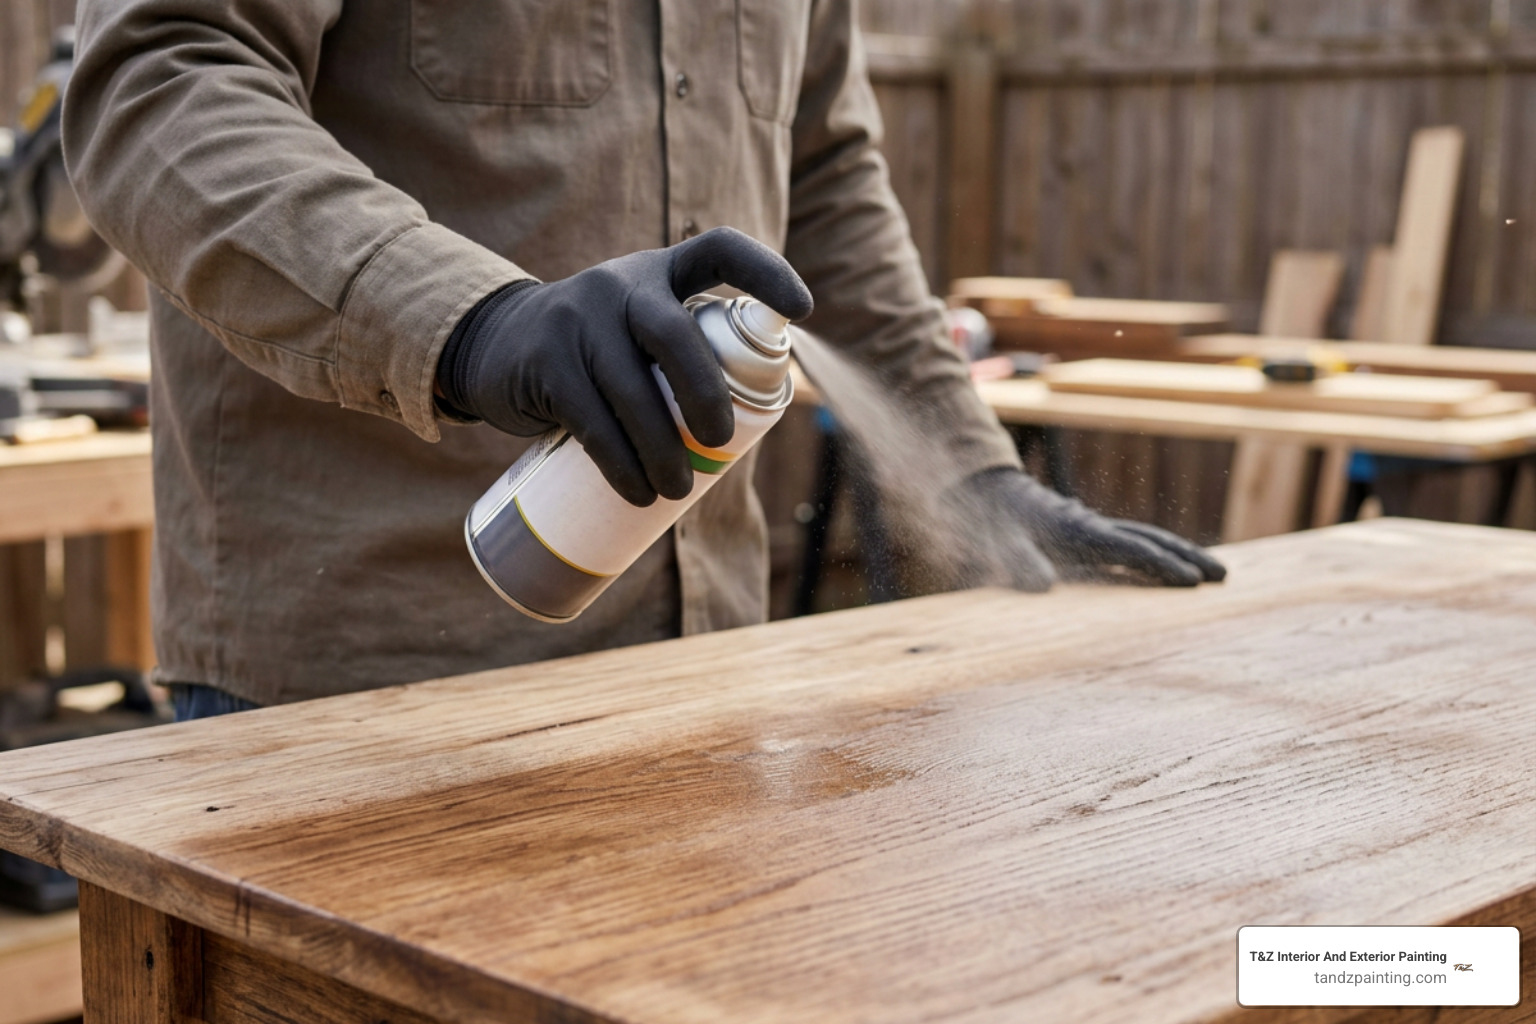
Choose the Right Spray Paint for Wood
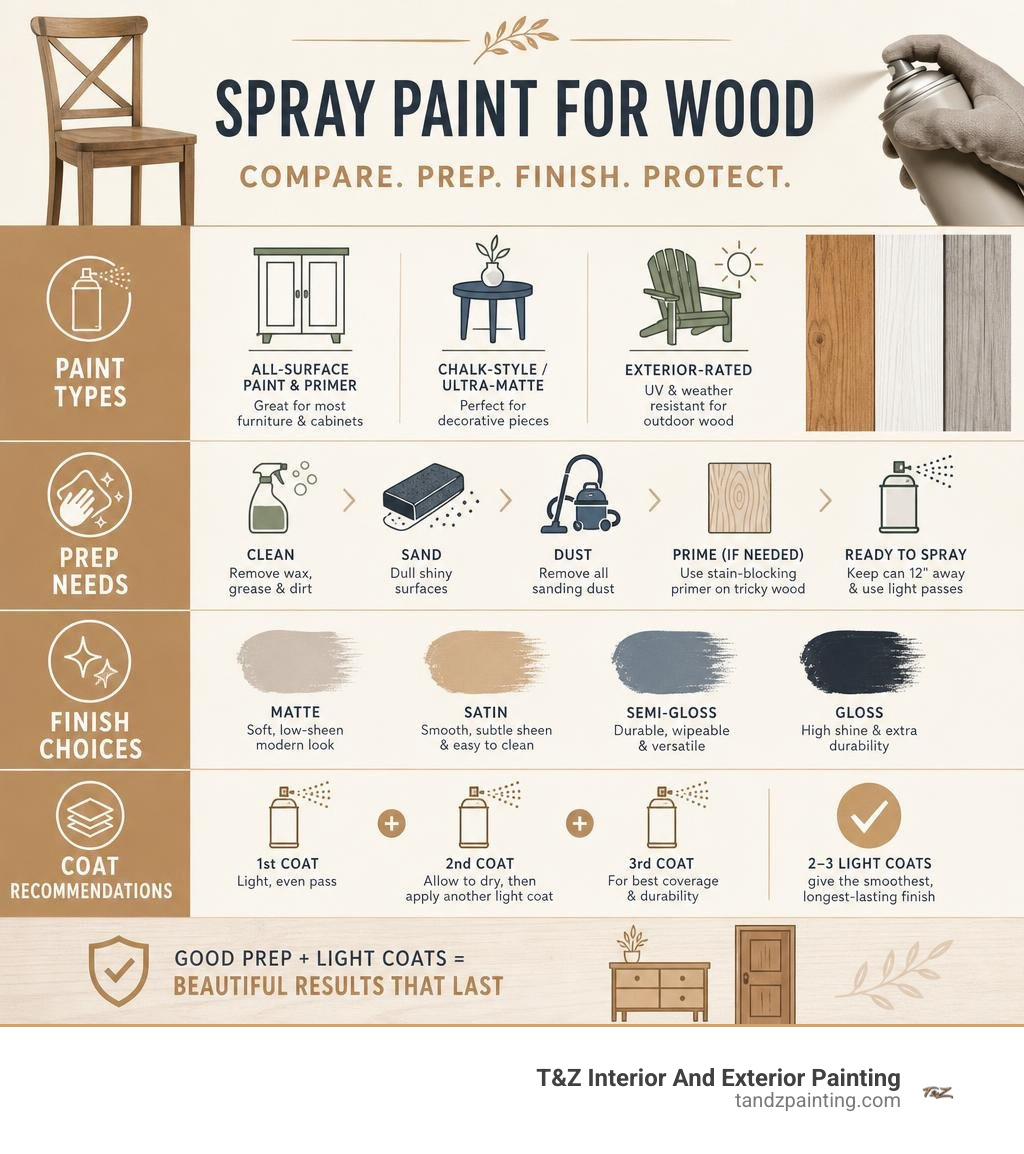
For most wood furniture, choose an all-surface paint-and-primer spray in a satin or semi-gloss finish, then apply two to three light coats over a clean, scuff-sanded surface. Use a stain-blocking primer first on bare, dark, stained, glossy, or knotty wood to improve adhesion and stop discoloration from showing through.
The best spray paint for wood depends on where the piece will live:
- Furniture and cabinets: Durable enamel or paint-and-primer spray in satin or semi-gloss.
- Decorative pieces: Chalk-style or ultra-matte spray for a soft, low-sheen look.
- Outdoor wood: An exterior-rated formula with UV and weather resistance, followed by a compatible clear protective coat when needed.
Spray paint gives wood a smooth, brush-mark-free finish and reaches details that are difficult to paint by hand. But the can matters less than the prep: clean away wax and grease, dull shiny finishes, remove sanding dust, and spray thin, overlapping passes from about 12 inches away.
I am Tomasz Niemotko of T&Z Interior And Exterior Painting, a licensed and insured painting contractor serving Lombard, Itasca, Addison, Glen Ellyn, Oak Brook, and surrounding towns for more than 15 years. Our 5.0 Google Reviews rating reflects the careful preparation and reliable workmanship we bring to projects involving spray paint for wood and other detailed interior and exterior finishes.
Simple guide to spray paint for wood:
- Spray painting interior doors
- Professional cabinet spraying
- furniture spray painting services near me
Top Types of Spray Paint for Wood and How to Choose
Selecting the right formulation for your wooden project ensures the finish looks refined and withstands daily use. Aerosol coatings atomize paint into a fine mist, settling evenly across complex carvings, turned spindles, and recessed trim where brushes often leave telltale drips and streaks.
When choosing between formulas, consider resin chemistry, pigment concentration, and environmental resistance:
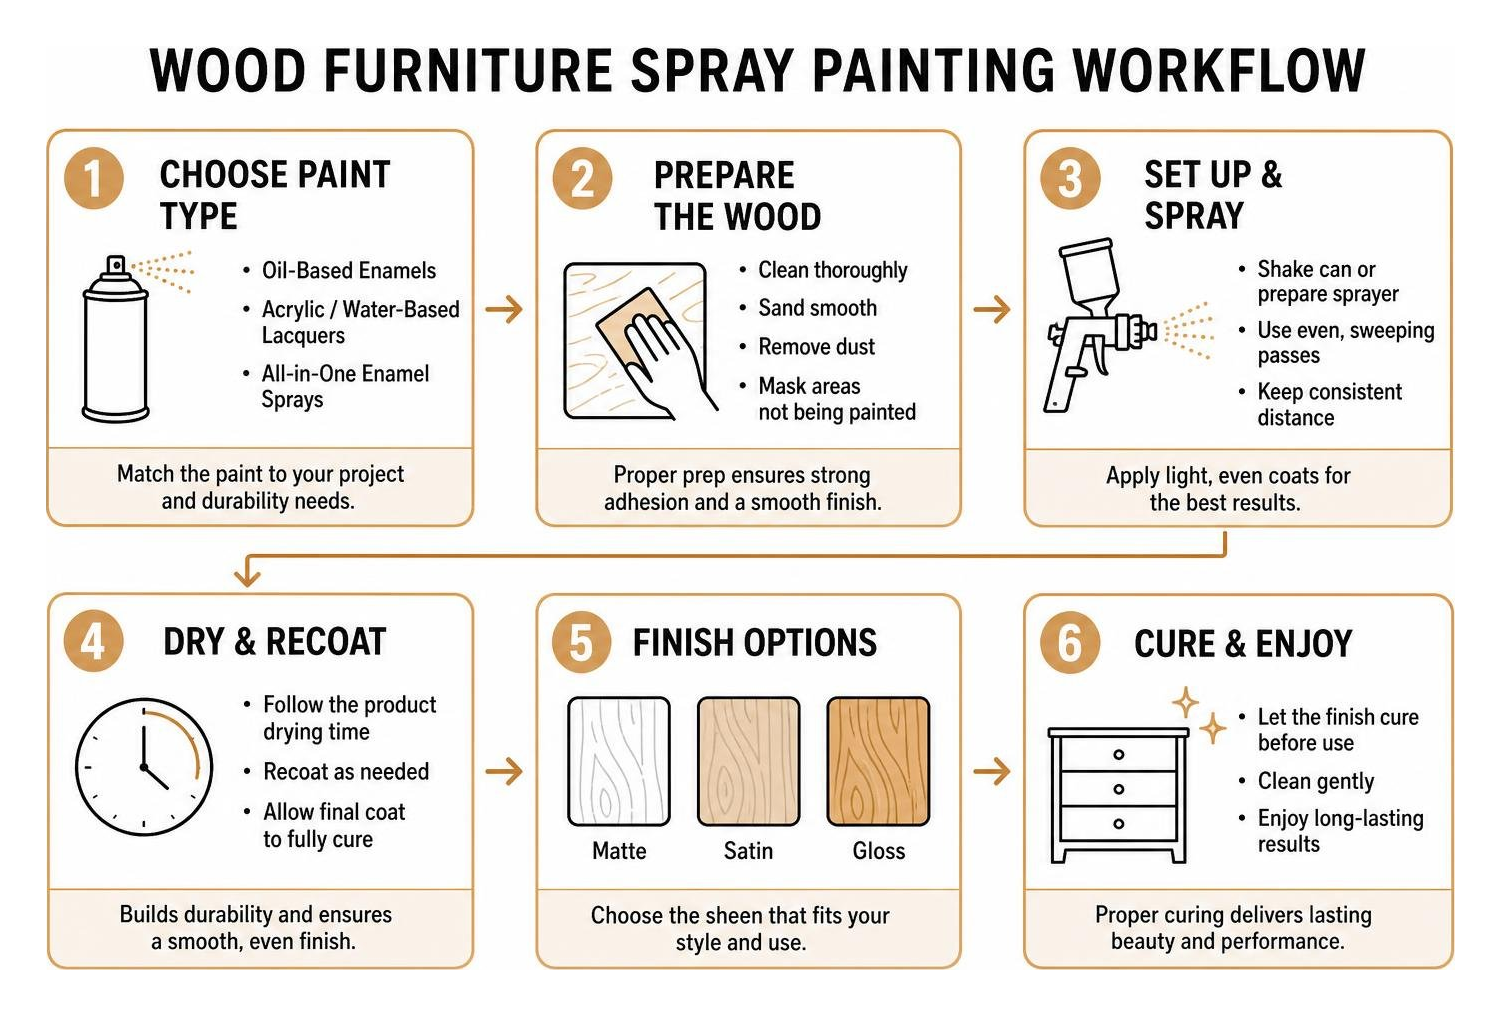
- Oil-Based Enamels: Known for rock-hard durability, exceptional leveling, and rich depth of color. They bond tenaciously to wood fibers and resist mechanical abrasion, making them ideal for high-contact furniture, shelving, and architectural details.
- Acrylic and Water-Based Lacquers: Fast-drying formulations that resist yellowing over time. These low-odor options provide quick turnaround times between coats and offer simple cleanup while maintaining UV stability.
- All-in-One Enamel Sprays: Advanced formulas such as BEHR PREMIUM® Spray Paint incorporate primer chemistry directly into the can, offering 10 to 15 square feet of coverage per aerosol can while resisting rust and corrosion on mixed-material wooden decor.
| Spray System / Paint Type | Primary Chemistry | Ideal Wood Projects | Key Advantages | Typical Drying Time (To Touch) |
|---|---|---|---|---|
| Aerosol Enamels | Alkyd / Solvent-Based | Chairs, end tables, indoor trim, craft builds | Excellent self-leveling, durable film, rich gloss | 15–30 minutes |
| Chalk-Style Sprays | Acrylic / Ultra-Matte | Vintage dressers, accent decor, sideboards | Ultra-flat look, fast build, easy distressing | 15 minutes |
| HVLP Fine Finishing Sprayers | Waterborne Enamels & Lacquers | Built-in cabinets, large tables, interior doors | High transfer efficiency, zero brush marks, large volume | 30–60 minutes |
Best Spray Paint for Wood Furniture and Cabinets
Refinishing heirloom wood furniture and interior cabinetry requires products that dry to a durable, washable surface. For decorative dressers, credenzas, and nightstands, specialized matte sprays like KILZ® Chalk Spray Paint offer an ultra-flat vintage aesthetic with roughly 12 square feet of coverage per can. Many modern cans include specialized comfort spray tips designed to fight hand and finger fatigue during larger projects.
For built-in cabinets, vanities, and extensive kitchen millwork, aerosol cans are great for touch-ups, while large-scale transformations benefit from dedicated spray setups. When updating high-touch kitchen surfaces, our team utilizes high-volume, low-pressure setups during professional cabinet spraying to deliver a factory-grade finish that withstands grease, steam, and everyday handling.
Best Outdoor Spray Paint for Wood Projects
Exterior wooden surfaces—such as patio armchairs, planter boxes, decorative lattice, and exterior wooden gates—face direct sunlight, thermal expansion, moisture, and seasonal freeze-thaw cycles.
To ensure long-lasting outdoor protection:
- Choose Exterior-Rated Enamels: Look for products with built-in UV blockers and rust/corrosion inhibitors to prevent fading and protect exposed metal fasteners.
- Utilize Dedicated Spray Units for Large Areas: When coating extensive outdoor projects like patio furniture sets or wooden fences, an HVLP unit like the Wood&Metal Sprayer W 250 18V allows you to apply low-viscosity exterior finishes and wood preservatives evenly without cumbersome cords.
- Seal Exposed End Grain: Outdoor wood absorbs moisture rapidly through end grain cuts. Spray extra primer passes over bottom legs and cut edges before applying topcoats.
Selecting Sheens: Matte, Satin, and Gloss Finishes
The sheen you choose influences not only the visual character of the wood piece but also its cleanability and surface resilience.
- Flat / Ultra-Matte: Absorbs light completely, diffusing minor wood grain flaws, scratches, and dents. Perfect for antique furniture, decorative picture frames, and rustic display pieces. Matte surfaces hold dust more readily and should be sealed with a protective clear coat if placed in high-use areas.
- Satin: A gentle, velvety luster that provides the ideal balance between hiding imperfections and offering scrubbability. Satin is the most popular sheen for dressers, coffee tables, dining chairs, and baseboards.
- Semi-Gloss & High Gloss: Reflective finishes that highlight fine woodwork details, turned legs, and carved moldings. Gloss coatings provide a non-porous surface that repels moisture and cleans easily with a damp cloth, making them excellent for children’s furniture and exterior railings.
Step-by-Step Guide to Spray Painting Wood Surfaces
Achieving a mirror-smooth finish without runs or orange peel requires patience and disciplined application technique. Whether you are refreshing a small nightstand or learning how to spray paint interior doors, following a structured sequence guarantees professional results.
Surface Preparation: Cleaning, Sanding, and Priming
Proper prep work is the foundation of any long-lasting paint finish:
- Disassembly and Hardware Removal: Remove all metal pulls, hinges, knobs, and glass inserts. Label screws and hardware in sealed bags to make reassembly effortless.
- Degrease the Surface: Clean the wood thoroughly using a specialized surface cleaner or degreaser like Krud Kutter to lift away natural skin oils, food residue, furniture polish, and wax. Rinse with a lightly dampened cloth and allow the wood to dry fully.
- Scuff Sanding: Lightly sand the entire piece using 220-grit sandpaper. The goal is not to remove all underlying stain or old paint, but to etch the surface (creating microscopic “teeth”) so the new coating can adhere firmly. Always sand in the direction of the wood grain.
- Dust Elimination: Vacuum loose particles using a soft brush attachment, then wipe the entire profile with a clean microfiber or tack cloth. Any remaining dust will create bumps under aerosol atomization.
- Apply a Dedicated Primer: Spray a stain-blocking bonding primer over raw wood, dark stains, or exposed knots. Primers prevent tannins from migrating into the topcoat and create a uniform base for vibrant color reproduction.
Proper Spraying Techniques for Smooth Coverage
Mastering can handling keeps the paint film level and prevents puddles:
- Shake Thoroughly: Shake the can vigorously for a full minute after the internal mixing ball begins to rattle. This disperses dense pigments and leveling agents evenly.
- Maintain Working Distance: Hold the aerosol tip approximately 10 to 12 inches away from the wood surface. Holding the can too close creates runs, while spraying too far away causes the atomized paint to dry in mid-air, landing as a rough, gritty dust.
- Keep the Can Moving: Never press the nozzle while holding the can stationary over the wood. Start your spray stroke slightly off the edge of the piece, sweep smoothly across the surface at a steady pace, and release the button only after passing the opposite edge.
- Overlap Each Pass: Maintain a consistent 50% overlap on each successive horizontal pass to ensure uniform film thickness without striping.
- Spray Multiple Thin Coats: Always apply two to three light coats rather than a single heavy coat. Light coats dry quickly and level out smoothly.
Drying Times, Recoat Windows, and Protective Clear Topcoats
Pay close attention to the recoat schedule listed on your product label. Most modern aerosol enamels dry to the touch within 15 to 30 minutes at 70°F (21°C) and 50% relative humidity.
- The Recoat Window: Most spray enamels require you to apply additional coats either within 1 hour of the first coat or after 24 to 48 hours. Applying a second coat during the middle curing stage (between 2 and 20 hours) can cause the base layer to wrinkle or lift as the solvents reactivate.
- Protective Clear Coats: For surfaces subject to heavy wear—such as dining table tops, desk surfaces, and coffee tables—apply two coats of a non-yellowing acrylic or polyurethane clear topcoat in your chosen sheen to guard against water rings, scratches, and daily impact.
Common Mistakes and Workshop Safety
Even experienced DIYers occasionally encounter paint run-offs or spray texture flaws. Understanding how to avoid and correct these issues ensures your wooden pieces turn out beautifully, while our guide to professional furniture spray painting provides deeper insights into workshop craftsmanship.
Fixing Drips, Orange Peel, and Color Bleed-Through
- Runs and Sags: If paint begins to run, resist the urge to wipe it with a rag while wet, as this smears the coating and damages the base. Allow the run to cure completely for 24 hours. Once solid, use a sanding block wrapped in 320-grit wet/dry sandpaper to level the drip flush with the surrounding surface, wipe away residue, and spray a light blending pass.
- Orange Peel Texture: A bumpy surface texture usually indicates that the paint was applied in conditions that were too hot, causing the atomized droplets to dry before leveling out. Lightly wet-sand the cured surface with 400-grit sandpaper, adjust your spray distance slightly closer (around 10 inches), and apply a fresh, wet coat in cooler temperatures.
- Tannin and Stain Bleed-Through: Red wood species (like cedar, cherry, and mahogany) and old oil-based wood stains can leach dark yellow or brownish oils through water-based topcoats. If discoloration appears, stop painting. Seal the area with a coat of oil-based or shellac-based stain-blocking primer, allow it to dry, and then resume topcoat application.
Essential Safety Equipment and Proper Ventilation
Aerosol mists contain volatile organic compounds (VOCs) and airborne solvents such as acetone and xylene that require proper safety precautions:
- Respiratory Protection: Always wear a NIOSH-approved half-face respirator fitted with organic vapor cartridges and particulate pre-filters (such as an N95 or P100 rating). Simple paper dust masks do not filter out chemical solvent vapors.
- Eye and Skin Protection: Wear snug-fitting safety goggles to shield your eyes from drifting overspray, along with nitrile gloves to keep solvents off your hands.
- Workspace Airflow: Work outdoors on calm, low-humidity days, or spray inside a dedicated workshop equipped with cross-ventilation fans exhausting fumes outside. Avoid spraying in direct sunlight or temperatures outside the 50°F to 90°F range.
- Fire Safety: Solvent vapors are flammable. Extinguish open flames, avoid operating tools that produce sparks, and never smoke near active spray zones.
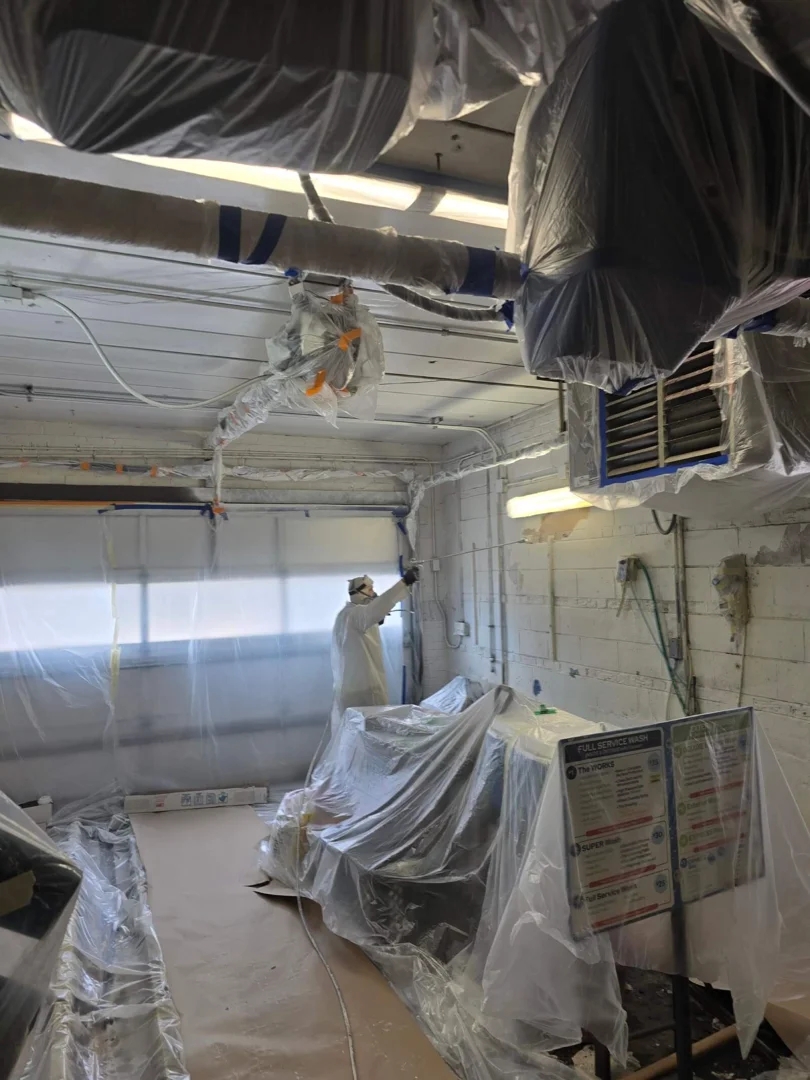
- Overspray Management: Aerosol paint mist travels surprisingly far on subtle air currents. Line floors and surrounding walls generously with heavy canvas drop cloths or poly sheeting, masking off unpainted zones with high-quality painter’s tape.
Frequently Asked Questions About Spraying Wood
Can You Spray Paint Stained Wood Without Sanding?
While you can technically apply paint directly over stained wood using specialized high-adhesion chalk sprays or shellac-based bonding primers, skipping sanding is generally not recommended for high-contact surfaces.
Old stains, clear polyurethanes, and furniture waxes prevent spray paints from forming a strong mechanical bond. Performing a quick 5-minute scuff sand with 220-grit paper breaks the surface tension and ensures the new paint film won’t peel, scratch, or chip off when exposed to daily use. If working with intricate antique carvings where sanding is impossible, wash the piece with a chemical de-glosser (liquid sandpaper) before applying a dedicated bonding primer.
How Many Coats of Spray Paint Are Needed for Wood?
Two to three thin, even coats are typically necessary to achieve complete color opacity, uniform sheen, and dependable film strength.
Applying one heavy coat to try and save time inevitably leads to runs, bubbling, and extended dry times where airborne dust can settle into the wet paint. Spraying two or three light coats allows the solvents to flash off quickly, producing a factory-smooth surface free of drips. Porous bare wood species like pine or poplar may require a dedicated primer coat followed by two full topcoats for seamless color coverage.
What Is the Difference Between Spray Paint and Regular Paint for Wood?
The primary differences lie in viscosity, delivery method, and drying time:
- Application Uniformity: Aerosol spray paint and HVLP systems atomize liquid paint into micro-fine droplets, eliminating brush marks, roller stipple, and lap lines.
- Drying Speed: Aerosol paints use fast-evaporating solvent carriers, allowing them to dry to the touch in 15 to 30 minutes, whereas standard brush-on latex or oil paints often require 2 to 6 hours to dry between coats.
- Film Thickness: Brush-applied paints deposit a thicker single layer of material per pass, whereas spray paint deposits a much thinner, more controlled film that highlights natural wood grain details without filling them in.
Conclusion
Transforming tired wooden furniture, custom built-ins, and architectural trim with spray paint is one of the most effective ways to refresh your interior and exterior spaces. By selecting the correct paint chemistry, investing time into thorough surface preparation, and using steady, overlapping passes from 12 inches away, you can achieve a smooth, durable finish that revitalizes your home.
When your project demands larger-scale refinishing, fine architectural spraying, or whole-home updates, partner with the local experts. At T&Z Interior And Exterior Painting, we bring over 15 years of dedicated experience to every project. We are fully licensed and insured, hold an outstanding 5.0 Google Reviews rating, and take immense pride in delivering meticulous craftsmanship across Lombard, Itasca, Addison, Glen Ellyn, Oak Brook, and the surrounding communities.
Explore our professional spray painting services today to discuss your next residential or commercial wood finishing project.