
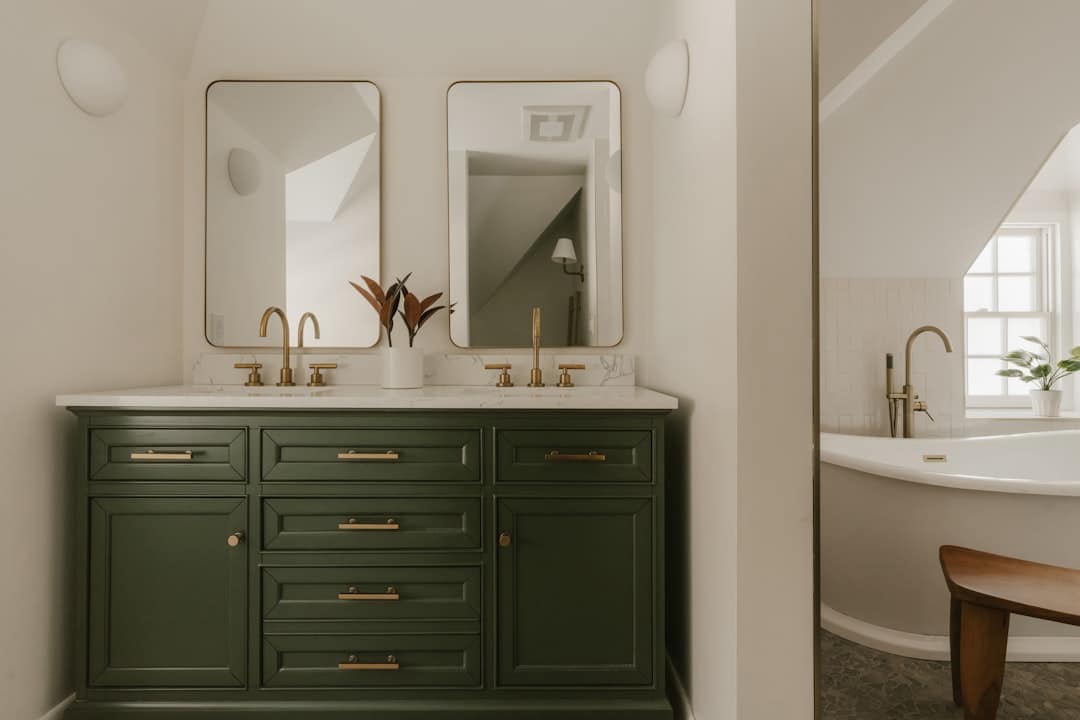
Why Repainting Your Bathroom Vanity Is One of the Smartest Home Updates You Can Make
Want to repaint bathroom vanity cabinets and transform your bathroom without replacing anything? Here’s the quick answer:
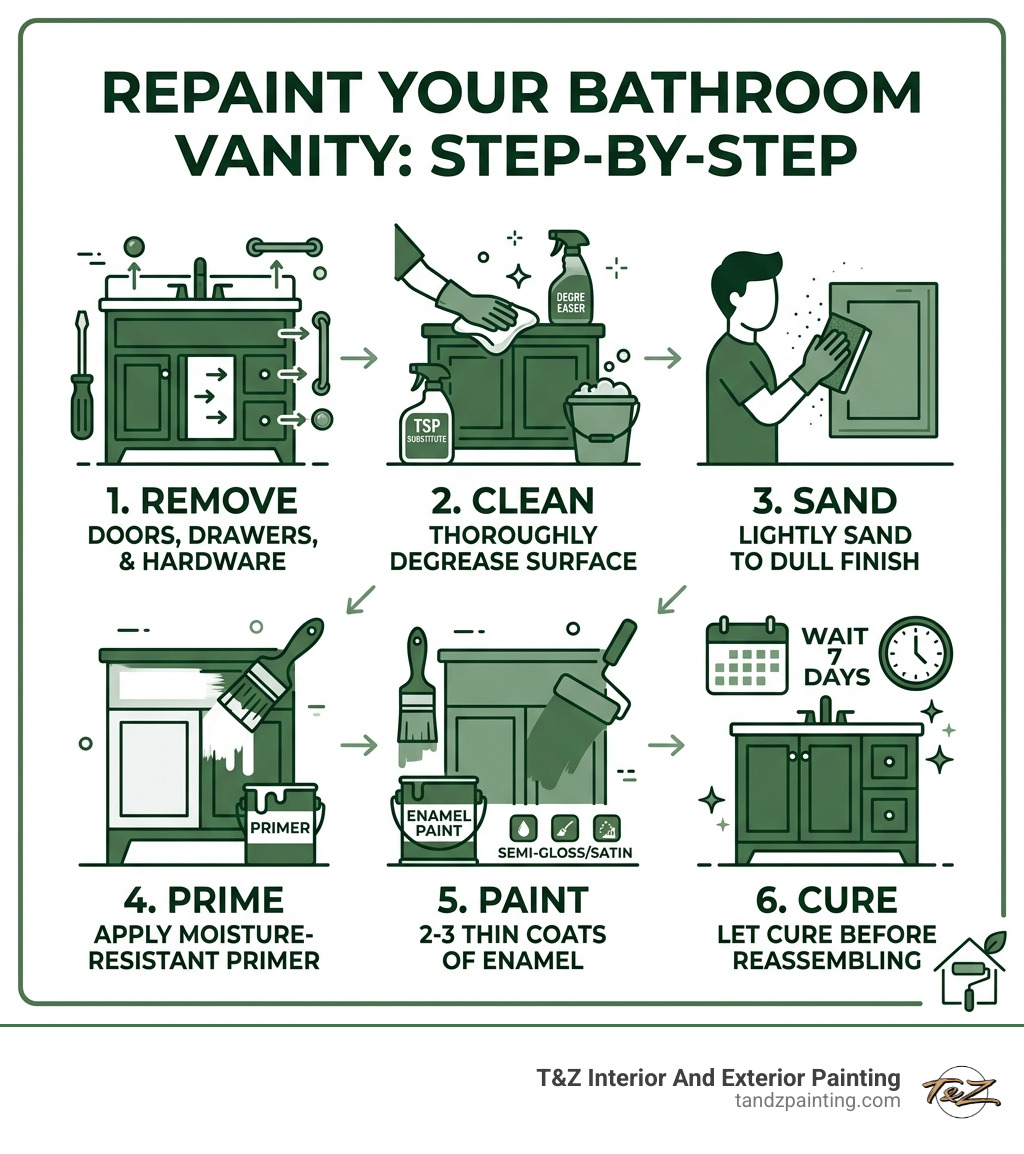
- Remove all hardware, doors, and drawers
- Clean the surface thoroughly with a degreaser like TSP
- Sand to dull the finish for better adhesion
- Prime with a moisture-resistant, high-adhesion primer
- Paint with 2-3 thin coats of alkyd or urethane enamel in semi-gloss or satin
- Cure for at least 7 days before reinstalling hardware
A bathroom vanity replacement can cost anywhere from $300 to $3,800. A fresh coat of paint? A fraction of that — and you can complete the project in a single day.
Your vanity takes a beating. Daily humidity, splashing water, and years of use leave even a well-built cabinet looking tired and dated. But if the structure is solid, there’s no reason to replace it. Repainting gives you a clean, updated look — without the disruption of a full renovation.
This guide walks you through every step, from choosing the right paint for a moisture-prone bathroom to getting a smooth, professional finish that holds up for years.
I’m Tomasz Niemotko, owner of T&Z Interior And Exterior Painting, with over 15 years of hands-on experience helping homeowners in Lombard and the surrounding suburbs repaint bathroom vanity cabinets and other surfaces to a durable, professional standard. Let’s get into exactly how it’s done.
Repaint bathroom vanity vocab to learn:
Essential Tools and Materials to Repaint Bathroom Vanity
Before we dip a single brush into a can of paint, we need to gather the right arsenal. As we move into April 2026, the technology for cabinet coatings has never been better, but the results are only as good as the tools you use.

To achieve a factory-smooth finish, we recommend the following supplies:
- Sanding Blocks and Sandpaper: You’ll want a variety of grits, typically 120-grit for initial scuffing and 220-grit for smoothing between coats.
- TSP (Trisodium Phosphate) or a Heavy-Duty Degreaser: Bathrooms are hotspots for hairspray, lotions, and soap scum. You must strip these away, or your paint will peel.
- Painter’s Tape and Drop Cloths: To protect your floors and the edges of your tub or tile.
- Angled Brushes and Foam Rollers: Use a high-quality 2-inch angled sash brush for details and a high-density foam roller for the flat panels.
- Tack Cloth: Essential for removing every last speck of dust after sanding.
For a deeper dive into professional-grade materials, check out our Cabinet Painting Complete Guide.
Required Safety Gear
Safety is never optional. When you repaint bathroom vanity cabinets, you are working in a confined space with chemicals that can be irritating.
- Ventilation: Open windows and use a box fan to pull air out of the room.
- Respirators: If you are using oil-based primers or alkyd paints, a N95 mask isn’t enough; you need a respirator rated for organic vapors.
- Gloves and Eye Protection: Protect your skin from harsh degreasers and your eyes from paint splatters.
For more on safety protocols, How to Paint a Bathroom Vanity offers excellent tips for DIYers.
Hardware Management
One of the most common “rookie” mistakes is painting around hinges and knobs. Don’t do it! It looks messy and leads to stuck drawers.

We always suggest removing all doors, drawer fronts, and hardware. Use painter’s tape to label each piece (e.g., “Left Sink Door”) and place the screws and hinges in labeled plastic bags. If you’re planning to update your look, April 2026 trends suggest matte black or champagne gold hardware as the perfect “jewelry” for your newly painted vanity.
Surface Preparation: The Foundation of Professional Results
If you ask any of our team members at T&Z Interior And Exterior Painting what the most important step is, they will say “prep” before you can even finish the question. In a humid environment like a bathroom in Wheaton or Elmhurst, prep is the difference between a finish that lasts ten years and one that chips in ten days.
First, clear everything off the vanity and scrub it down. We use a TSP solution to ensure no oils remain. Once dry, inspect the wood. If there are deep scratches or old hardware holes you want to move, fill them with a high-quality wood filler. For a detailed breakdown of restoration, see How to Restore Your Bathroom Vanity With 7 Refinishing Steps.
Sanding Techniques for Adhesion
You don’t need to sand down to bare wood, but you do need to “scuff” the surface. The goal is to turn a glossy finish into a dull one so the primer has something to “bite” into.
- Start with 120-grit: Sand in the direction of the wood grain.
- Vacuum and Wipe: Use a shop vac to get the bulk of the dust, then follow up with a tack cloth.
- Intermediate Sanding: Between your primer and paint coats, a light pass with 220-grit sandpaper will remove any tiny bubbles or dust nibs, ensuring a silky-smooth feel.
Learn more about our professional Cabinet Painting process and how we handle these details.
Handling Different Materials
Not all vanities are solid wood. Many modern units are made of laminate, thermofoil, or melamine. Each requires a slightly different approach to ensure the paint sticks.
| Material | Prep Strategy | Recommended Primer |
|---|---|---|
| Solid Wood | Sand with the grain; fill holes | Shellac or Oil-based |
| Laminate | Light scuffing (do not over-sand) | High-adhesion Bonding Primer |
| Thermofoil | Check for peeling; glue down edges | Stix or similar Bonding Primer |
| Melamine | Thorough degreasing is vital | Specialty Plastic/Melamine Primer |
Selecting the Right Paint and Primer for Moisture Resistance
In a bathroom, the “all-in-one” paint and primer products you see at the big-box stores usually won’t cut it. You need a dedicated primer that acts as a bridge between the old surface and the new paint.
We highly recommend shellac-based primers (like Zinsser BIN) or high-quality oil-based primers for wood. They block tannins from bleeding through and provide the best moisture barrier. To understand why the base layer is so critical, read Everything You Need to Know About Kitchen Cabinet Primers.
Best Paint Sheens to Repaint Bathroom Vanity
When you repaint bathroom vanity surfaces, the sheen isn’t just about looks—it’s about survival.
- Semi-Gloss: This is the “gold standard.” It offers a beautiful glow and is incredibly easy to wipe down. It resists the moisture and steam from your morning shower better than flatter finishes.
- High-Gloss: Very durable and modern, but be warned: it highlights every single imperfection in your sanding.
- Satin: A good choice for a more “furniture-like” look, but ensure you use a high-quality enamel version for washability.
Discover Why Semi-Gloss Paint is the Secret Sauce for Your Kitchen Cabinets and why it’s equally effective in the bath.
Primer and Paint Types
For the topcoat, we suggest Waterborne Alkyd Enamel or Urethane Enamel. These paints behave like old-school oil paints—they level out beautifully to hide brush marks and dry to a rock-hard finish—but they clean up with water and don’t have the same harsh smell. This is what we use for our clients in Plainfield and La Grange who want a “factory” look.
Step-by-Step Guide to Painting Your Vanity
Now for the fun part! Once your prep is done and your materials are ready, it’s time to apply the color.
- Prime First: Apply one thin, even coat of primer. Let it dry completely (usually 1-2 hours for shellac, longer for oil).
- The First Coat: Start with your brush in the recessed areas and corners. Then, follow up with your foam roller on the flat surfaces to smooth out any brush marks.
- Sand Lightly: Once the first coat is dry, very lightly sand with 220-grit. Wipe with a tack cloth.
- The Second Coat: Repeat the process. Most vanities require two coats, but if you’re going from a dark wood to a light white, a third may be necessary.
For those on a tight schedule, our Quick Dry Cabinet Refinishing Experts for Your Fast-Paced Life can help you get back to using your bathroom sooner.
Application Methods
- Brushing: Great for control, but requires a high-quality synthetic brush to avoid streaks.
- Rolling: Faster and provides a consistent “orange peel” or smooth texture depending on the roller nap.
- Spraying: This is how we achieve a flawless, factory-smooth finish at T&Z. It requires more masking and specialized equipment, but the results are unmatched.
How Long Does it Take to Repaint Bathroom Vanity?
While the “active” work time might only be 4 to 6 hours, the “waiting” time is much longer.
- Day 1: Prep, cleaning, and priming.
- Day 2: First and second coats of paint.
- Wait 24-48 Hours: Before very light use.
- Wait 7 Days: Before scrubbing the surface or reinstalling hardware.
- Full Cure: Most modern enamels take 21 to 30 days to reach maximum hardness.
Frequently Asked Questions
Can I paint my vanity countertop and sink?
Yes, but you can’t use the same paint you used on the cabinets. You’ll need a specialized epoxy or marine enamel kit. These products are designed to withstand standing water and the abrasive nature of bathroom cleaners. While a painted countertop can look great and last several years, it requires much more meticulous prep than the cabinets themselves.
What are common mistakes to avoid?
The biggest mistake is rushing the “cure” time. If you put your doors back on too early, they may stick to the frame and peel the paint right off when you open them. Another common error is applying paint too thickly. Multiple thin coats are always more durable and look better than one thick, gloppy coat.
How do I maintain a painted vanity?
Treat your newly painted vanity like fine furniture. Avoid harsh abrasive cleaners or scouring pads. A soft microfiber cloth and a drop of mild dish soap are all you need. Also, make sure to wipe up standing water immediately—don’t let a wet washcloth sit on the painted edge of a drawer.
Conclusion
When you repaint bathroom vanity cabinets, you aren’t just changing a color; you’re reviving a room. Whether you’re in Lombard, Carol Stream, or Chicago, a professional-looking vanity can significantly boost your home’s aesthetic and even its resale value.
At T&Z Interior And Exterior Painting, we take pride in delivering that “stunning result” every time. We know the local climate challenges in the Western Suburbs and use only the best materials to ensure your bathroom stands up to the test of time. If you’re ready to transform your space but want the peace of mind that comes with 15+ years of expert craftsmanship, we’re here to help.