
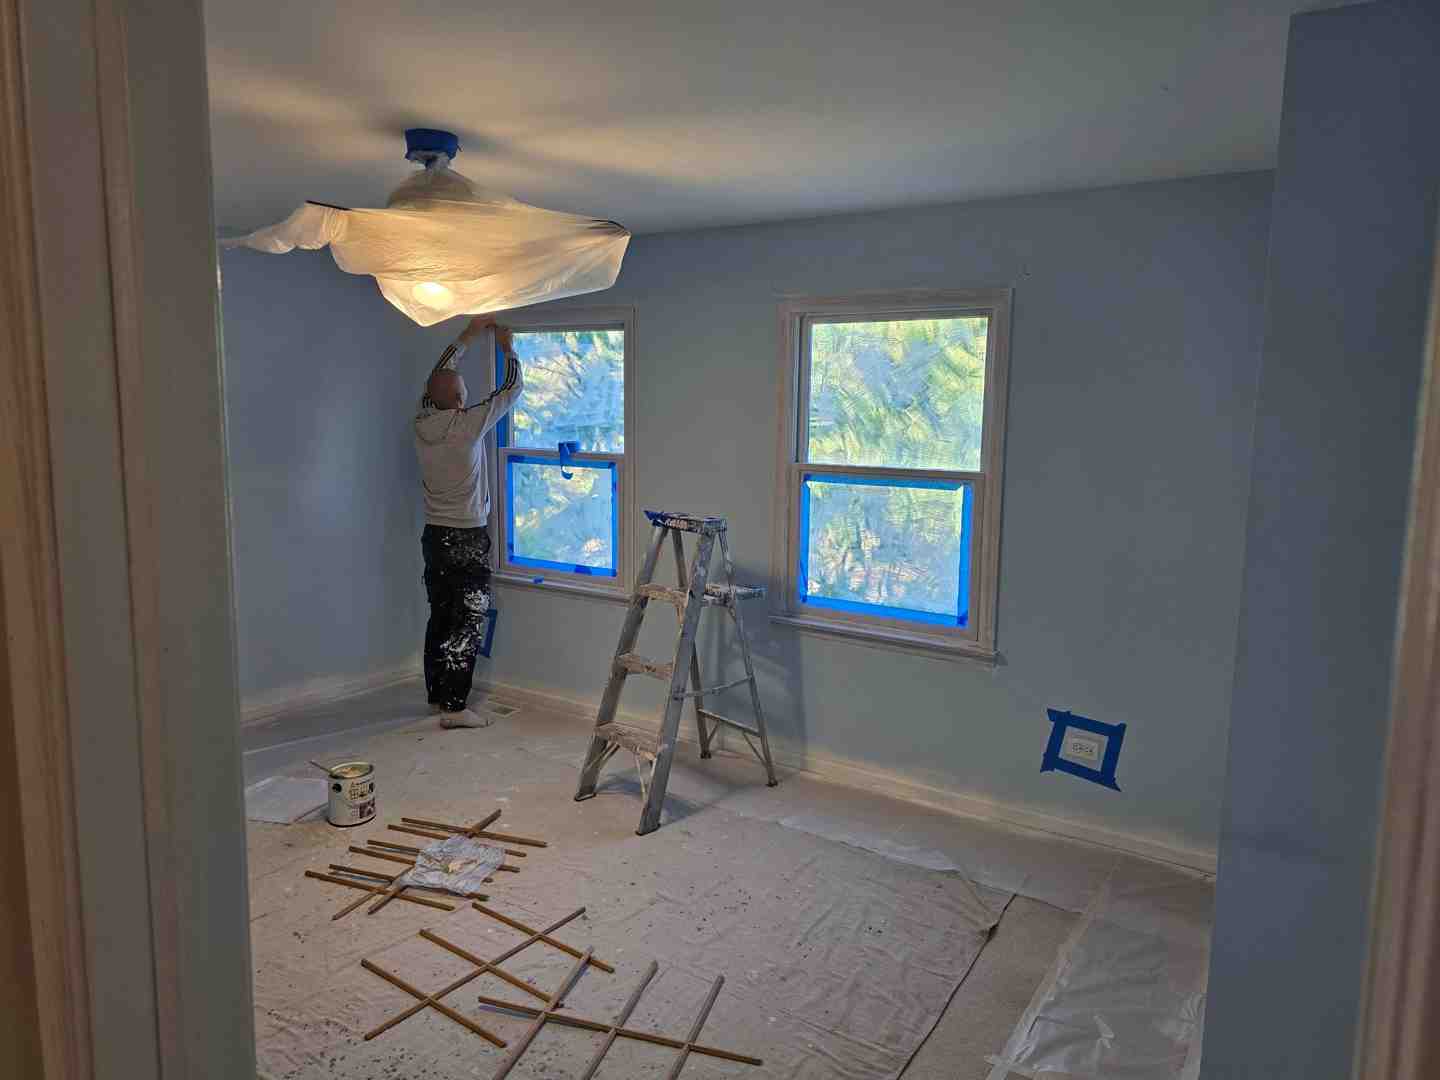
How to Spray Paint Interior Walls for a Smooth Finish
To spray paint interior walls the right way, clean and repair the walls first, protect every surface you do not want painted, then use steady, overlapping passes with the sprayer held square to the wall. Test the spray pattern on cardboard, work from the top down, and overlap each pass by about 50% to avoid thin spots, lines, and drips.
Spraying can coat a room far faster than brushing and rolling, but the prep work is just as important as the spraying itself. Fine paint mist can travel beyond the wall, so floors, trim, windows, furniture, vents, and doorways need careful paper, plastic, and tape protection. For large, empty rooms or whole-home projects, an airless sprayer is often the practical choice; an HVLP sprayer offers more control for trim and smaller details.
I am Tomasz Niemotko of T&Z Interior And Exterior Painting, a licensed and insured painting company serving Lombard, Itasca, Addison, Glen Ellyn, Oak Brook, and surrounding towns with 15+ years of experience and a 5.0 Google Reviews rating. We spray paint interior walls with close attention to masking, clean work areas, and durable, even finishes.
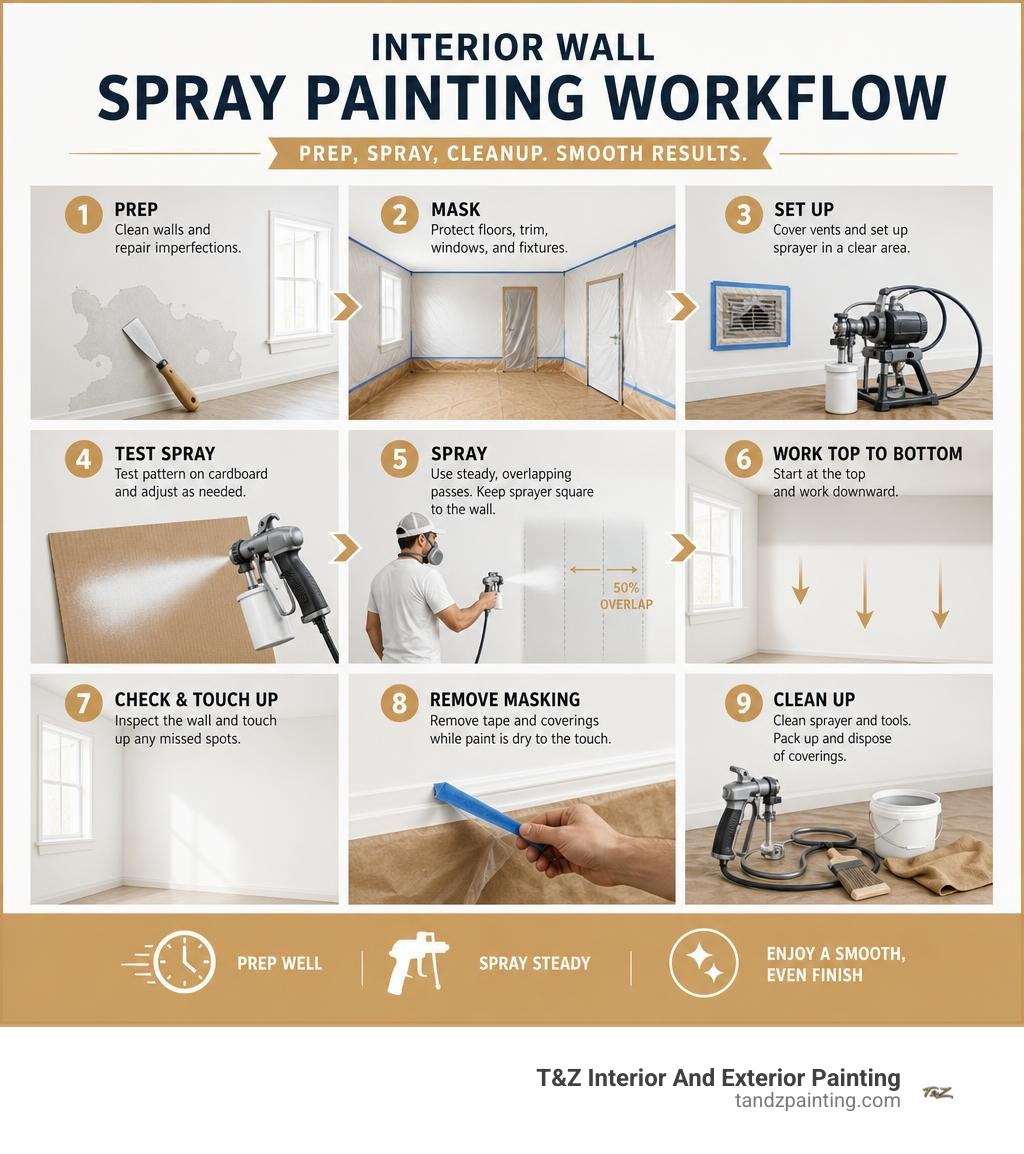
Spray paint interior walls terms made easy:
Pros and Cons of Spraying vs. Traditional Rolling
Transforming a home with a fresh layer of color can revitalize living spaces, improve property value, and create a welcoming ambiance. When planning a residential refresh, selecting the proper application method between spraying and rolling determines the timeline, texture, and overall finish quality.
Spraying atomizes liquid paint under high pressure, projecting a uniform cloud of microscopic droplets that coalesce into a flawless, mirror-flat film without the brush marks, stipple texture, or roller rope marks often left by traditional tools. Because atomization deposits paint quickly across large planes, it eliminates the need to manually cut in edges with a handheld sash brush. For high-end homes featuring expansive drywall surfaces or textured architecture, professional wall painting using spray systems provides exceptional uniformity across broad sightlines.
However, mechanical spraying requires significantly more prep work than picking up a standard roller. Atomized paint particles produce an airborne mist and fine paint dust that settle on exposed floors, fixtures, and furniture unless the space is completely sealed. While traditional rolling involves dipping a roller cover into a tray and applying paint directly to drywall with minimal containment, sprayers demand extensive masking and strict equipment maintenance.
When to Spray Paint Interior Walls vs. Using a Roller
Determining whether to spray or roll depends entirely on the condition of the room, the scope of the project, and the presence of furnishings:
- Vacant Homes & Major Renovations: Spraying is ideal when a property is completely empty, before new flooring is installed, or during a whole-home remodel. High-pressure spray equipment coats bare drywall, ceilings, and closets in record time.
- Textured Drywall & Ceiling Surfaces: Spray application effortlessly penetrates deep recesses on knock-down, orange peel, or popcorn surfaces where standard roller naps might pull away delicate textures or leave voids.
- Monochromatic Color Schemes: When ceilings and walls receive the same neutral hue and finish, spraying delivers unbeatable speed because no masking is required between intersecting planes.
- Occupied Single-Room Projects: In fully furnished homes or isolated single-room updates where furniture cannot be removed, traditional rolling is often cleaner and requires significantly less plastic partitioning.
Time Savings and Paint Consumption Realities
The application speed of an airless sprayer is unmatched. Once masking is complete, a skilled operator can spray a full coat across an entire residential bedroom in approximately 5 to 10 minutes. By comparison, traditional cutting-in and rolling can easily take an hour or more per coat for the same space. As highlighted in practical field guides such as Whole-House Interior Painting Tips, property managers and renovators can repaint the interior of entire vacant houses in as little as 6 to 8 hours.
Material efficiency, however, presents a distinct trade-off. Spraying interior walls generally uses about 20% to 25% more paint than brush-and-roller application due to overspray and atomization losses in the air. Yet on large whole-home transformations involving smooth drywall, continuous fluid delivery from bulk containers avoids the heavy paint absorption lost inside thick roller covers and paint trays, creating a balanced, high-yield application across multiple rooms.
Choosing the Right Equipment and Materials
Selecting the proper spray equipment ensures smooth fluid atomization and prevents common application errors like runs, sags, or uneven banding. Pairing reliable machinery with high quality paints provides consistent wet film thickness, excellent coverage, and long-lasting durability for active family households.

Essential Equipment to Spray Paint Interior Walls Efficiently
To achieve a clean, professional finish across interior walls, assemble the following tools and protective supplies:
- Airless Paint Sprayer: A dedicated stand or cart-mounted electric pump operating between 1,500 and 3,000 PSI to handle unthinned latex and acrylic wall paints.
- Reversible Spray Tips: High-efficiency tips sized between 0.015″ and 0.019″ (such as a 415 or 517 tip) paired with a 60-mesh gun filter to eliminate clogging.
- 50-Foot Airless Fluid Hose: Provides full mobility between rooms without moving the primary paint bucket or pump station.
- Tip Extension Wand: A 12- to 24-inch wand attachment that allows comfortable spraying of high ceiling junctions and lower baseboards without bending or overreaching.
- Heavyweight Kraft Flooring Paper & 3.5 Mil Plastic Sheeting: Durable floor runners and tear-resistant plastic to shield non-painted areas against pressurized paint mist.
Airless vs. HVLP Sprayers for Indoor Drywall
Airless and HVLP (High Volume Low Pressure) systems serve distinct roles in residential interior painting. Understanding their mechanical differences helps ensure the right tool is used for each surface.
| Feature | Airless Paint Sprayer | HVLP Turbine Sprayer |
|---|---|---|
| Operating Pressure | 1,500 to 3,000 PSI | 4 to 10 PSI (High Airflow) |
| Primary Use | Broad interior drywall, ceilings, large rooms | Fine trim, doors, millwork, cabinets |
| Paint Viscosity | Sprays unthinned latex and acrylics easily | Often requires thinning for thick latex |
| Transfer Efficiency | High speed, moderate overspray | Pinpoint accuracy, low overspray |
| Material Supply | Direct siphon from 1- or 5-gallon pails | Onboard cup reservoir (1 to 1.5 quarts) |

Airless sprayers deliver high fluid volume directly from original containers, making them the standard for expansive drywall walls. HVLP sprayers deliver exceptional atomization and fine control at low pressure, making them the ideal choice for casing, crown molding, baseboards, and interior passage doors.
Room Preparation, Masking, and Safety Protocols
Thorough preparation is the most critical phase of any interior spray project. Knowing how to prepare a house for painting guarantees crisp, straight borders and prevents atomized paint particles from drifting into adjoining rooms or HVAC systems.
Surface Cleaning, Patching, and Dust Removal
Paint requires a clean, stable surface to establish a strong bond. Follow this preparation sequence before setting up spray machinery:
- Wash Surfaces: Wipe down walls using a non-soapy detergent or a Trisodium Phosphate (TSP) substitute mixed with warm water using a flat microfiber mop on an extension pole to clear dust, kitchen grease, and fingerprints.
- Repair Drywall: Recess protruding nail heads with a screwdriver, fill drywall holes and gouges with high-grade spackling putty, and feather edges smooth.
- Circular Sanding: Once the patching compound dries, sand repairs flush using 120- to 150-grit sandpaper in gentle circular motions.
- Dust Elimination: Thoroughly vacuum all drywall dust from floors, corners, and baseboards with a HEPA-filtered vacuum. High-velocity air from a paint sprayer will blow loose drywall dust into wet paint if left behind.
Following technical spray specifications for KILZ TRIBUTE eggshell or matte formulas ensures a clean, sound drywall substrate that allows paint to achieve its full coverage rating of 250 to 400 square feet per gallon at 4.0 to 8.0 mils wet film thickness.
Comprehensive Masking for Floors, Ceilings, and Trim
Because pressurized airless sprayers project paint at high velocity, careful masking is necessary to safeguard non-painted surfaces:
- Flooring Protection: Roll heavy kraft flooring paper or red rosin paper along room perimeters. Fasten edges securely with 2-inch standard painter’s tape, then overlap with canvas drop cloths across open floor centers. Paper resists paint bleed-through better and is less slippery than plastic.
- Ceiling Borders: When spraying walls a different color than the ceiling, run a crisp baseline of painter’s tape along the ceiling junction. Taping approximately 1/8 inch onto the ceiling hides previous uneven cuts. Secure 8-foot plastic drop cloths beneath the tape line to shield overhead surfaces against rising overspray.
- Trim, Windows, and Fixtures: Seal window assemblies and door openings with 3.5 mil plastic. Cover light fixtures, cover plates, and return grilles completely with protective plastic or heavy paper, wrapping all edges tightly with tape.
- Door Removal: Pop door hinge pins to remove interior passage doors. Spraying doors horizontally or upright in a designated staging area yields a smoother finish than trying to cut and mask around hinges inside the room.
- Containment Barriers: Build temporary plastic partition walls across hallways and open entryways, taping or lightly stapling plastic sheeting to isolate working zones and stop airborne paint dust from migrating.
Ventilation and Personal Protective Equipment
Indoor spray painting demands proper respiratory safety and active airflow management. Standard cloth or paper dust masks do not provide adequate protection against atomized paint mists and organic chemical vapors.
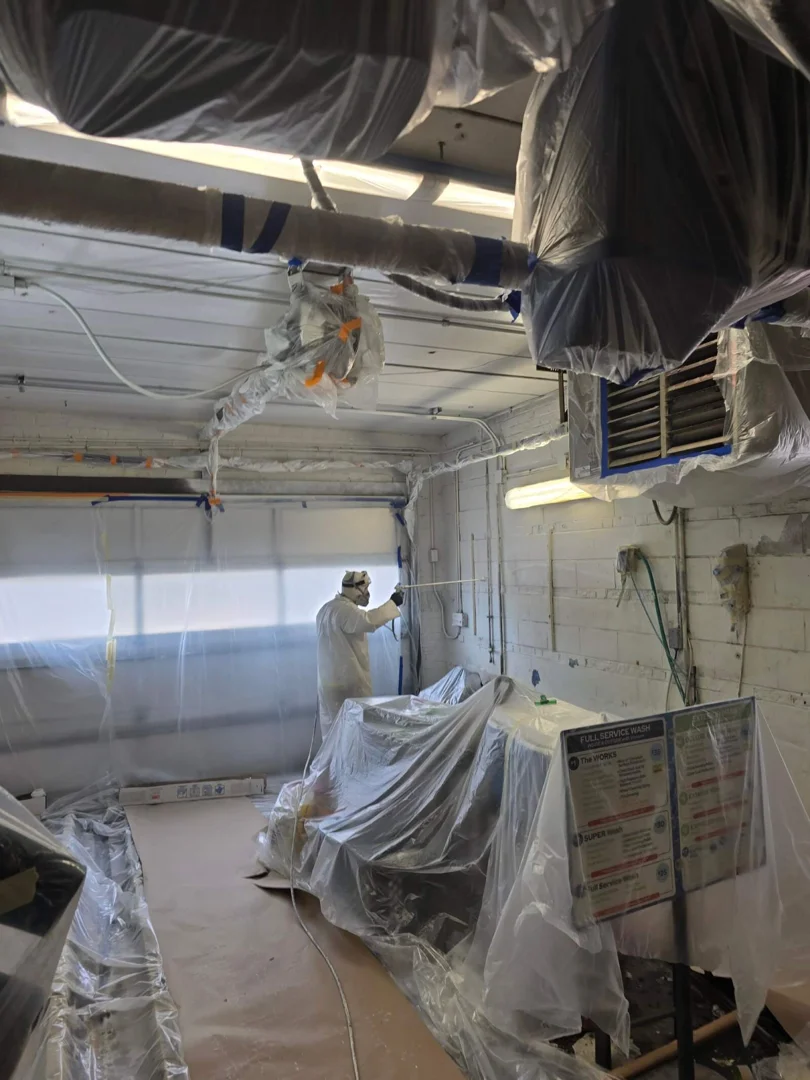
Always wear a NIOSH-approved half-mask or full-face respirator equipped with organic vapor cartridges and P-series particulate pre-filters (such as P95 or P100 filters). Protect eyes with sealed safety goggles and shield skin using a breathable painter’s hooded suit and nitrile gloves. Set up box fans in exterior windows pointing outward to pull paint mist outside while creating steady negative air pressure that keeps overspray contained within the room.
How to Spray Paint Interior Walls with Professional Precision
Applying paint with a sprayer requires controlled, consistent mechanics. Proper gun positioning and uniform trigger control ensure an even finish without streaks, thick banding, or drips across living room, bedroom, or hallway drywall.
When performing a spray painting house interior project, smooth execution produces an even, durable coating across all living spaces.
Setting Pressure, Tip Sizing, and Testing the Fan
Begin by pouring paint through a fine mesh strainer into a clean 5-gallon pail to prevent dried paint flecks from blocking the spray tip. Submerge the intake tube, prime the pump according to manufacturer guidelines, and pressurize the system.
For standard interior latex and acrylic paints, adjust the pump pressure between 1,500 and 2,200 PSI. Mount a 0.015″ to 0.019″ spray tip with a 60-mesh manifold filter.
Test the spray pattern on a large piece of scrap cardboard. Hold the gun 12 inches away, pull the trigger quickly, and inspect the fan shape:
- If heavy bands or lines appear on the outer edges (known as “tails”), atomization is incomplete. Increase pressure slightly or check the tip for partial blockages.
- If the pattern produces a soft, even oval with fully dispersed atomized droplets across a 6- to 8-inch fan width, your spray setup is dialled in.
Proper Spray Technique, Overlap, and Corner Transitions
Follow these professional application practices to achieve a smooth, uniform finish:
- Maintain Gun Distance: Hold the spray gun perpendicular (at a strict 90-degree angle) exactly 10 to 12 inches away from the drywall. Never swing your wrist or arc the gun, which leads to thick paint deposits in the center and thin, patchy edges.
- Move with Your Body: Move your arm steadily across the wall, bending at the knees rather than your lower back to maintain a consistent distance from floor to ceiling.
- Trigger Mechanics: Start moving your arm before pulling the trigger, and release the trigger before stopping the stroke. Spraying past the wall edge onto masked borders avoids heavy paint buildup at the end of each pass.
- 50% Overlap Rule: Overlap each spray stroke by 50%, aiming the spray tip directly at the bottom edge of the previous pass to ensure uniform wet film thickness across the entire wall.
- Inside Corner Technique: When coating inside wall junctions, aim the spray tip directly into the corner seam so the 50/50 fan pattern deposits paint equally onto both adjoining walls simultaneously.
- Back-Rolling Considerations: For smooth drywall in living spaces, consider back-rolling immediately after spraying. Having a helper run a short-nap roller over freshly sprayed wet paint works the coating into the drywall surface, eliminates microscopic air pockets, and provides an even texture that makes future touch-ups simple.
Following established industry techniques like the Wagner Spray Tech interior painting guidelines ensures uniform wet mil application and clean coverage across every room.
Sprayer Cleanup, Flush, and Maintenance
Proper cleanup immediately after spraying keeps your equipment in top condition and prevents stubborn clogs on future projects:
- Relieve System Pressure: Turn the power switch off, switch the valve from spray to prime, and trigger the gun into a waste bucket to relieve remaining fluid pressure.
- Power Flush System: Run clean, warm water (for water-based latex paints) through the intake hose and prime valve until the discharge runs clear, then flush through the fluid hose and spray gun.
- Clean Filters and Tips: Remove the gun filter, manifold filter, and reversible spray tip. Clean all components thoroughly using a soft bristle brush and warm water, clearing any dried paint around the tip guard.
- Long-Term Storage: If storing the sprayer between uses, pump pump-preserver fluid or light storage oil through the system to prevent internal seals and valves from sticking or corroding.
- Unmasking Timing: Allow paint to dry to the touch (typically 1 to 2 hours) before carefully pulling painter’s tape at a 45-degree angle to reveal crisp, clean lines without peeling fresh paint film.
Frequently Asked Questions About Spraying Interior Walls
How much overspray is generated when spraying interior walls?
Airless sprayers release atomized paint droplets under high pressure. While most paint lands directly on the target surface, airborne paint mist can travel across the room. Because these microscopic droplets dry quickly in mid-air, they settle as fine “paint dust” on unmasked surfaces. Maintaining a secure plastic and paper containment perimeter extending at least 2 to 4 feet beyond target walls—along with plastic dust barriers across doorways—ensures surrounding areas remain clean.
Do you need to back-roll after spraying interior drywall?
Back-rolling is a proven professional technique where a damp roller follows directly behind the sprayer while the paint is still wet. While direct spraying creates a flat finish, back-rolling pushes the paint into drywall pores, improves mechanical adhesion, fills minor surface imperfections, and creates a subtle orange peel texture that makes spot touch-ups down the road blend seamlessly.
Can you spray walls and trim different colors in the same room?
Yes, but it requires a structured multi-stage approach. The most efficient method is to spray all trim, crown molding, and baseboards first using a fine-finish HVLP nozzle. Once the trim cures completely (typically 24 hours), mask the woodwork with delicate-surface painter’s tape and plastic sheeting. You can then spray the walls with an airless system without risking color transfer onto the fresh trim.
Conclusion
Spraying interior walls is a fast, efficient way to achieve smooth, durable finishes across residential spaces. However, achieving flawless results requires careful drywall preparation, complete masking, accurate equipment pressure, and proper overlapping mechanics. Without the right tools and setup, indoor spraying can quickly lead to runs, uneven coverage, or unwanted paint mist on surrounding surfaces.
For homeowners in Lombard, Itasca, Addison, Glen Ellyn, Oak Brook, and nearby communities seeking exceptional interior finishes, our team at T&Z Interior And Exterior Painting delivers reliable, high-end results. Backed by 15+ years of hands-on experience, full licensing and insurance, and a 5.0 Google Reviews rating, we treat every home with meticulous care, detailed masking, and superior craftsmanship.
Explore our specialized services/spray painting solutions today to discover how our experienced team can transform your home’s interior with lasting beauty and precision.