
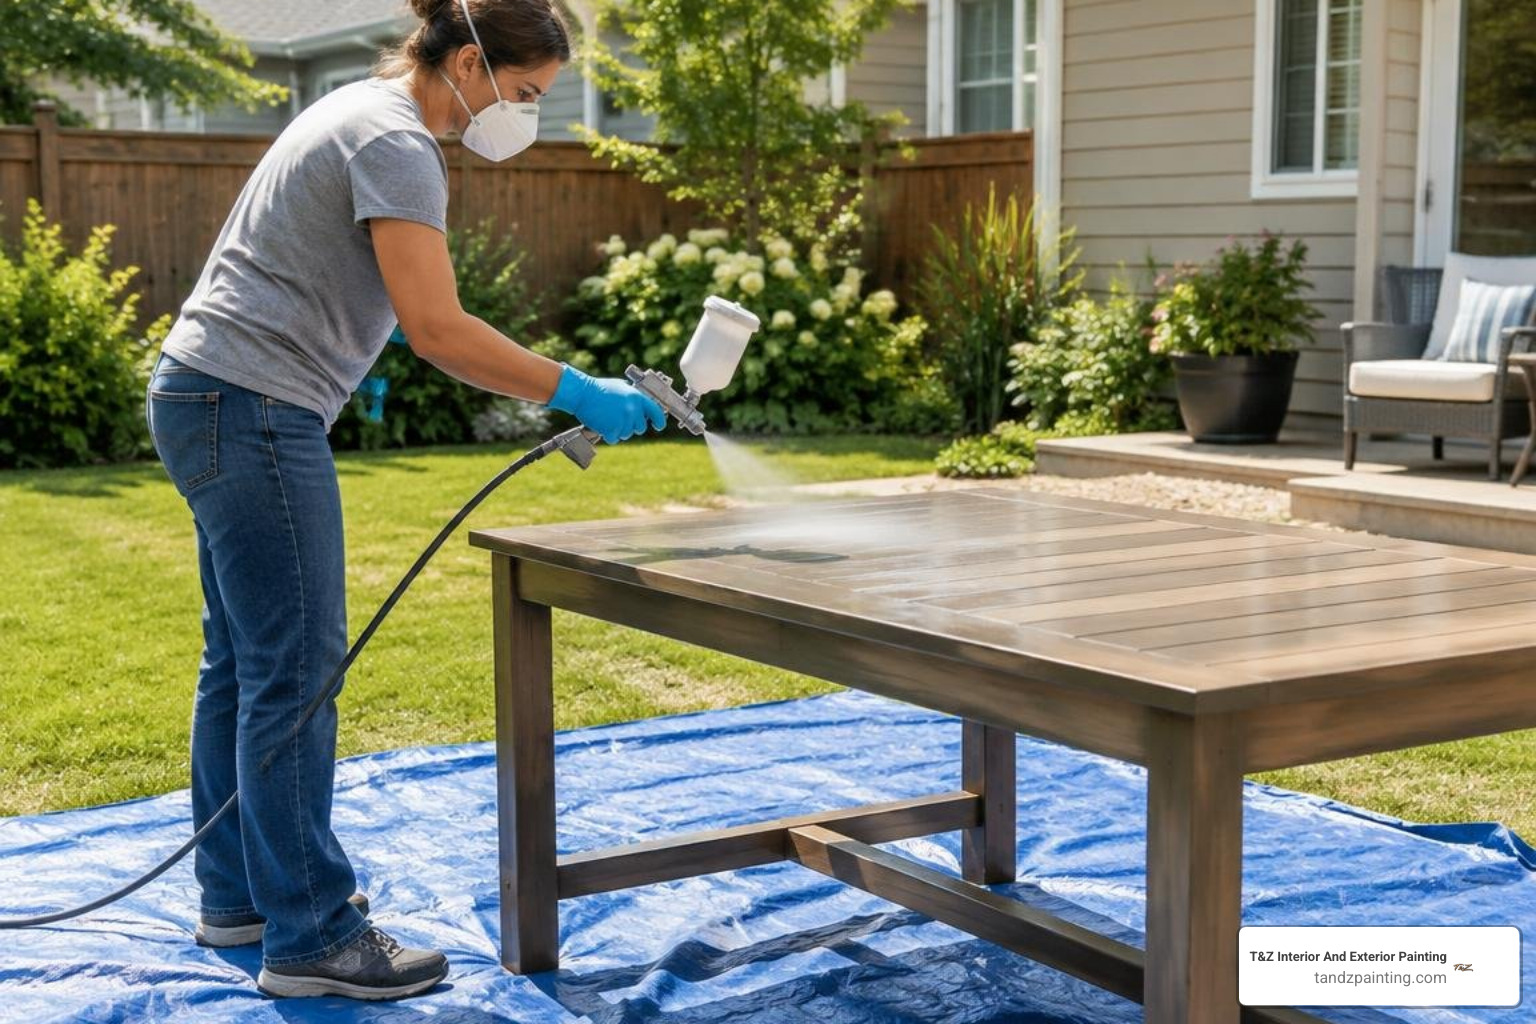
How to Spray Paint a Table for a Smooth, Lasting Finish
For spray painting a table, clean and dry it first, then lightly sand any glossy finish and remove the dust. Use a primer suited to the surface, apply two or three thin coats of spray paint, and let each coat dry as directed on the can. Add a compatible clear topcoat if the tabletop will see regular use.
You usually do not need to strip a sound existing finish. The key is giving the new paint a clean surface it can grip.
I’m Tomasz Niemotko, owner and founder of T&Z Interior And Exterior Painting, a licensed and insured painting contractor founded in 2009 and based at 1101 S Columbine Ave, Lombard, IL 60148. With over 15 years of painting and furniture refinishing experience, I’ll walk you through the prep, spraying, and protection that matter most when spray painting a table.
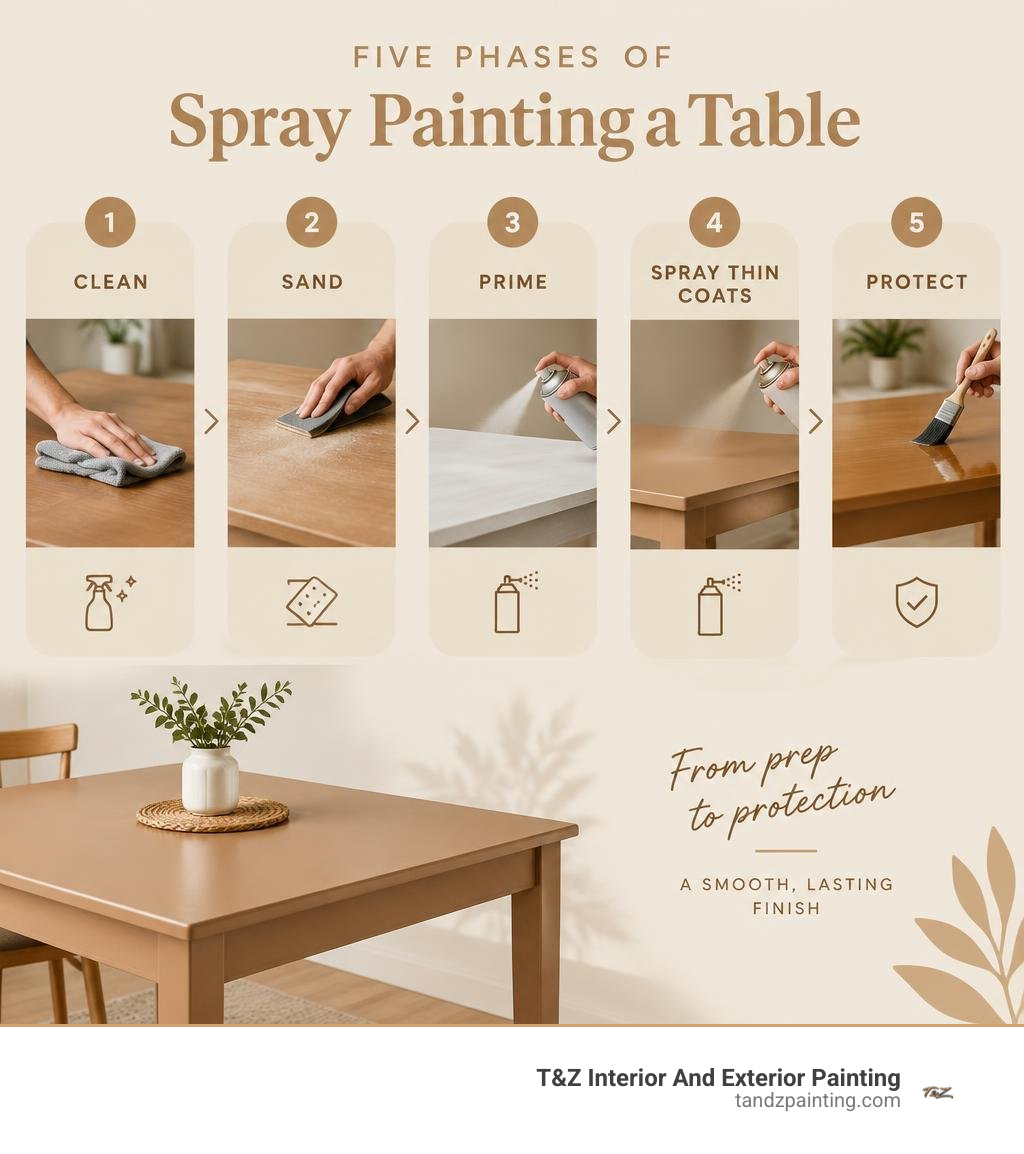
Spray painting a table terms to remember:
Essential Tools and Supplies for Spray Painting a Table
Getting a factory-smooth finish on a table starts with gathering the proper supplies before you shake your first can of paint. Having the right tools within arm’s reach keeps your application moving steadily and prevents mid-project interruptions.
Here is the core checklist we recommend for a successful table makeover:
- Aerosol Spray Paint and Primer: High-grade alkyd enamel, acrylic, or chalk-style spray paints designed for furniture.
- Comfort Trigger Grip Handle: Snapping a reusable trigger handle onto your spray can saves your index finger from fatigue. If you are painting a dining table and several matching chairs, an ergonomic handle is the difference between smooth, controlled passes and hand cramps.
- Drop Cloths or Plastic Sheeting: Heavy canvas or plastic drop cloths protect your garage floor, driveway, or lawn from stray overspray dust.
- Painter’s Tape: High-tack masking tape protects glass inserts, metal accents, or table glides that you do not want painted.
- Sandpaper: Fine-grit sanding sponges and sheets (220-grit for initial scuffing and 320-grit for smoothing between coats).
- Tack Cloths and Lint-Free Rags: Essential for wiping away microscopic sanding dust that vacuuming leaves behind.
- Personal Protective Equipment: An N95 particulate respirator or half-mask cartridge respirator, nitrile gloves, and safety glasses.
Selecting the Right Paint and Primer Formulas
Different table materials require specific paint chemistry. Choosing the right product ensures your paint will stick tightly instead of peeling off when someone sets down a coffee mug.
For bare or stained wood, an oil-based or bonding aerosol primer seals open grain, prevents natural wood tannins from bleeding through light colors, and creates a uniform foundation. When selecting your finish coat, study our guide to choosing the best spray paint for wood to match your project’s wood type with the ideal enamel formulation.
If you are working with a metal table base, look for rust-inhibiting enamel sprays that bond directly to ferrous surfaces. For laminate or veneer, a high-adhesion bonding primer like Rust-Oleum or Zinsser is mandatory to grip the slick synthetic resin. For a classic vintage aesthetic, ultra-matte chalk sprays dry rapidly and create a velvety texture, though they always require a durable sealer for daily dining or coffee table use. Always follow the manufacturer’s safety instructions and wear appropriate respiratory protection when handling solvent-based formulas.
Spray Painting vs Brush Painting for Tables
When deciding how to coat furniture, homeowners often weigh the pros and cons of aerosol cans, HVLP spray systems, and traditional hand brushes. Spraying distributes atomized paint droplets evenly across complex table legs, routed edges, and flat tabletops, eliminating the brush marks and roller stipple that often ruin a hand-painted finish.
Reviewing how kitchen cabinet spraying vs hand painting works highlights why spraying provides an ultra-smooth, leveled finish across large, flat surfaces.
| Application Method | Finish Quality | Application Speed | Leveling & Texture | Ideal Table Project |
|---|---|---|---|---|
| Aerosol Spray Can | Smooth, uniform sheen | Fast | Excellent self-leveling; no brush marks | Coffee tables, end tables, nightstands |
| HVLP Spray Gun | Ultra-smooth factory grade | Fastest | Superior atomization; custom fluid control | Large dining tables, full dining sets |
| Traditional Brush & Roller | Visible texture / stipple | Slow | Relies heavily on paint leveling additives | Small touch-ups, ornate carvings |
Step-by-Step Preparation and Priming
A paint job is only as durable as the preparation underneath it. Skipping surface prep will cause the finest paint to chip, bubble, or scratch off with minimal contact.
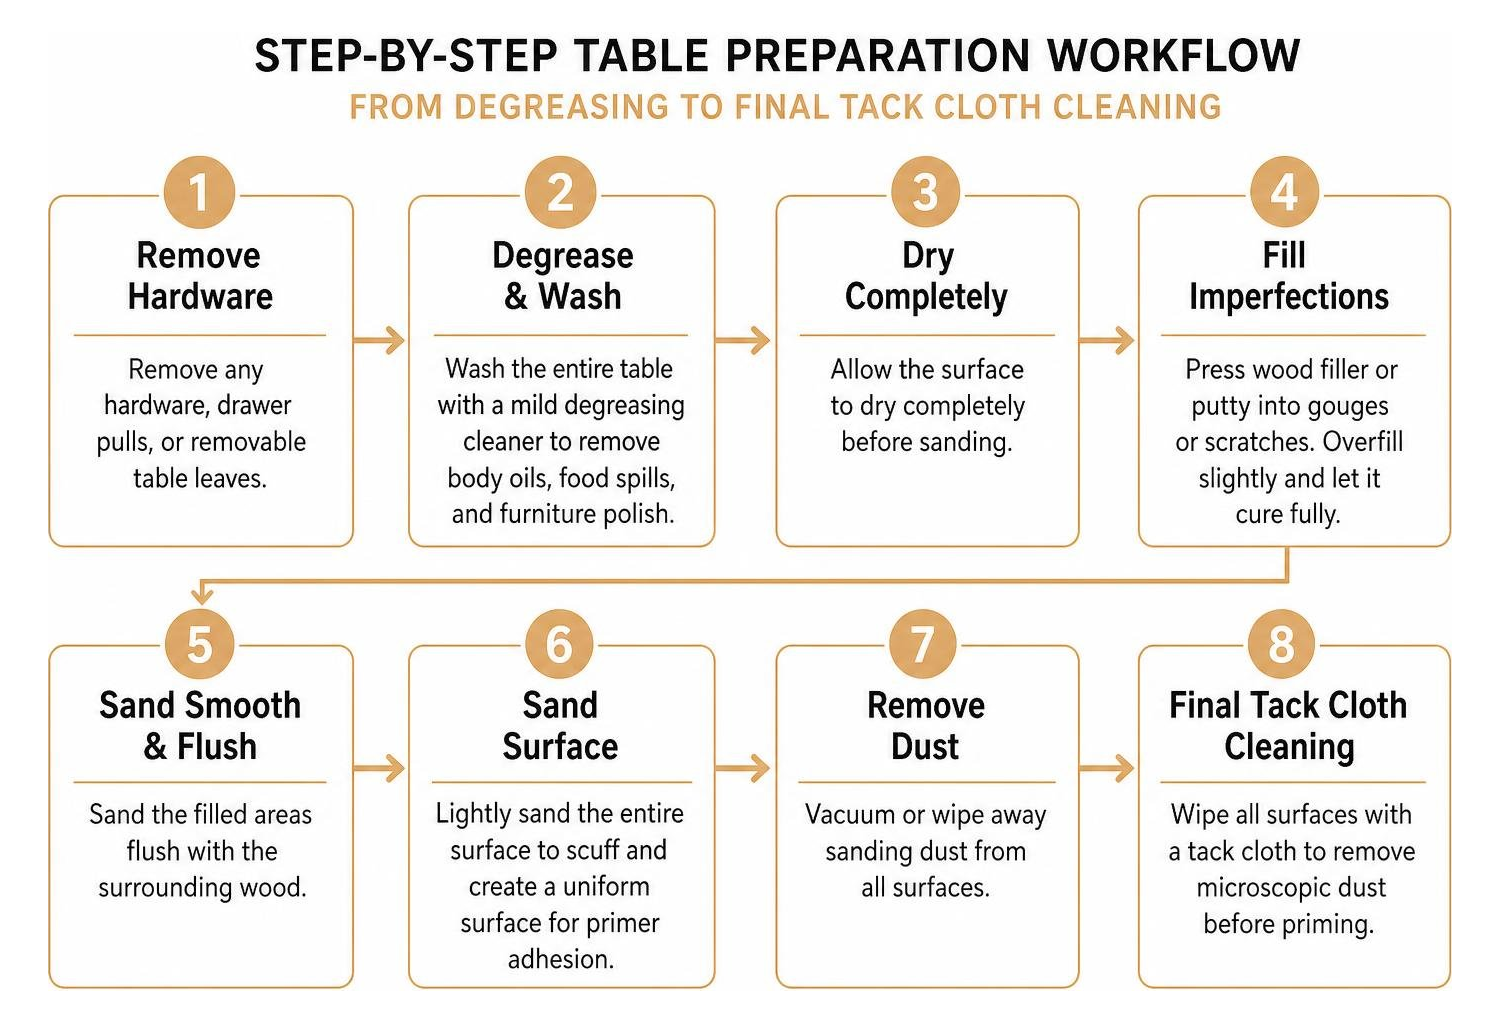
Begin by removing any hardware, drawer pulls, or removable table leaves. Wash the entire table with a mild degreasing cleaner (such as diluted dish soap or a dedicated TSP substitute) to remove body oils, food spills, and furniture polish. Furniture wax and silicone polish repel paint, leading to crater-like flaws known as “fish eyes.” Allow the surface to dry completely before sanding.
If your table has deep gouges or scratches, press wood filler or putty into the damaged areas using a flexible putty knife. Overfill slightly to account for shrinkage as it dries, then sand it flush with the surrounding wood once fully cured.
Surface Prep and Sanding Methods
You do not need to sand down to bare wood unless the existing paint or varnish is cracking and flaking. For sound finishes, your goal is “scuff sanding.” Scuff sanding removes the glossy sheen and etches microscopic grooves into the old finish, giving your primer a mechanical grip.
- Initial Scuffing: Use 220-grit sandpaper or a medium-fine sanding sponge. Work systematically across the tabletop in the direction of the wood grain, applying light, even pressure until the entire surface looks dull and uniform.
- Dust Removal: Vacuum the surface thoroughly with a brush attachment.
- Tack Cloth Wipe: Gently wipe the wood with a tack cloth to capture remaining fine dust. Do not press hard on the tack cloth, as this can transfer sticky wax residues onto the wood.
- Fine Smoothing: Keep 320-grit sandpaper ready to smooth between paint layers.
Careful dust extraction between coats is a key step in producing an ultra-smooth finish, and it is the same discipline we apply on our professional spray painting projects.
Priming for Maximum Adhesion
Primer acts as the glue between your table and your color coats. It also seals porous wood, reducing overall paint consumption by creating a consistent barrier.
Shake your aerosol primer can vigorously for at least two full minutes after the mixing ball begins rattling. Hold the can 8 to 12 inches away from the table surface and apply one to two light, even coats. Allow the primer to dry according to the manufacturer’s directions (usually 30 to 60 minutes).
Once the primer dries to the touch, run 320-grit sandpaper lightly over the surface to knock down raised wood grain or paint nibs. Wipe clean with your tack cloth before applying your topcoat.
Application Techniques for a Flawless Finish
Spray painting a table requires steady rhythm, proper distance, and patience. Applying one thick, heavy coat in an effort to finish quickly is the fastest way to cause sagging paint, runs, and bubbling.
Step-by-Step Process for Spray Painting a Table Evenly
Follow this reliable application routine:
- Shake the Can Thoroughly: Shake for two minutes before spraying, and give the can a quick shake every few passes to keep pigments and solvents blended.
- Start and End Off the Edge: Begin spraying just off the side of the table, sweep smoothly across the surface, and release the trigger only after passing the opposite edge. This prevents heavy puddles at your start and stop points.
- Maintain 8 to 12 Inches of Distance: Holding the nozzle too close deposits excess wet paint that sags; holding it too far away causes the atomized paint to dry mid-air, creating a rough, gritty texture.
- Overlap Each Pass by 50 Percent: Align each new stroke so it overlaps the previous pass by half. This creates a uniform wet film across the entire tabletop.
- Apply 2 to 3 Thin Coats: Allow 10 to 15 minutes of flash-off time between light coats. Thin coats cure much faster and build durable, chip-resistant layers.
- Paint the Underside First: Elevate your table on wood blocks. Spray the underside, legs, and aprons first, then finish with the tabletop to ensure any light overspray settles underneath rather than on your focal surface.
Ideal Weather Conditions and Climate Control
Climate plays a huge role in aerosol paint performance. Always spray in a sheltered, well-ventilated area, such as an open garage or outdoor carport, shielded from direct sunlight and falling leaves.
- Temperature: The ideal temperature range is between 60°F and 80°F. Temperatures below 50°F thicken the paint, reduce can pressure, and cause uneven spraying, while excessive heat dries droplets before they level out.
- Humidity: Avoid spraying on rainy days or when relative humidity exceeds 65%. High moisture slows solvent evaporation, leaving the surface tacky for days and creating a hazy, clouded blush on dark finishes.
- Wind: Even a gentle breeze blows atomized paint off course, causing patchy coverage and blowing dust directly onto your wet finish.
When working outside, set up portable windbreaks or a pop-up spray shelter to catch wandering overspray and keep the finish clean.
Troubleshooting Common Spray Paint Flaws
Even with careful technique, minor issues can occur. Here is how to fix common flaws without restarting the entire project:
- Runs and Drips: If wet paint sags on a table leg or edge, resist the urge to wipe it with your finger or a rag. Let it cure completely (at least 24 hours), then sand the drip flat with 320-grit paper before applying a light blending coat.
- Gritty Texture (Dry Spray): If the surface feels like fine sandpaper, you held the can too far away or sprayed in windy conditions. Let it dry for two hours, scuff it smooth with 320-grit paper, clean with a tack cloth, and re-spray from 8 to 10 inches away.
- Orange Peel: An uneven, dimpled texture resembling citrus skin indicates the paint was applied too heavily or in cold weather. Sand down the high spots once dry and reapply thinner, warmer coats.
- Clogged Nozzle: If paint sputters, turn the can upside down and spray for two seconds until clear gas emerges, or soak the removable nozzle tip in mineral spirits.
Sealing, Topcoats, and Decorative Customization
A tabletop endures heavy daily use from plates, laptops, keys, and cleaning wipes. While high-gloss and satin enamel sprays provide solid protection on their own, adding a clear topcoat dramatically increases scratch and moisture resistance.
Water-based polycrylic or polyurethane spray sealers are ideal because they dry crystal clear without ambering over white or light-colored paint. Apply two to three thin coats of clear sealer, allowing 30 minutes between coats. For high-traffic dining tables or desks, consider reviewing professional furniture spray painting techniques to ensure you achieve long-term durability against daily wear.
Creative Finishes and Distressing When Spray Painting a Table
Spray paint provides a clean canvas for customized decorative effects:
- Chalk-Style Patina: Spraying chalk-finish paint allows you to create a classic farmhouse look. Thin the chalk medium according to the manufacturer’s directions and apply it in light, even passes for a smooth matte surface.
- Edge Distressing: After your color coat dries, take a 220-grit sanding block and lightly sand high-wear areas, such as table edges, turned leg details, and corners, to reveal the underlying wood tone or a contrasting base paint color.
- Antique Glazing: Brush a water-based dark walnut or slate glaze over your dried paint, then immediately wipe off the excess with a damp lint-free cloth. The glaze settles into routed grooves, carved details, and corners, adding visual depth.
- Two-Tone Contrast: Spray table legs in a deep charcoal or matte black while finishing the tabletop in a soft linen white, or vice versa, for a modern accent piece.
Frequently Asked Questions About Table Spray Painting
Do I need to remove the existing finish before spray painting a table?
In most cases, you do not need to strip down to bare wood. As long as the existing varnish, polyurethane, or factory paint is sound and not flaking, you only need to clean off all grease and scuff-sand the gloss with 220-grit sandpaper. Apply a coat of quality bonding primer to ensure the new spray paint adheres tightly.
How many coats of spray paint are needed for full table coverage?
Plan on applying two to three light, even coats of color over your primer. If you are making a dramatic color shift (such as turning a dark espresso table bright white), you may need three to four thin passes for complete, streak-free opacity. Always favor several thin coats over one heavy application.
How long does spray paint take to dry and fully cure on furniture?
Most modern enamel spray paints dry to the touch within 20 to 30 minutes and can be recoated within one hour. However, drying is not the same as curing. Paint dries when solvents evaporate, but full chemical curing takes between 24 and 48 hours for light handling, and up to 7 to 14 days before you should place heavy objects, lamps, or placemats on the tabletop.
Conclusion
Spray painting an outdated table is an affordable, satisfying way to give worn furniture a clean, modern look. By dedicating time to degreasing, scuff sanding, choosing the right primer, and applying thin, overlapping coats, you can achieve a durable finish that stands up to daily use.
If you have a large dining room set, intricate woodwork, or kitchen cabinetry that requires a flawless factory finish, our local team is here to help. At T&Z Interior And Exterior Painting, we have over 15 years of experience delivering quality, stunning results for homeowners across Lombard and surrounding communities like Glen Ellyn, Downers Grove, Wheaton, and Elmhurst. We back our licensed and insured craftsmanship with a 2-year warranty and a 5.0 Google rating across 85+ customer reviews.
To explore our complete range of professional spray painting services or to discuss your next home update, request a free estimate on tandzpainting.com or call us directly at (224) 240-0054.