
Spray Paint Deck Railing for a Smooth, Fast Refresh
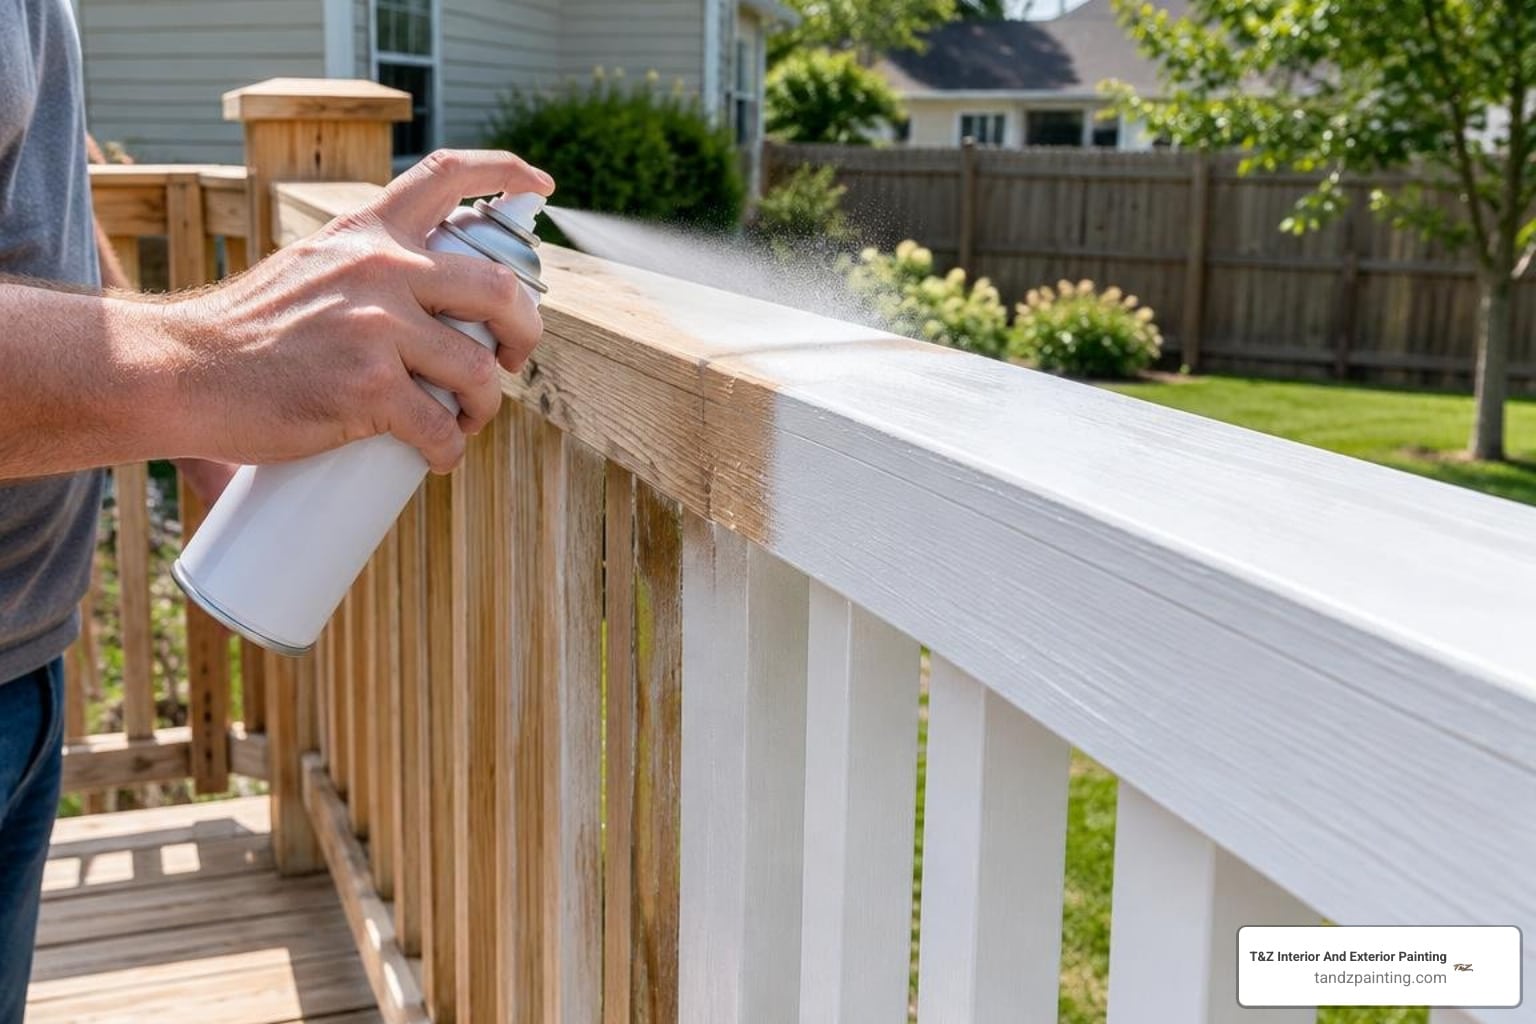
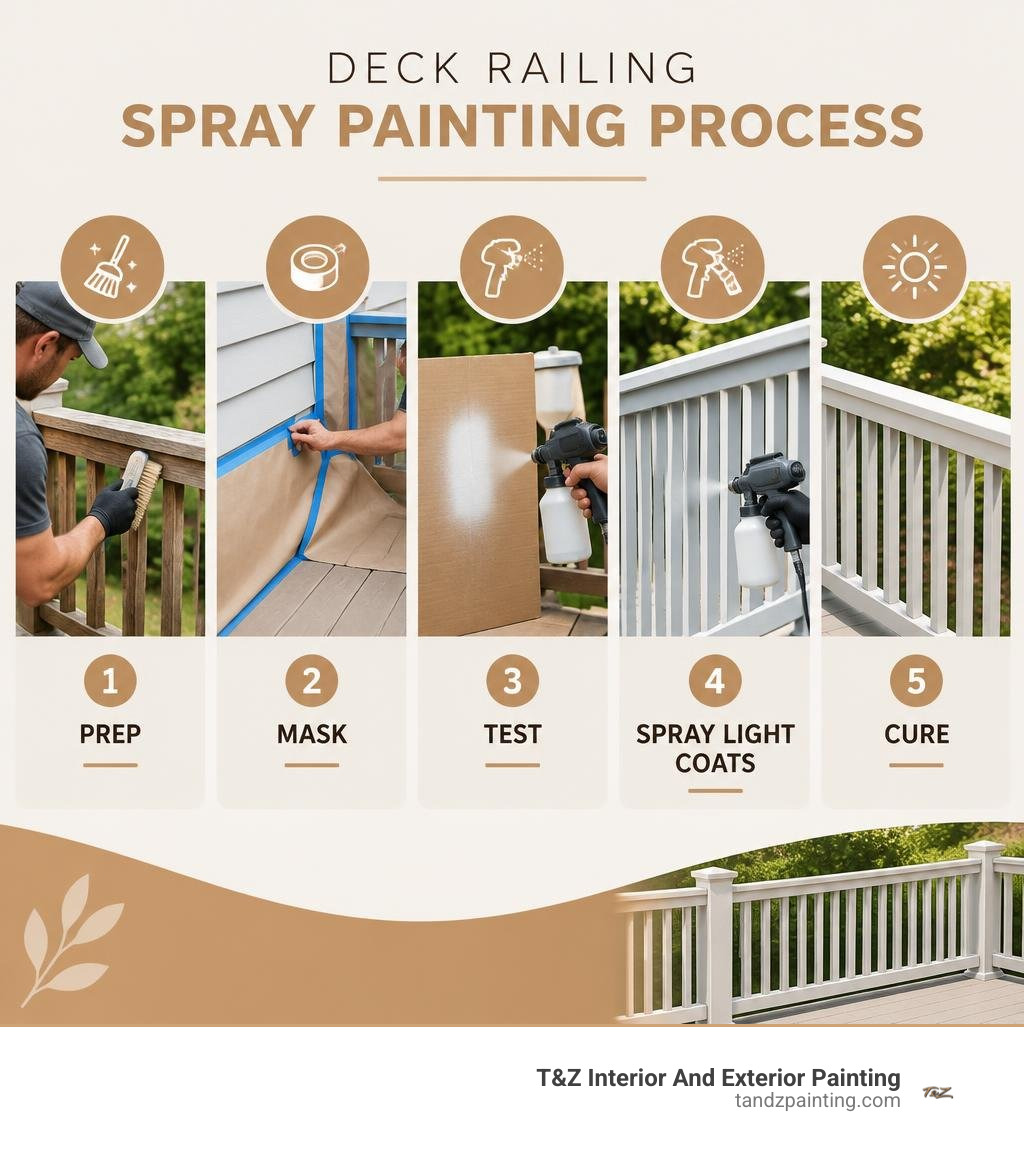
To spray paint deck railing successfully, clean and dry the surface, scrape or sand loose coating, mask nearby siding and deck boards, then apply two or three thin coats with steady, overlapping passes. Hold the sprayer about 8-12 inches from wood railings, keep it moving to prevent drips, and test the pattern on cardboard before spraying the railing.
A sprayer can coat narrow spindles, rails, and hard-to-reach edges much faster than a brush while leaving a more even finish. The tradeoff is preparation: protecting nearby surfaces from overspray and choosing a coating made for exterior wood or metal matter just as much as the spraying itself.
I am Tomasz Niemotko of T&Z Interior And Exterior Painting, and our team brings more than 15 years of exterior painting experience to homes in Lombard, Itasca, Addison, Glen Ellyn, Oak Brook, and nearby towns. This guide explains how to spray paint deck railing surfaces with careful prep, clean technique, and durable results in mind.
Explore more about Spray paint deck railing:
Why Use a Sprayer for Deck Railings?
Deck railings feature some of the most intricate geometry on a home’s exterior. Between four-sided balusters, routed handrails, bottom rails, and tight corners, working with a standard handheld brush can quickly turn into a grueling weekend chore. Using a paint sprayer simplifies this entire process by atomizing the paint or stain into a fine mist that settles evenly over spindles, edges, and carved details.
Airless and high-volume low-pressure (HVLP) sprayers allow you to cover up to 150 square feet per minute. Beyond raw speed, sprayers eliminate the brush marks, pooling around hardware, and lap lines that often plague hand-applied finishes. For homeowners updating outdoor living areas across Lombard and Glen Ellyn, using a sprayer ensures a smooth, factory-grade finish that boosts curb appeal and protects against harsh Midwestern weather.
| Feature | Paint Sprayer Application | Traditional Brush Application |
|---|---|---|
| Application Speed | Very fast (coats spindles in seconds) | Slow (each spindle side requires individual strokes) |
| Finish Texture | Smooth, uniform, zero brush marks | Potential brush marks and runs at corner joints |
| Prep & Masking Needs | Extensive (requires tarps, cardboard, masking) | Minimal (requires basic floor protection) |
| Coating Penetration | Excellent when paired with light back-brushing | Good manual penetration into open pores |
| Hard-to-Reach Areas | Easily covers tight gaps between balusters | Difficult to coat interior spindle gaps neatly |
Whether you are refinishing weathered cedar balusters or giving wrought iron a crisp modern look, proper equipment makes all the difference. When planning larger projects that involve both horizontal deck floorboards and vertical boundaries, combining your railing refresh with comprehensive deck and fence painting ensures consistent protection across all exterior wood.
Tools and Surface Preparation Before Spraying
Spraying delivers an impeccable finish only when the underlying surface is properly sound, clean, and dry. Paint will not adhere to weathered wood fibers, mildew, or flaking layers.
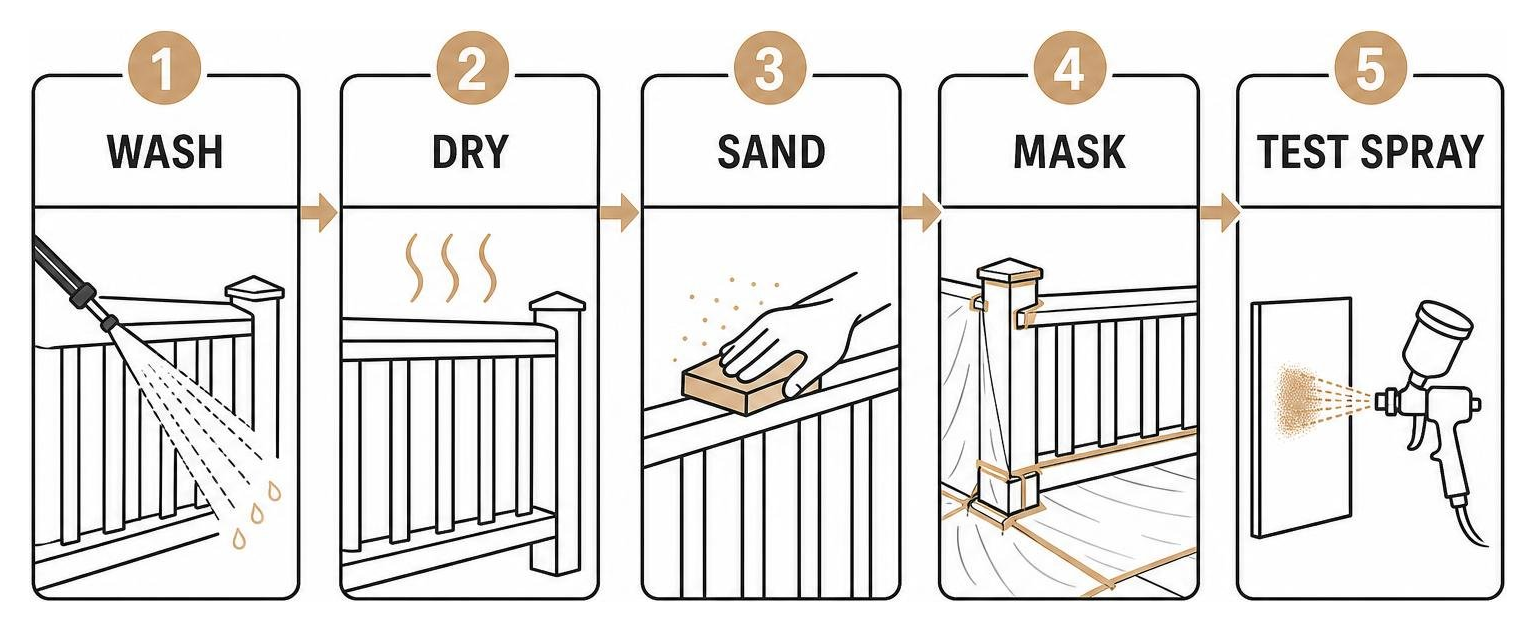
- Pressure Washing & Cleaning: Thoroughly wash the railings with an exterior deck cleaner to remove dirt, mold, and atmospheric grime. Allow 24 to 48 hours for complete drying before sanding or applying any paint. Rushing into spraying damp wood traps moisture and leads to peeling.
- Scraping and Sanding: Scrape away any flaking or peeling paint. Use 80- to 120-grit sandpaper or specialized abrasive discs (such as PaintEater discs) to feather sharp edges where old paint meets bare substrate. Proper surface prep can increase paint adhesion by up to 30%.
- Dust Removal: Wipe down or vacuum all railing surfaces to remove fine sanding dust.
- Masking Surrounding Areas: Use painter’s tape, plastic masking film, and heavy canvas drop cloths to cover the deck flooring, adjacent siding, brickwork, patio furniture, and nearby landscaping. When applying detailed masking, adopting proven trim spray painting techniques ensures crisp lines along deck posts and thresholds.
Essential Gear to Spray Paint Deck Railing Surfaces Safely
Spraying outdoor coatings requires appropriate personal protective equipment (PPE) to protect your lungs, eyes, and skin from atomized mist.
- Respirator Mask: Wear a properly fitted NIOSH-approved respirator with organic vapor cartridges when spraying solvent- or oil-based products, or a particulate respirator for exterior acrylics.
- Eye Protection: Safety glasses or full-seal goggles keep stray paint particles and blowing debris out of your eyes.
- Spray Sock & Gloves: A breathable spray hood (spray sock) protects your hair and neck, while nitrile or chemical-resistant gloves keep sticky coatings off your skin.
- Worksite Safety: Always ensure adequate cross-ventilation in outdoor areas and adhere to standard airless sprayer safety guidelines to manage high-pressure spray tips safely.
Selecting Coatings and Sprayer Settings for Wood and Metal
Choosing the right formulation and setting up your sprayer correctly prevents clogs and uneven build.
- Exterior Wood Railings: High-grade 100% exterior acrylic paints or water-based penetrating stains provide flexible UV and moisture resistance. Bare wood should first receive a quality exterior water-based primer. For wood, use an 8-inch spray pattern with a .013 to .015 tip size, holding the spray gun 8 to 12 inches away.
- Metal Railings (Aluminum or Wrought Iron): Metal requires direct-to-metal (DTM) exterior enamel or rust-inhibitive primers. Following proper metal surface preparation ensures firm bonding. For metal balusters, use a narrow detail nozzle or fine-finish tip, adjust air power to a moderate level (setting 3 or 4 on compact sprayers), and maintain a closer distance of 6 to 8 inches to minimize overspray.
Step-by-Step Guide to Spray Paint Deck Railing
Executing your passes in a logical order ensures seamless coverage without dry spray marks or missed spots.
- Mix and Strain the Paint: Pour your paint or stain into a 5-gallon bucket through a mesh strainer bag to remove settled skins or particles that could clog the spray tip.
- Test Your Spray Pattern: Test the spray fan on a piece of cardboard or scrap plywood. Adjust your fluid flow and air pressure until the fan produces an even, solid pattern without heavy streaks at the edges (tails or fingers).
- Follow a Top-Down Workflow: Start by spraying the top handrail, holding the gun perpendicular to the wood surface. Work along the length in smooth, continuous passes.
- Maintain 50% Overlap: As you move down to the balusters, overlap each pass by 50% to build a uniform film thickness.
- Back-Brush When Staining: If applying a penetrating wood stain or base coat to bare cedar or pine, immediately back-brush with a soft bristle brush. This forces the coating deep into the grain pores and evens out any minor pooling.
- Apply Multiple Thin Coats: Apply two to three light, even coats rather than one thick application. Allow adequate drying time between coats according to product instructions. Incorporating structured exterior spray painting methods ensures consistent durability against weather and sun exposure.
How to Spray Paint Deck Railing Spindles in Distinct Colors
Giving deck spindles an accent color—or alternating spindle shades—adds custom charm to outdoor entertainment areas.
- Plan the Pattern: Count your spindles and map out your color layout beforehand.
- Use a Mobile Cardboard Shield: Cut a rectangular piece of heavy cardboard or open a paper grocery bag to serve as a handheld backer. Hold the cardboard directly behind the single spindle you are spraying to catch overspray and prevent mist from reaching adjacent spindles or deck boards.
- Spray in One Consistent Direction: Spray each individual spindle from top to bottom, coating all exposed facets, then move your shield to the next target. If working with iron or aluminum spindles, refer to specialized metal railing spraying tips to tackle spiral twists and decorative joints smoothly.
- Keep a Touch-Up Brush Handy: Use a small artist brush for quick touch-ups on joints and contact points where the baluster meets the top and bottom rails.
Maintenance, Equipment Cleanup, and Troubleshooting
Promptly cleaning your spray equipment keeps it running smoothly and extends the life of your tools.

- Flushing the System: For water-based paints and acrylic stains, flush the sprayer hopper or suction tube with warm soapy water until the discharge runs clear. For oil-based coatings, use mineral spirits.
- Clean Nozzles and Filters: Remove the spray tip, atomizing nozzle, gun filter, and manifold filter. Scrub away any softened paint with a soft cleaning brush.
- Troubleshooting Common Issues:
- Runs and Sags: Caused by holding the sprayer too close, moving too slowly, or applying the coating too heavily. Wipe wet runs immediately with a foam brush, let dry, lightly sand smooth, and reapply a lighter coat.
- Orange Peel Texture: Caused by improper paint viscosity or spraying at inadequate air pressure. Thin the coating slightly per manufacturer specifications or increase atomization pressure.
- Poor Adhesion / Peeling: Usually indicates surface moisture, chalking paint, or trapped oils. Sand back to bare substrate, clean, let dry completely, and prime before recoating. For durable long-term results on metal railings, keep up with routine outdoor metal maintenance.
Frequently Asked Questions About Deck Railing Spraying
How long does it take to spray paint deck railings?
For an average residential deck (approximately 20 to 30 linear feet of railing), the actual spraying time is remarkably quick—often taking under an hour per coat. The overall project, including cleaning, drying, sanding, and masking, typically spans a weekend. Many homeowners break active preparation into convenient half-hour chunks over several days, followed by two light spray coats once surfaces cure completely.
How do I prevent overspray on the deck floor and house?
Protect the floor directly beneath the railing with canvas drop cloths taped down along the edge. Fasten lightweight plastic sheeting to adjacent exterior siding using exterior painter’s tape. When spraying individual spindles, hold a sturdy cardboard shield or painter’s shield directly behind each spindle to catch drifting mist. Always check wind conditions before spraying; avoid outdoor spraying if wind speeds exceed 8 to 10 mph.
Should I back-brush after spraying deck railings?
Back-brushing is highly recommended when applying semi-transparent stains or penetrating primers to bare exterior wood. Spraying delivers fast, uniform material distribution, while following immediately with a light brush pass works the product into the wood grain, breaks surface tension, and prevents runs in tight corners. For solid color acrylic topcoats on pre-primed wood or metal, back-brushing is generally unnecessary if you maintain an even 8- to 12-inch spraying distance.
Conclusion
Refreshing your deck railings with a paint sprayer provides a smooth, professional-grade finish in a fraction of the time required by traditional brush painting. Taking the time to properly wash, sand, mask, and calibrate your sprayer ensures your deck remains a durable, attractive centerpiece for outdoor gatherings.
For homeowners in Lombard, Itasca, Addison, Glen Ellyn, Oak Brook, and the surrounding Chicago suburbs looking for flawless curb appeal without the hassle of DIY prep, our team at T&Z Interior And Exterior Painting is here to help. Backed by over 15 years of residential and commercial experience, fully licensed and insured crews, and a 5.0 Google Reviews rating, we deliver lasting craftsmanship on every project. Discover how our professional spray painting services can transform your home’s exterior spaces with enduring beauty and protection.