
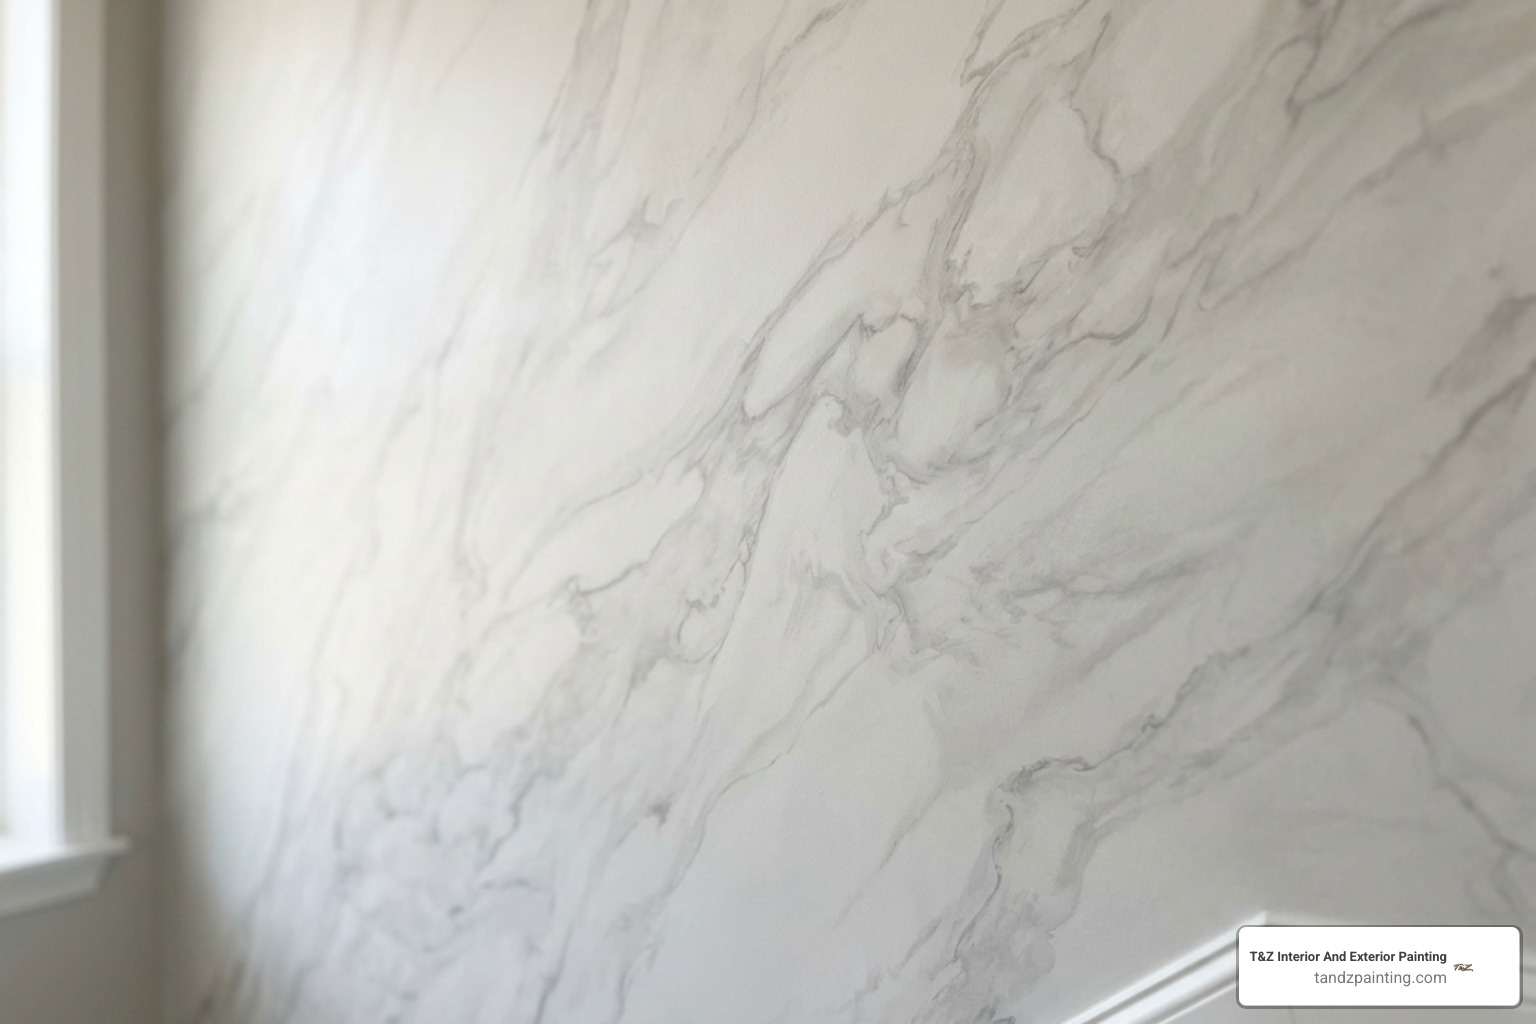
How to Create a Realistic Marble Effect on Walls
Marble effect paint for walls can create a convincing stone look with a smooth base coat, translucent color layers, soft veining, and a protective clear finish. For the best result, prepare the wall until it is clean and smooth, test your colors on a sample board, then work in small sections so the glaze stays blendable.
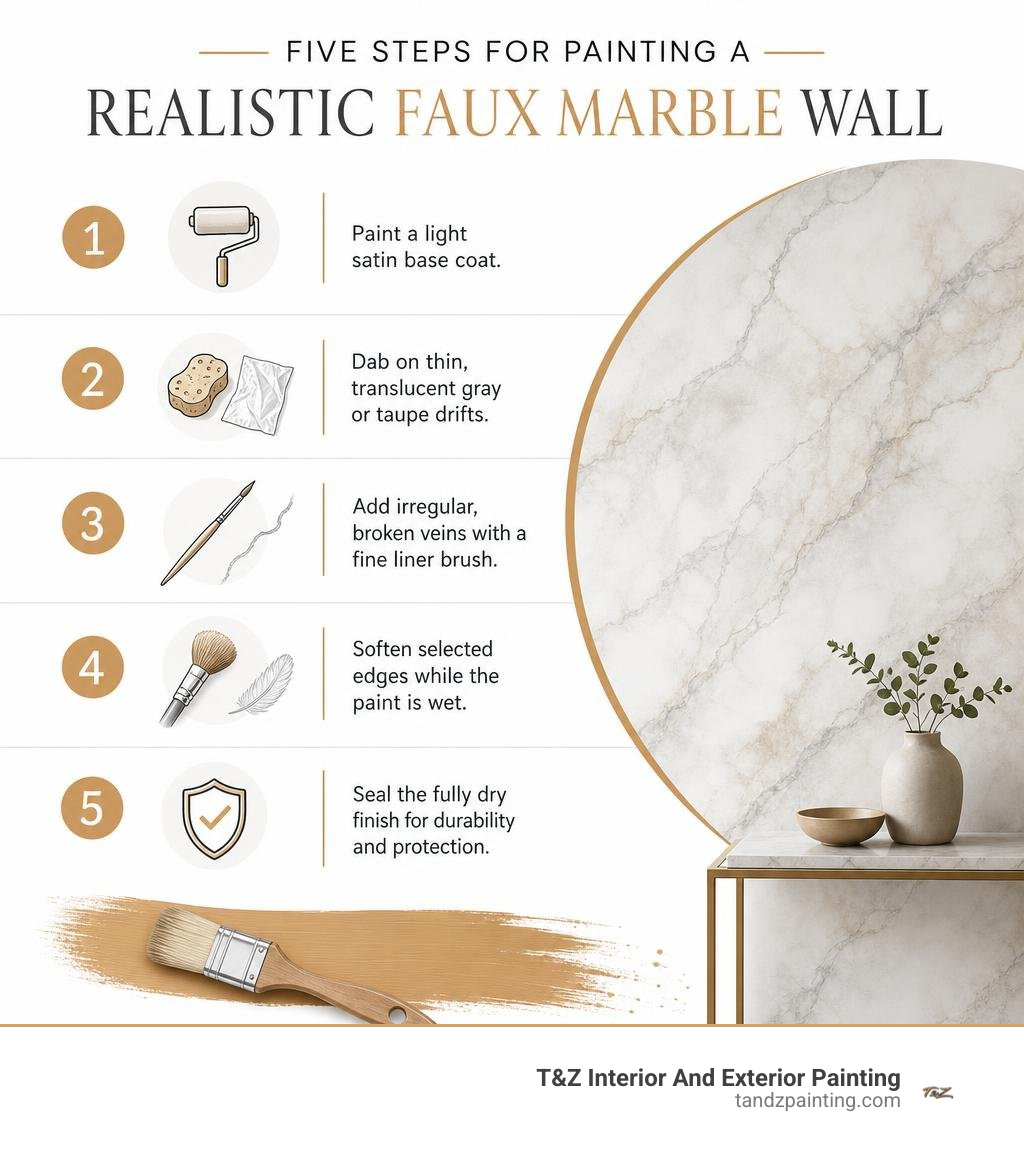
- Paint a light satin base coat.
- Dab on thin, translucent gray or taupe drifts with a sponge or crumpled plastic.
- Add irregular, broken veins with a fine liner brush or feather.
- Soften selected edges while the paint is wet.
- Seal the fully dry finish if the wall needs extra washability or moisture resistance.
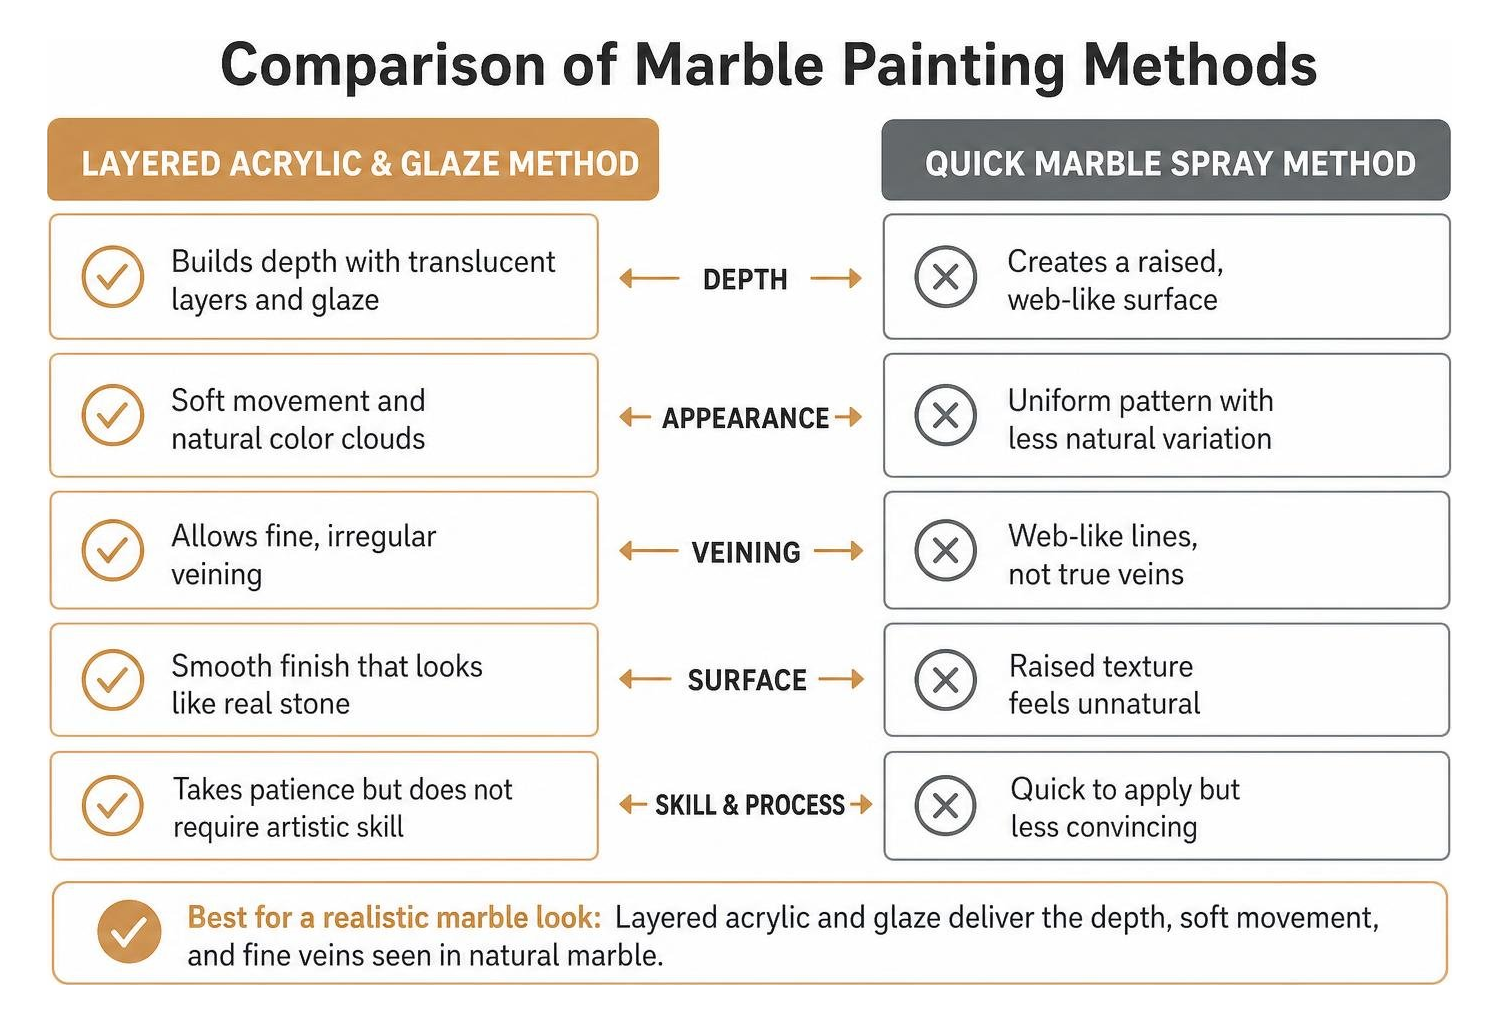
Unlike a quick marble spray, which creates a raised web-like pattern, layered acrylic paint and glaze create the depth, soft movement, and fine veins seen in natural marble. It takes patience, but you do not need to be an artist: study a real marble reference, avoid evenly spaced lines, and keep some areas quiet.
I am Tomasz Niemotko of T&Z Interior And Exterior Painting, bringing more than 15 years of painting experience to homeowners in Lombard, Itasca, Addison, Glen Ellyn, Oak Brook, and nearby towns. Our licensed and insured team is known for detailed, reliable work and a 5.0 Google Reviews rating, including careful guidance on marble effect paint for walls and other decorative finishes.
Marble effect paint for walls word guide:
Understanding Marble Effect Paint and Faux Stone Finishes
Transforming standard drywall into an architectural statement requires an understanding of how natural stone looks in three dimensions. Genuine marble displays deep translucency, soft color clouds, and delicate fractures formed over millions of years. When creating decorative faux finishes on interior walls, we replicate this look through specialized waterborne acrylic formulations, clear glazing mediums, and layered application methods.
Traditional faux marble painting relies on building depth through consecutive translucent layers. Rather than applying a single coat of opaque color, painters work with thinned acrylics suspended in an extender glaze. This allows light to pass through the top veining layers, reflect off the underlying base coat, and give the illusion of solid, quarried stone.
Why Choose Marble Effect Paint for Walls Over Real Stone?
Slab marble and heavy stone tiles bring structural weight limitations and require specialized framing support, especially across expansive surfaces. Faux finishing delivers limitless architectural flexibility across curved walls, fireplace surrounds, and dining room backdrops without structural modifications.
For homeowners exploring high-end texture alternatives, Acrylic Venetian Plaster offers smooth, polished stone textures using troweled synthetic plasters. Combining classic glazing with modern specialty products makes an accent wall design feature painting project seamless, durable, and fully customized to match existing woodwork and furnishings.
Specialty Sprays vs. Layered Acrylic Paint Kits
When planning your project, consider the differences between aerosol specialty coatings, brush-and-sponge glaze kits, and troweled plasters:
| Coating Type | Application Method | Visual Texture & Effect | Best Room Applications |
|---|---|---|---|
| Marble Effect Aerosol Sprays | Spray can held 12–14 inches away; cross-hatch “X” motion | Raised, webbing-like strands over a dry base coat | Small alcoves, columns, decorative trim, furniture accents |
| Layered Acrylic Glaze Systems | Sea sponges, feathers, and fine artist brushes | Translucent depth, soft cloudy drifts, organic natural veining | Living room focal walls, dining rooms, primary bedroom suites |
| Venetian & Marble Plasters | Stainless-steel rounded trowels in 2–3 thin coats | Smooth, cool-to-touch stone feel with authentic sheen | Powder rooms, entry foyers, high-end commercial spaces |
Specialty aerosol products like Montana Cans Marble Effect Spray (4.4 out of 5 stars across 1,731 reviews) or Rust-Oleum Specialty Marble Spray Paint deliver quick filament patterns. However, for expansive, realistic wall surfaces, multi-layer acrylic glaze systems provide superior control over color density and organic flow.
Essential Preparation and Required Tools
Achieving an authentic stone finish requires thorough surface prep. Any drywall dent or texture bump breaks the illusion of polished stone. Applying specialty coatings textured painting begins with creating a level, uniform foundation.
Essential Supplies for Applying Marble Effect Paint for Walls
Assemble your tools and materials before opening your paint cans:
- Base Paint: High-quality interior latex paint in an eggshell or satin sheen, such as Regal® Select Waterborne Interior Paint – Flat Gallon Venetian Marble 2114-70 or Ben® Interior Acrylic Paint & Primer – Eggshell Gallon Venetian Marble 2114-70.
- Veining & Drift Colors: Acrylic paints in charcoal, warm taupe, soft gray, and pure titanium white.
- Translucent Acrylic Glazing Liquid: Extends working time and provides essential transparency.
- Application Tools: Natural sea sponges, a soft turkey feather or goose quill, and a #1 or #2 artist liner brush.
- Softening Brushes: A wide, dry badger hair blending brush or soft synthetic dusting brush.
- Surface Prep: 220-grit sandpaper, tack cloths, and 2-inch low-tack painter’s tape.
- Optional Specialty Products: Dulux Spray Effects Marble White or specialty crushing-particle formulations like Marble Effect Paint • Cadence Boya for unique decorative accents.
- Protective Clear Coat: Water-based clear polyurethane or acrylic topcoat in satin or gloss.
Wall Preparation and Base Coat Application
- Repair and Smooth: Fill all drywall nail holes, dents, and seams with spackle. Once dry, sand the entire wall smooth with 220-grit sandpaper and wipe away all residual dust with a damp microfiber cloth.
- Mask Edges: Apply painter’s tape along baseboards, adjoining walls, crown molding, and electrical trim.
- Prime Thoroughly: Apply a dedicated bonding primer across the wall to ensure even absorption of your base colors.
- Apply Base Coat: Roll on two thin, even coats of your background satin paint. Allow 2 to 4 hours of drying time between coats. Professional color consultation palette selection ensures your underlying base shade complements your home’s natural light and decor.
How to Apply Marble Effect Paint for Walls in 5 Steps
Working with glazes requires maintaining a wet edge. Divide your wall visually into working sections roughly 3 feet by 3 feet, allowing patterns to blend across boundaries.
Step 1: Base Coat and Drifts Creation
Natural marble features diagonal color movements called “drifts” or “clouds.”
- Mix your background glaze by blending two parts clear acrylic glazing liquid with one part thinned gray or soft taupe paint.
- Dip a damp sea sponge lightly into the mixture, dabbing off excess liquid on a paper plate.
- Apply the glaze in soft, diagonal sweeps across your working section, running at roughly a 45-degree angle.
- Leave open spaces showing the original base coat to establish natural variation.
Step 2: Sponging Background Depth
- While the initial drift is wet, take a crumpled plastic bag or a lightly dampened sea sponge to stipple the edges of the glaze.
- Soften harsh boundaries by tapping gently in circular, drifting patterns.
- Keep a spray misting bottle filled with clean water on hand. If your room is warm and the glaze dries too fast, lightly mist the surface to keep the paint workable for blending.
Step 3: Drawing and Softening Veins
- Dip the tip of a natural feather or a dampened artist liner brush into a slightly darker, undiluted charcoal or slate acrylic paint.
- Hold the feather loosely between your fingertips, rotating it as you pull it along the natural flow of your background drifts.
- Allow your hand to tremble slightly to create authentic, organic fractures rather than straight, rigid lines.
- Immediately take your dry softening brush and sweep across the freshly drawn line with very light pressure to blur the vein into the background glaze.
Step 4: Layering and Editing
- Step back 6 to 8 feet to review your overall pattern balance.
- Use an artist brush loaded with opaque white paint to add fine, crisp highlight lines alongside major dark veins.
- If any vein looks too heavy, take a thinned wash of base-coat paint on a damp sponge and dab over the area to push the line into the background, creating the illusion of mineral depth under the stone surface.
Step 5: Sealing for Durability and Sheen
- Allow your completed marble wall to cure fully for 24 to 48 hours.
- Apply one to two coats of water-based clear acrylic sealer or polyurethane using a high-density foam roller.
- A satin sheen provides a soft, honed-stone aesthetic, while a gloss topcoat delivers the reflective brilliance of polished Italian marble.
Common Mistakes to Avoid When Painting Faux Marble
Creating a believable stone finish requires avoiding a few common pitfalls:
- Symmetrical or Grid Veining: Natural stone forms organically. Never create parallel lines, grid formations, or evenly spaced “lightning bolt” patterns. Always follow a single, dominant diagonal direction across the wall.
- Working Too Slowly in Warm Rooms: Acrylic glazes lose their blendability quickly when worked in hot or dry environments. Turn off ceiling fans while painting, work in smaller manageable sections, and keep edges damp.
- Over-Blending Details: Over-working a section with sponges and blenders turns distinct marble veins into muddy, uniform smudges. Know when to step away and allow the paint to settle.
- Skipping Wall Smoothing: Marble is smooth and polished. Painting faux stone over heavy drywall orange-peel texture immediately breaks the visual illusion.
Frequently Asked Questions About Faux Marble Walls
How durable is marble effect paint on interior walls?
When sealed with a high-grade waterborne polyurethane or clear acrylic topcoat, faux marble wall finishes offer long-term scrubbability and resist routine scuffs. The sealed surface protects the artistic paint layers beneath, making it suitable for active living rooms, hallways, and dining spaces.
Can marble effect paint be used in bathrooms and kitchens?
Yes, provided the surface is properly primed and protected with a moisture-resistant, non-porous clear sealer. In powder rooms, kitchen feature walls, and dining areas, the clear finish shields the wall from ambient moisture and steam. Avoid direct exposure inside shower stalls or behind cooking ranges where heavy grease and continuous standing water occur.
Do I need artistic experience to paint faux marble walls?
You do not need formal fine-art training to achieve a high-end finish. Success comes from studying reference photos of real stone, practicing feather motions on sample foam boards first, and working with glazing liquid that provides plenty of open time to edit and blend your veining lines.
Conclusion
Elevating plain drywall with realistic marble paint finishes brings timeless sophistication, warmth, and architectural character to your living space. Whether you desire a subtle white Carrara accent or a bold, dramatic stone feature wall, careful preparation, reliable materials, and precise technique make all the difference.
When you want flawless results without the learning curve, T&Z Interior And Exterior Painting is here to help. With more than 15 years of industry experience, our fully licensed and insured team delivers unmatched craftsmanship backed by a 5.0 Google Reviews rating. We proudly serve homeowners across Lombard, Itasca, Addison, Glen Ellyn, Oak Brook, and neighboring communities. Contact us today to explore our comprehensive interior painting services and schedule your project consultation.