
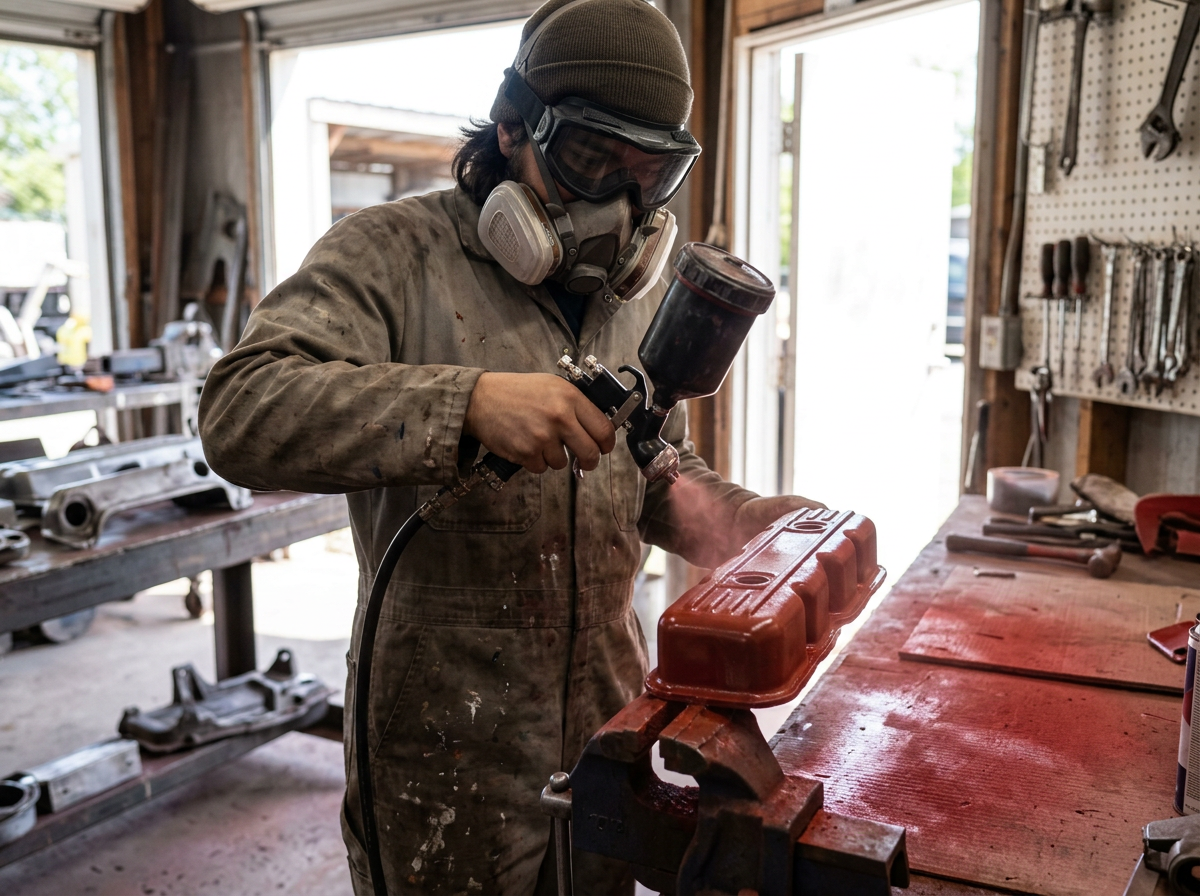
Spray Painting Metal Starts With Surface Prep
For a smooth, durable finish, spray painting metal follows a simple order: clean away grease and dirt, remove loose paint and rust, scuff glossy areas, apply the right primer when needed, then spray several thin coats. Keep the can moving about 8 to 12 inches from the surface, overlap each pass slightly, and let each coat dry according to the label.
Metal does not absorb paint like wood. It is smooth, non-porous, and often exposed to moisture, so shortcuts can lead to peeling paint, drips, or rust creeping beneath the new finish. Good preparation is what turns an old patio chair, railing, fixture, or hardware into a clean-looking surface that holds up over time.
The rest of this guide explains how to choose coatings for steel, aluminum, and galvanized metal; set up a safe work area; avoid common defects; and protect the finish after it cures.
I am Tomasz Niemotko of T&Z Interior And Exterior Painting, a licensed and insured painting company with more than 15 years of experience serving Lombard, Itasca, Addison, Glen Ellyn, Oak Brook, and nearby towns. Our work in spray painting metal and other detailed paint projects is built around careful prep, clean application, and reliable professional results.
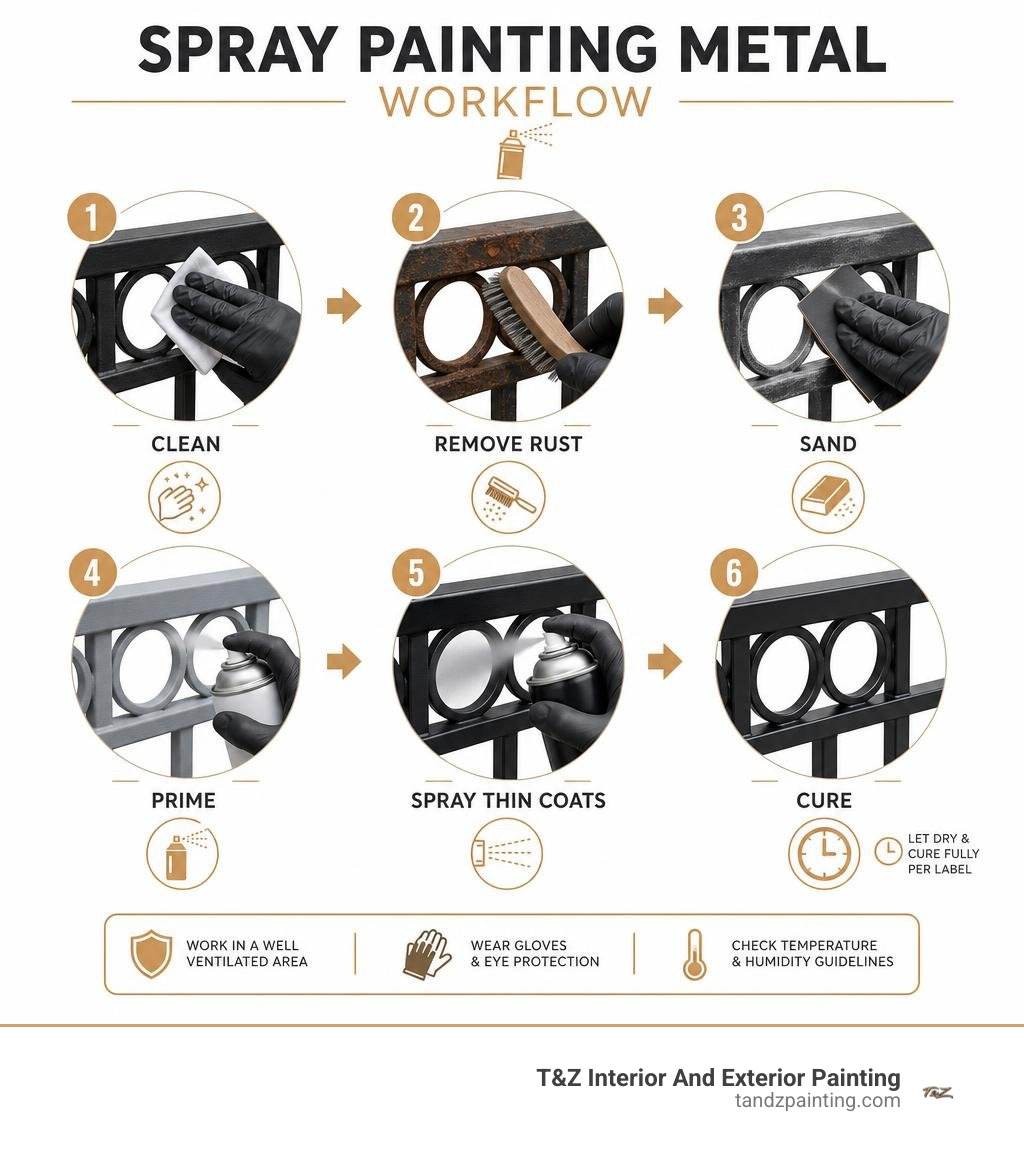
Quick look at spray painting metal:
Essential Preparation Steps Before Spray Painting Metal
When it comes to metal coatings, paint behaves like an uncompromising mirror: it magnifies whatever lies underneath. If you spray directly over invisible oils, chalky residue, or active rust, the finish will blister and lift over time. To ensure optimal adhesion, adopt these effective methods on how to spray paint metal with these 7 quick changes to modernize your prep routine.
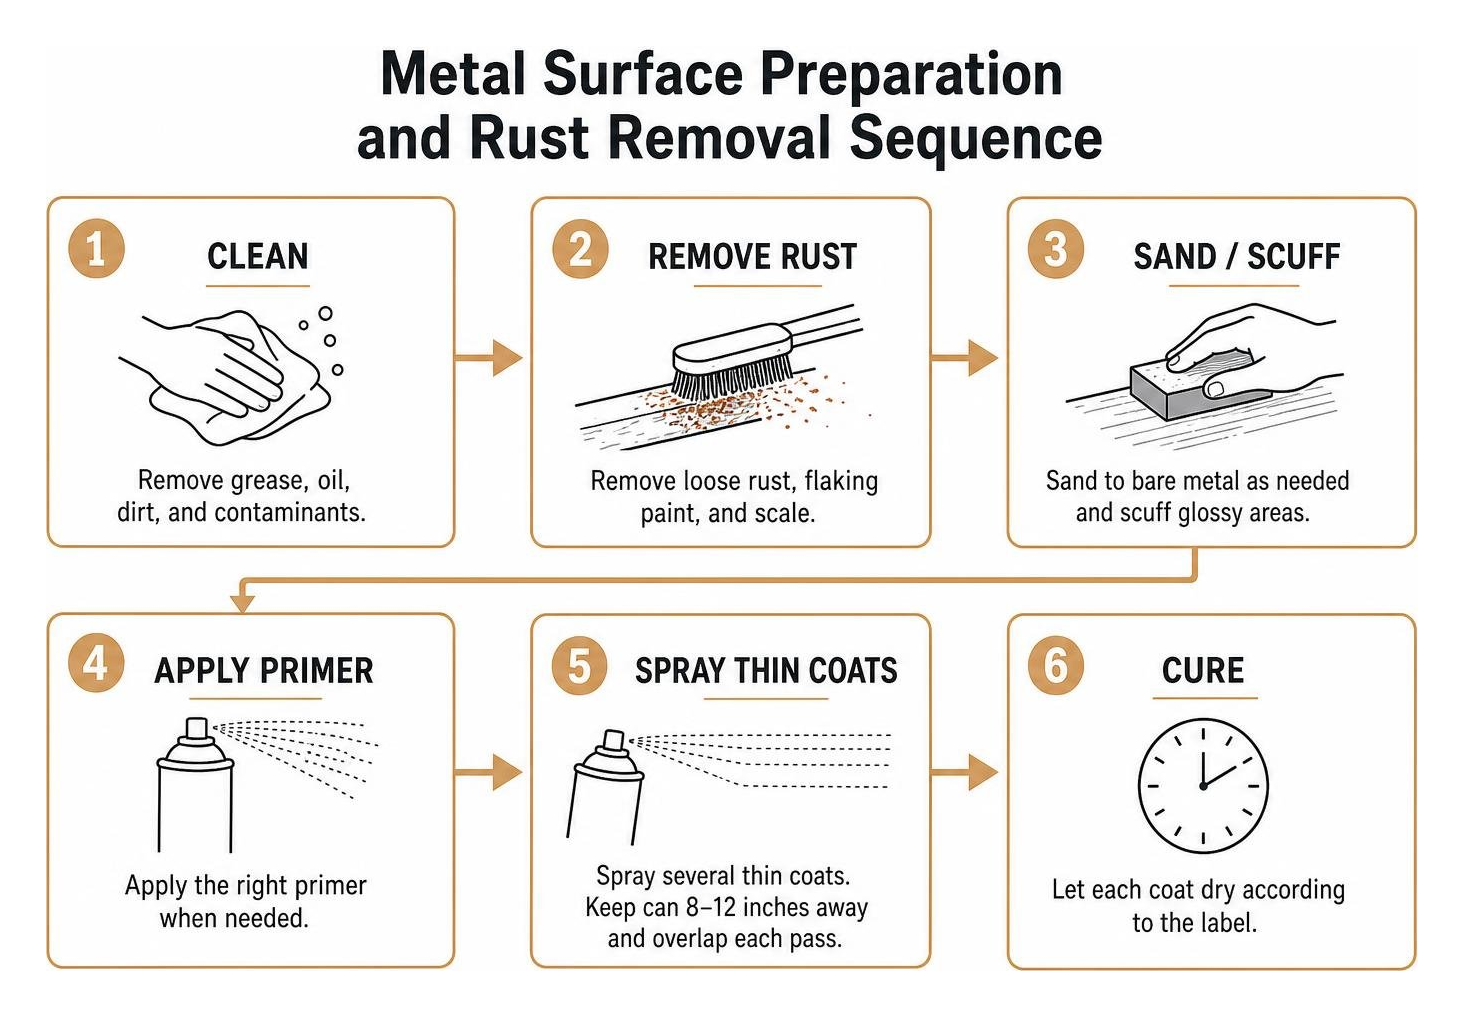
Every successful metal project requires a systematic approach to cleaning and profiling:
- Chemical Degreasing: Metal surfaces attract oily residues, workshop grease, and natural skin oils from handling. Before touching the piece with an abrasive, wash it down with hot soapy water or a dedicated grease-cutting cleaner. Follow up with a thorough wipe using denatured alcohol or pure acetone on a lint-free microfiber cloth. Never touch bare metal with your bare hands after degreasing—the natural oils from your fingertips can prevent paint bonding.
- Mechanical Rust and Scale Removal: Loose rust, flaking paint, and mill scale must be removed completely. Use a stiff wire brush or a drill-mounted wire wheel for heavily pitted sections. For intricate Victorian wrought iron or ornate scrollwork, light abrasive blasting or thorough wire brushing ensures every crevice is free of oxidation.
- Progressive Sanding: Paint needs a mechanical profile (tiny micro-scratches) to grip. Start with an aggressive 80-grit abrasive on rusted areas to reach clean base metal. Transition to 150-grit to feather down transitions between existing intact paint and bare substrate, and finish by scuffing the entire piece with 220-grit sandpaper.
- Tack Rag Dust Removal: Thoroughly wipe the surface with a tack cloth to capture lingering micro-dust before opening a single paint can.
Material Differences When Spray Painting Metal
Not all metals respond to paint in the same manner. Determining the specific alloy prevents unexpected chemical reactions, peeling, or corrosion:
- Ferrous Metals (Cast Iron, Carbon Steel, Wrought Iron): These metals contain iron and are prone to rust when exposed to oxygen and moisture. Test the workpiece with a refrigerator magnet—if it sticks firmly, it is ferrous. Ferrous substrates require dedicated anti-corrosive primers to halt moisture penetration. Check out our recommendations on dont let it rust top durable spray paints for lombard metalwork to keep exterior steel protected.
- Non-Ferrous Metals (Aluminum, Copper, Brass): Non-ferrous metals do not contain iron and will not attract a magnet. They form a micro-thin, slick oxidation layer rather than red rust. Aluminum and copper do not always require heavy rust inhibitors, but they must be scuff-sanded thoroughly with fine abrasive pads to break the smooth surface tension before applying an acrylic or bonding coating.
- Galvanized Metal (Zinc-Coated Steel): Galvanized metal is coated with a protective layer of zinc. Standard oil-based alkyd enamels can react chemically with zinc salts in a process called saponification, forming a soap-like film that causes the paint to slide off in sheets. Galvanized surfaces require cleaning with a 50/50 water-vinegar solution to strip passivating oils, followed by a specialized self-etching primer or an exterior acrylic direct-to-metal (DTM) formula.
Priming Foundations for Maximum Adhesion
Skipping primer on bare or restored metal is one of the most common DIY pitfalls. Primer provides specialized corrosion inhibitors and establishes a uniform bonding substrate that topcoats cannot deliver on their own.
- Rust-Inhibitive Primers: Formulations containing red iron oxide or zinc phosphate chemically pacify microscopic rust remnants, sealing out atmospheric humidity. If minor pitting remains after wire brushing, using a dedicated rusty metal primer your shield against the orange menace will encapsulate remaining oxidation.
- Bonding and Self-Etching Primers: For ultra-smooth surfaces like extruded aluminum, brass, or stainless steel, self-etching primers contain microscopic acid compounds that micro-etch into the substrate, creating a rock-solid chemical anchor.
- Intercoat Smoothing: Apply two light coats of primer rather than one heavy layer. Allow the primer to dry for 24 hours to achieve baseline hardness, then lightly scuff the surface with 400-grit wet/dry sandpaper. This removes dust nibs and ridges, creating a glass-smooth base for your color coats.
Choosing the Right Coatings and Setting Up Your Workstation
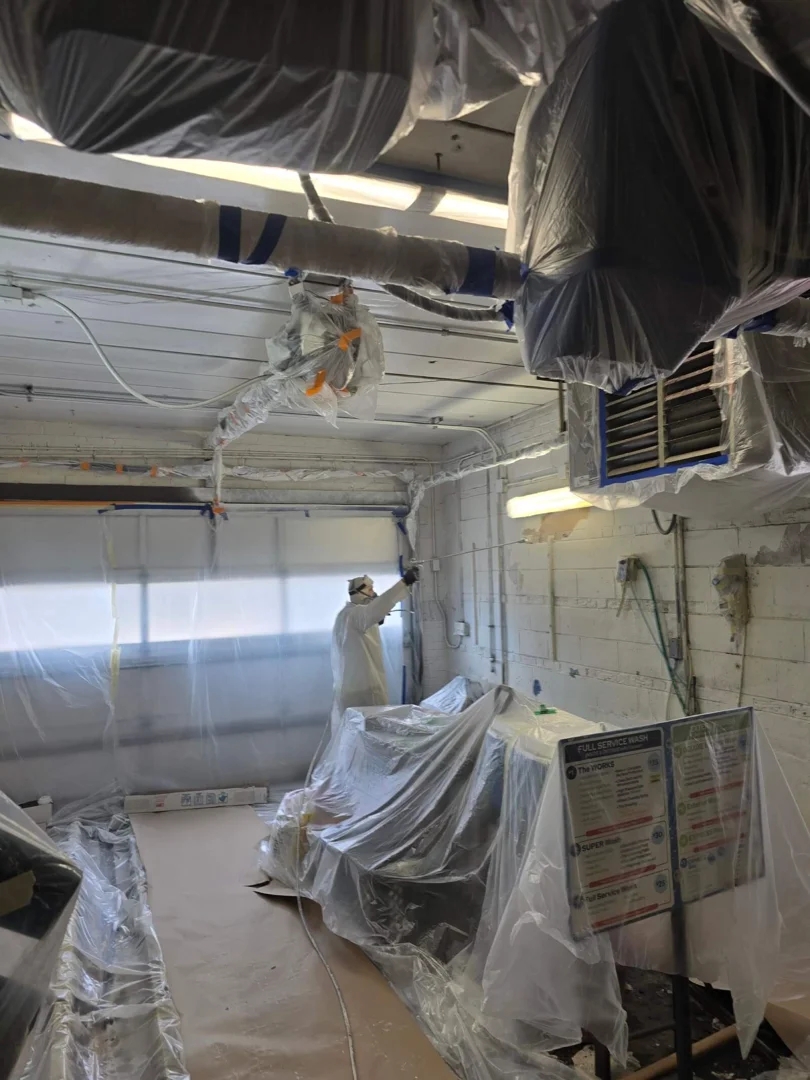
Creating a controlled application space is crucial for avoiding dust contamination, wind-blown overspray, and ruined finishes. When working on large structural pieces or architectural trim, reviewing professional techniques for spray painting for large surfaces will help you scale your setup efficiently.
To establish an ideal painting environment:
- Temperature and Humidity Targets: Apply coatings when ambient temperatures are between 50°F and 90°F (ideally 55°F to 75°F) and relative humidity is below 65%. High humidity above 70–80% traps solvents, causing dull blushing or prolonged cure delays. Avoid painting in direct sunlight, which causes the outer paint film to skin over too rapidly, trapping wet solvents underneath and triggering solvent blisters.
- Overspray Shielding & DIY Booths: Outdoors, hang heavy canvas drop cloths or build a temporary plastic painting enclosure to block wind and drifting pollen. For small household items, place a large cardboard box on its side to act as an overspray containment booth; when finished, close the box flaps lightly to protect the wet paint from bugs and settling dust.
- Personal Protective Equipment: Always wear a NIOSH-approved organic vapor respirator, protective safety eyewear, and nitrile gloves. Scraping or sanding coatings on vintage metal fixtures may release hazardous lead dust, requiring containment and certified respiratory filtration.
Aerosol Enamels, High-Solids, and Metallic Formulations
Selecting the right paint formulation determines your finish’s durability, UV resistance, and coverage:
- High-Solids Protective Coatings: Industrial formulations such as MRO Industrial-Grade High Solids Spray Paint—Stainless Steel contain higher resin and pigment volumes with lower solvent evaporation. A single 16-oz can covers up to 18 square feet—delivering roughly four times the output of conventional retail aerosol cans with exceptional resistance to oil, moisture, and impact.
- Modified Alkyd Enamels: Traditional oil-based aerosol enamels offer outstanding self-leveling and hardness. They are well-suited for outdoor railings, mailboxes, and patio furniture. Always verify substrate compatibility by reviewing manufacturer guidelines like the technical specifications for metallic sprays.
- Metallic Lacquers & Specialty Pigments: Fast-drying lacquers, like Seymour Spruce Metallic Spray Paint–Gold (12 oz), dry to the touch in 5 minutes, can be recoated in 20 minutes, and provide up to 15 square feet of coverage per can with heat resistance up to 250°F. For real metallic armor, Stainless-Blast—Specialty Stainless Steel Spray Paint (12 oz) incorporates actual 316L stainless steel flakes into the wet film, providing superior corrosion protection for welded joints and exterior hardware.
Master Application: How to Achieve a Flawless, Drip-Free Finish
Achieving a uniform, factory-grade finish with an aerosol can or spray gun comes down to mechanical muscle memory and steady pace control.
Step-by-Step Technique for Spray Painting Metal Smoothly
- Thorough Agitation: Shake the aerosol can vigorously for a minimum of 60 seconds after the internal steel mixing ball begins to rattle. Re-shake the can for 5 to 10 seconds every minute during application to keep heavy pigments suspended.
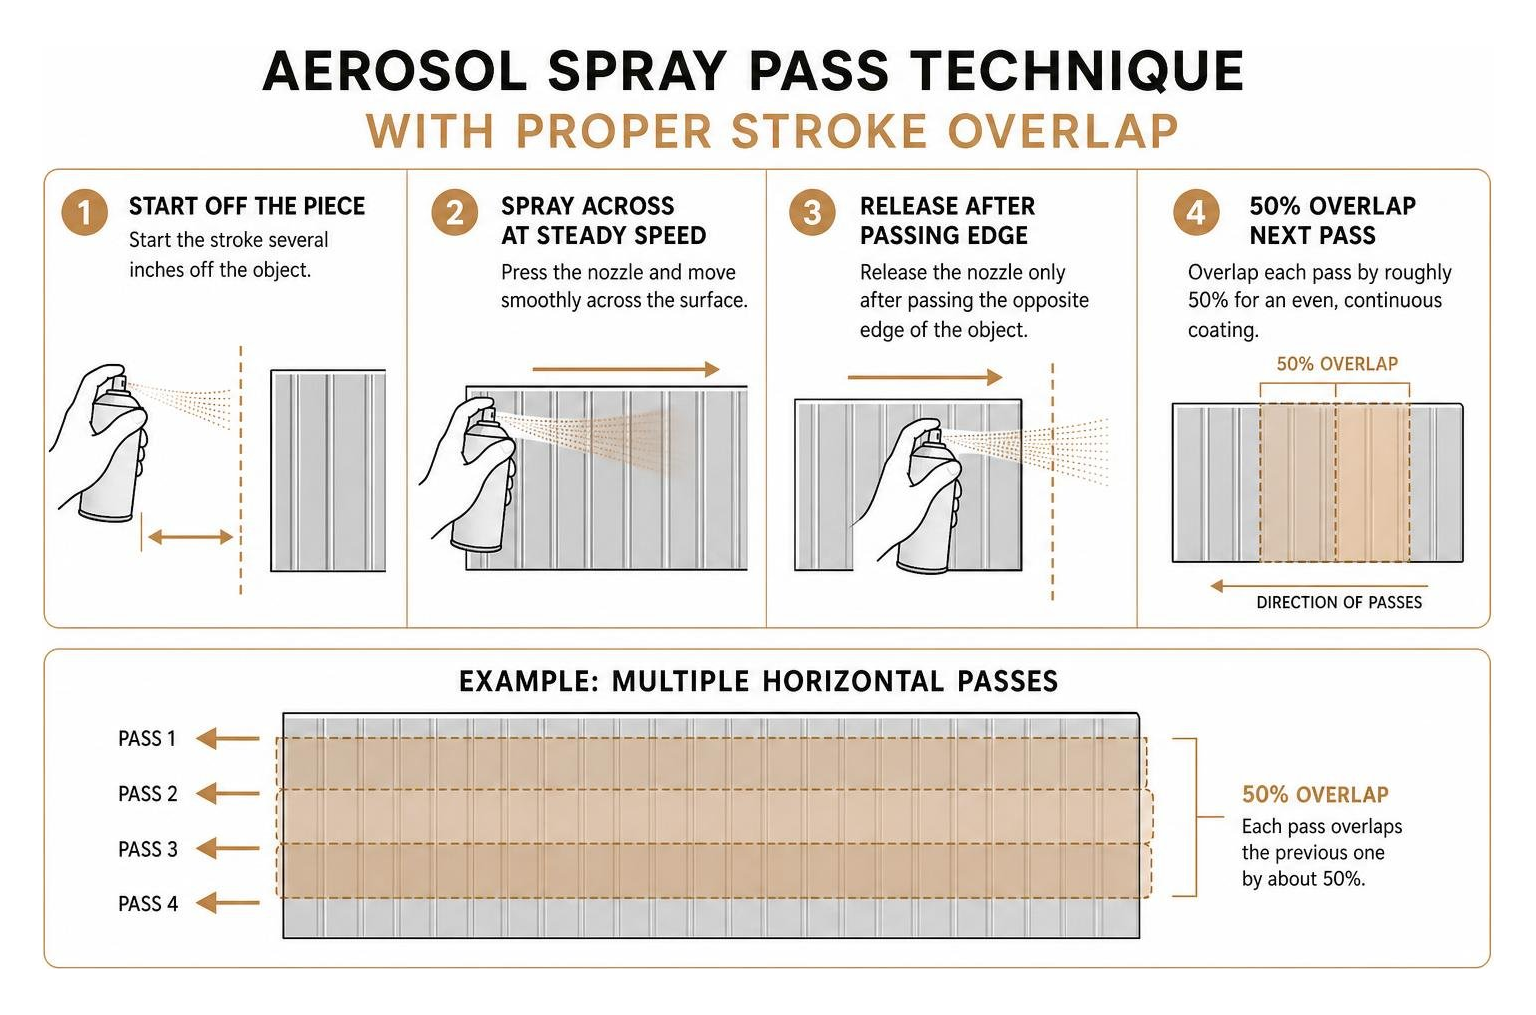
- Proper Spray Distance: Maintain a consistent distance of 8 to 12 inches between the spray tip and the metal substrate. Holding the can too close leads to puddles and runs; holding it too far away causes the paint mist to partially dry in midair, producing a gritty, textured surface known as dry spray.
- Trigger Control and Sweeping Passes: Never press the spray actuator directly over the target piece. Start the spray stroke several inches off to the side of the object, sweep smoothly across the target at an even speed, and release the trigger only after passing the opposite edge.
- Fifty Percent Overlap: Overlap each successive horizontal spray pass by roughly 50%. This creates an even, continuous wet film across the entire surface.
- Multiple Thin Coats: Apply 3 to 4 light coats (or 5 to 6 coats for high-wear premium furniture) rather than attempting full color opacity on the first pass. Wait 10 to 15 minutes of flash-off time between light coats. Products like Fusion All-In-One® Metallic | Krylon® Spray Paint offer broad coverage of 20 to 25 square feet per 12-oz can and dry to the touch in 20 minutes.
- Nozzle Maintenance: When you finish painting, turn the aerosol can upside down and press the nozzle for 2 to 3 seconds until only clear propellant gas emerges. Wipe the nozzle tip clean with a solvent rag before storage.
Troubleshooting Runs, Sags, and Texture Flaws
- Handling Wet Paint Runs: If you apply too much material and notice a run while the paint is still wet, gently dab the excess paint with a lint-free terrycloth rag. Allow the area to dry, lightly sand the defect flat with 320-grit sandpaper, wipe clean, and spray a light blending coat.
- Eliminating Orange Peel: A bumpy texture resembling orange skin occurs when paint is applied in cold weather, over-atomized, or sprayed too thick. To fix it, allow the coat to dry for 48 hours, sand the surface flat with 400-to-600-grit wet/dry sandpaper, and re-spray under proper temperature and humidity conditions.
- Wrinkling and Lifting: If a fresh topcoat wrinkles or lifts the base coat, you likely sprayed outside the recommended recoat window. Most metal enamels require you to apply additional coats within 1 hour, or wait a full 48 hours until the resin has chemically crosslinked.
| Application Factor | Spray Painting Metal | Brush Painting Metal |
|---|---|---|
| Finish Quality | Ultra-smooth, factory-level atomization without brush marks | Prone to brush lines and lap marks on flat panels |
| Intricate Surfaces | Excellent for ornate iron scrollwork, balusters, and wire mesh | Labor-intensive; bristles can cause pooling in corners |
| Application Speed | Fast coverage across expansive or complex geometry | Slower; requires continuous dipping, tipping, and leveling |
| Overspray & Prep | Requires masking, shields, and controlled booth ventilation | Minimal overspray; ideal for occupied indoor spaces |
| Film Thickness Control | Achieves precise dry film thickness (1.0–2.0 mils per coat) | Applies heavier, thicker coats requiring extended dry times |
Frequently Asked Questions About Spray Painting Metal
How long should spray paint cure on metal before heavy use?
While quality spray paint often dries to the touch in 20 to 30 minutes and can be lightly handled after 1 hour, it requires 24 to 72 hours to achieve baseline curing. True chemical cross-linking and full impact resistance take up to two to three weeks. Avoid subjecting newly painted outdoor metal furniture, railings, or machinery to heavy friction, rain, or abrasive wear during this initial curing window.
Can you spray paint directly over existing paint on metal?
Yes, provided the original finish is clean, sound, and firmly bonded. Scrape away any flaking or blistered paint with a wire brush, feather the paint edges smooth using 150-grit sandpaper, and scuff glossy base coats with 220-grit abrasives to create mechanical tooth. Clean the surface thoroughly with denatured alcohol. If the old coating is unknown or oil-based, apply a universal bonding primer before spraying your new topcoat to prevent intercoat adhesion failure.
Why is my spray paint bubbling or peeling off metal?
Peeling, blistering, and bubbling on metal usually result from three main issues:
- Contaminants: Microscopic grease, moisture, or body oils trapped under the paint film break the bond.
- Environmental Conditions: Spraying when ambient humidity exceeds 80% traps moisture in the coating, while painting in direct sunlight causes surface skinning that traps volatile solvents.
- Thermal Expansion and Substrate Incompatibility: Metal expands and contracts with shifting seasonal temperatures. Applying a brittle finish without an elastic rust-inhibitive primer causes the coating to fracture, allowing moisture underneath.
Conclusion
Restoring metal elements with high-performance coatings is one of the most effective ways to preserve architectural integrity, boost exterior curb appeal, and protect valuable property fixtures against rust and weathering. When properly prepped, primed, and coated with 3 to 5 light layers of industrial enamel, an exterior metal chair or architectural railing can withstand harsh seasonal elements for up to 20 years before requiring refinishing.
While small DIY hardware updates are manageable with aerosol cans, expansive residential and commercial metal installations demand professional spray equipment, controlled containment, and industrial-grade coatings.
At T&Z Interior And Exterior Painting, our team brings over 15 years of hands-on expertise to every project. We are fully licensed, insured, and maintain a 5.0 Google Reviews rating. Whether you need exterior architectural metal coatings, interior refinishing, or complete commercial painting throughout Lombard, Itasca, Addison, Glen Ellyn, Oak Brook, and surrounding communities, we deliver reliable, high-quality results.
For durable, professional finishes across your residential or commercial property, explore our specialized services/spray painting capabilities or contact our team today to schedule an expert consultation.