
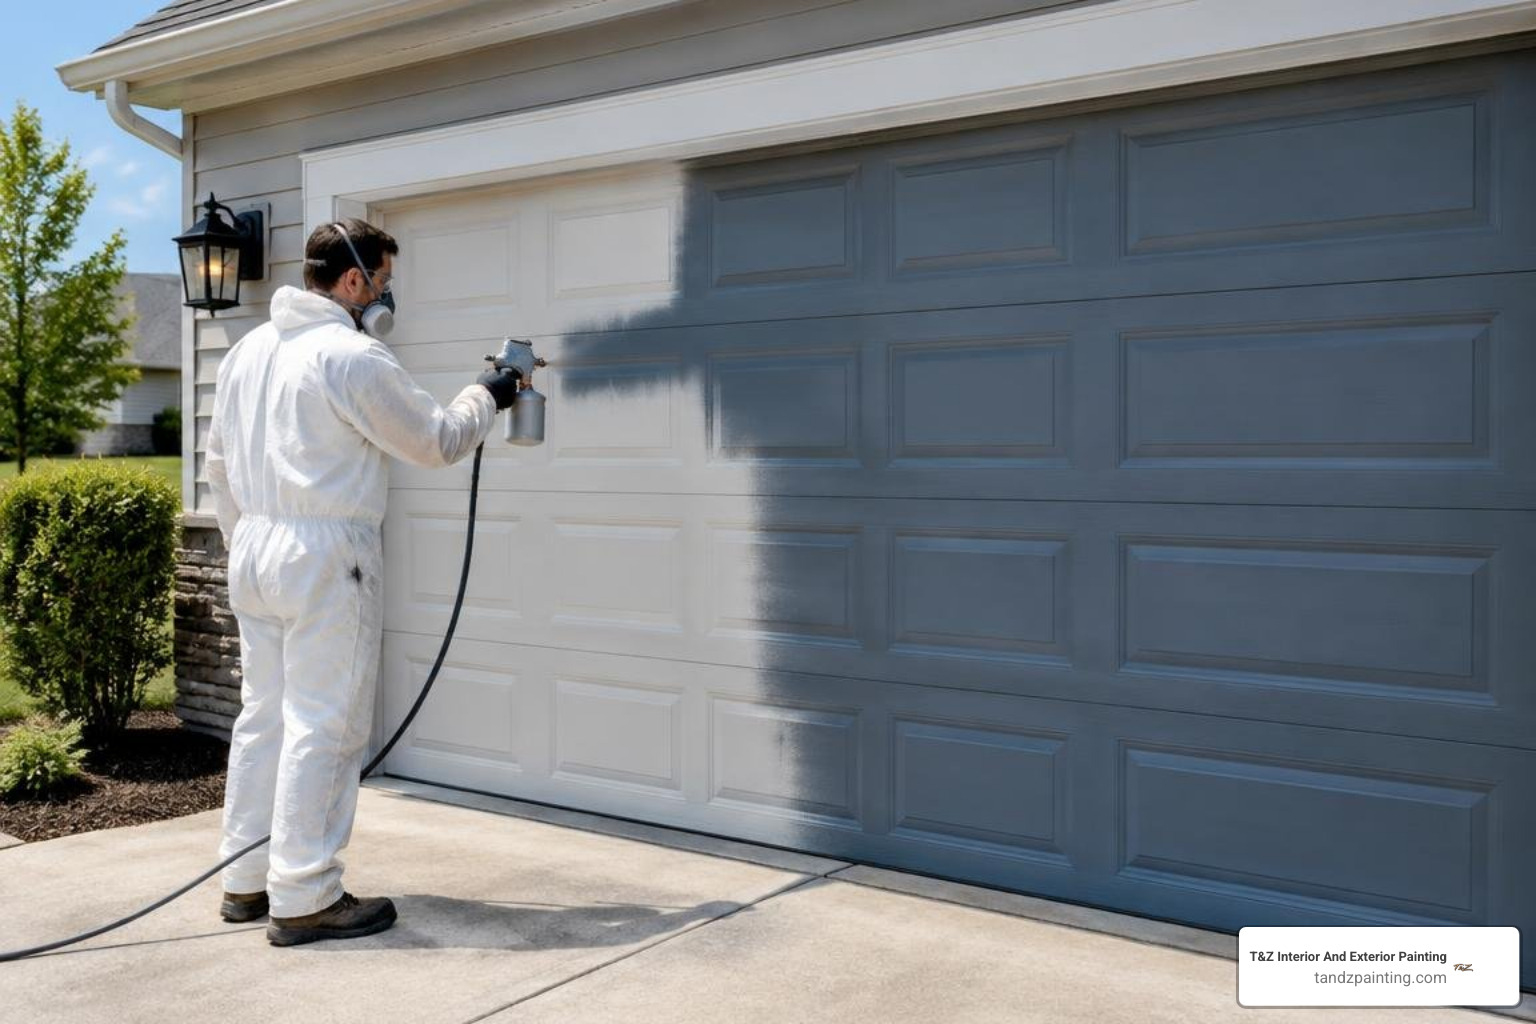
How to Spray Paint a Garage Door
To spray paint a garage door, clean and dry the surface, remove loose paint, sand rough spots, and mask the trim, driveway, and nearby surfaces. Prime bare or damaged areas with a product suited to the door material. Test the sprayer on cardboard, then apply thin, overlapping coats of exterior paint, following the label for drying and recoat times.
Spraying can cover recessed panels more evenly than a brush or roller, but careful prep matters just as much as spray technique. I’m Tomasz Niemotko, owner and founder of T&Z Interior And Exterior Painting, a licensed and insured contractor founded in 2009 and based at 1101 S Columbine Ave, Lombard, IL 60148. With over 15 years of painting experience, I’ll guide you through spray painting garage door panels for a smooth, durable finish.
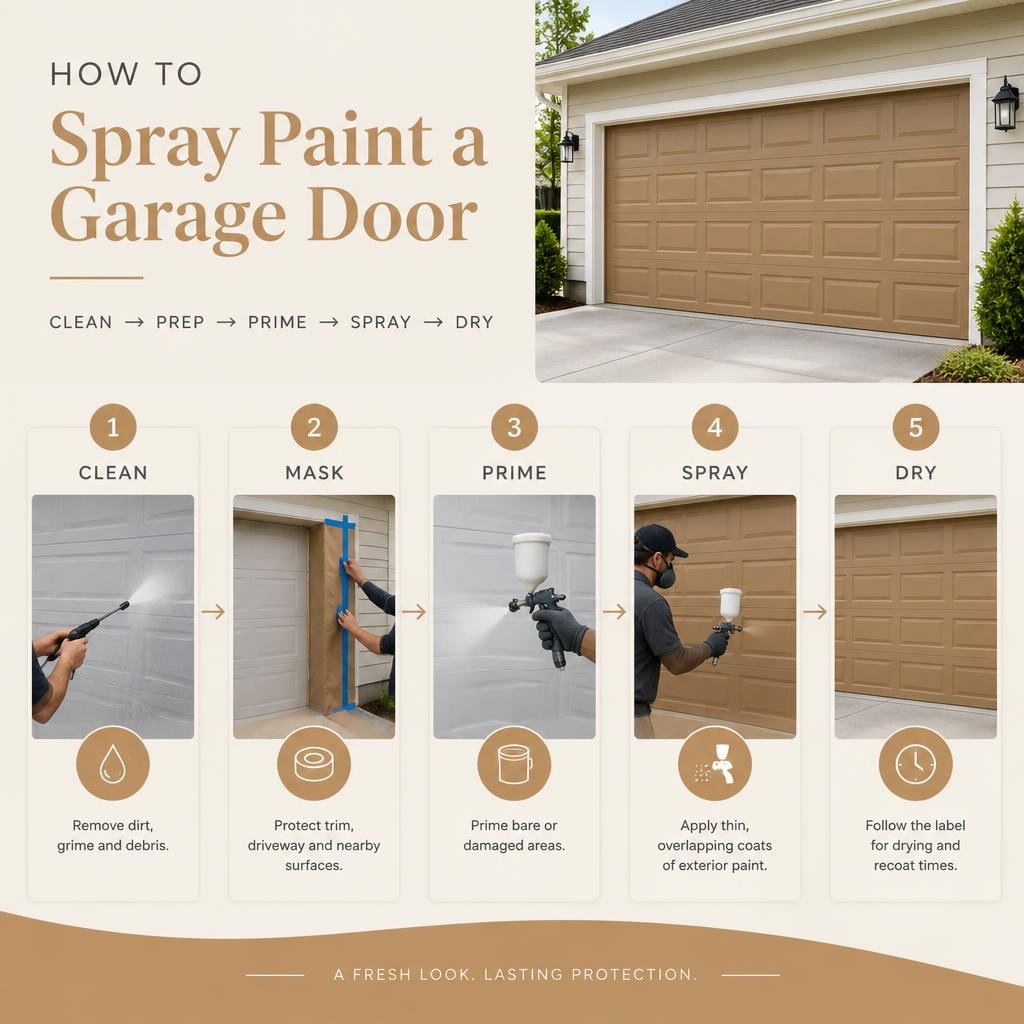
Spray painting garage door vocab explained:
Benefits of Spray Painting a Garage Door Over Traditional Methods
Applying paint with a sprayer provides significant advantages over traditional brushes and rollers. Modern garage doors feature intricate architectural details, including raised or recessed panels, horizontal joints, and simulated woodgrain textures. Reaching into these deep profiles with a roller often causes paint to pool in corners, while brushes leave behind visible lap marks and bristles. A paint sprayer atomizes exterior coatings into a fine mist, allowing the paint to wrap smoothly across contours for a factory-smooth finish.
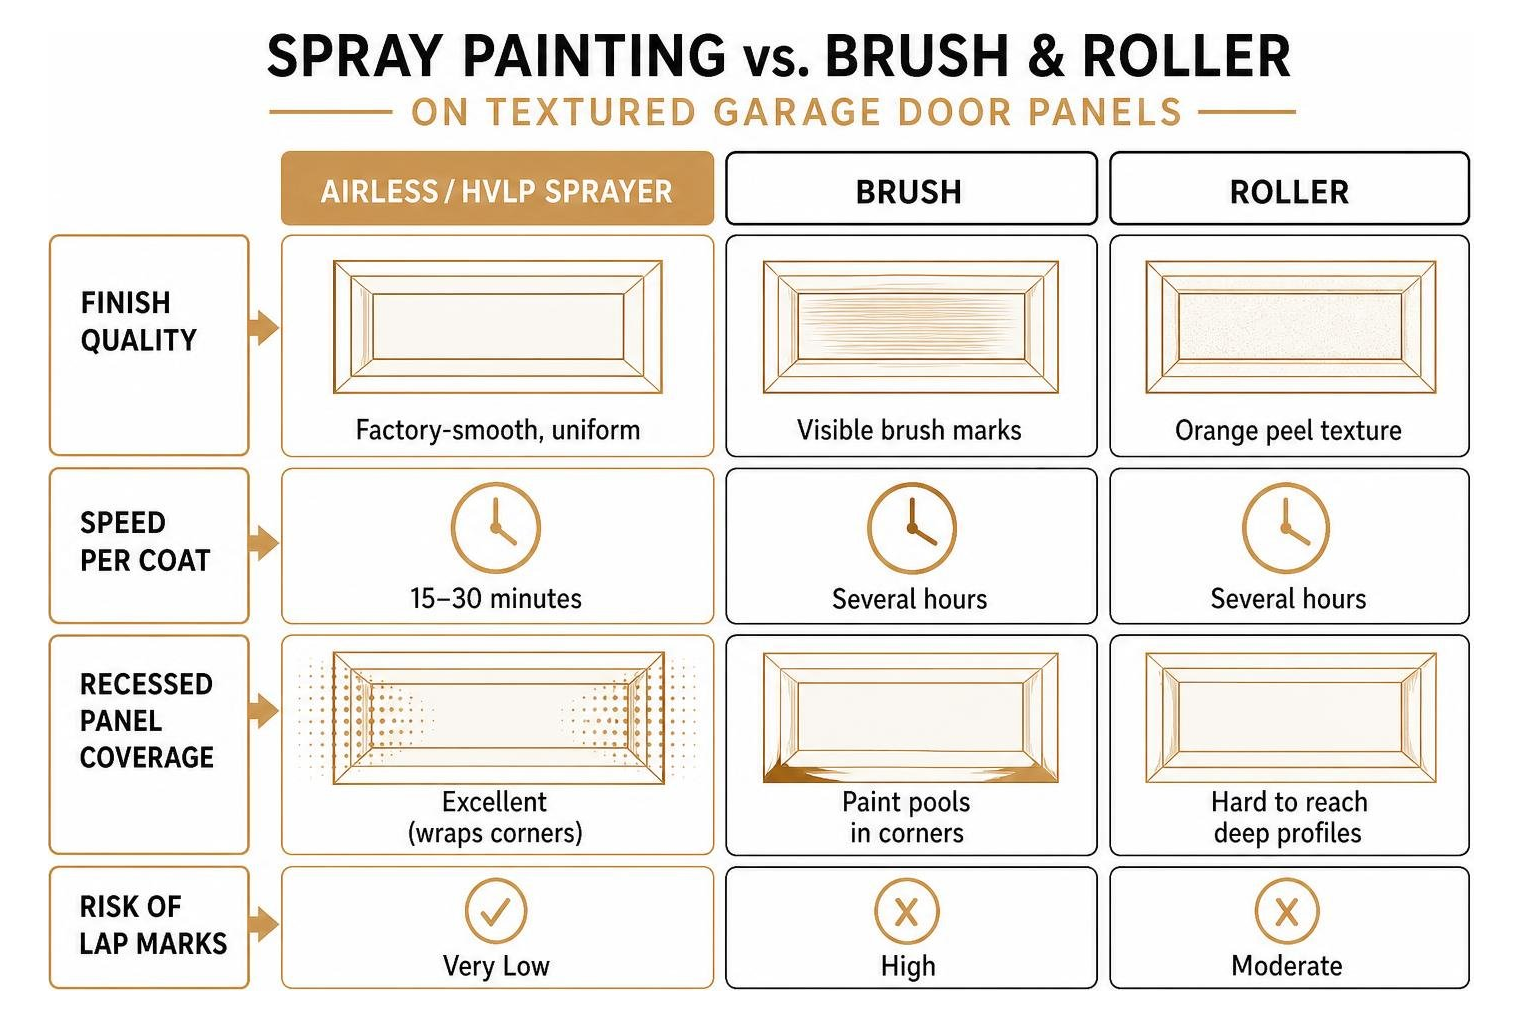
Spraying also delivers exceptional time efficiency. While brushing and rolling an entire multi-car garage door can consume an entire weekend, a sprayer allows you to complete each full coat in under thirty minutes once masking is in place. Furthermore, spray equipment delivers a consistent wet-film thickness (mil thickness) across the entire surface. This uniform application prevents premature fading and uneven wear. Homeowners looking to protect outdoor metal fixtures can read our outdoor metal spray painting guide to understand how consistent atomization protects against moisture intrusion.
| Application Method | Finish Quality | Speed per Coat | Recessed Panel Coverage | Risk of Lap Marks |
|---|---|---|---|---|
| Airless / HVLP Sprayer | Factory-smooth, uniform | 15–30 minutes | Excellent (wraps corners) | Very Low |
| Paint Roller | Light stipple texture | 1–2 hours | Poor (requires brushing seams) | Moderate |
| Paint Brush | Visible stroke marks | 2–3 hours | Moderate (slow, prone to runs) | High |
Superior Adhesion and Weather Protection
A spray-applied coating forms a continuous, uninterrupted protective barrier over the garage door substrate. Because atomized paint particles penetrate deep into microscopic surface pores, 100% acrylic resin coatings achieve superior mechanical bonding. This strong bond resists the daily expansion and contraction caused by seasonal Midwest weather swings. When combined with proper surface preparation, a spray-applied coating typically lasts through a five to seven year maintenance cycle before requiring a refresh. For broader exterior restoration projects, explore our professional exterior painting services to see how modern spray application shields siding, trim, and entryways.
Essential Tools, Materials, and Preparation Checklist
Achieving a clean finish requires the right equipment, safety gear, and masking supplies. Gathering these items before starting ensures your application runs smoothly without interruptions.
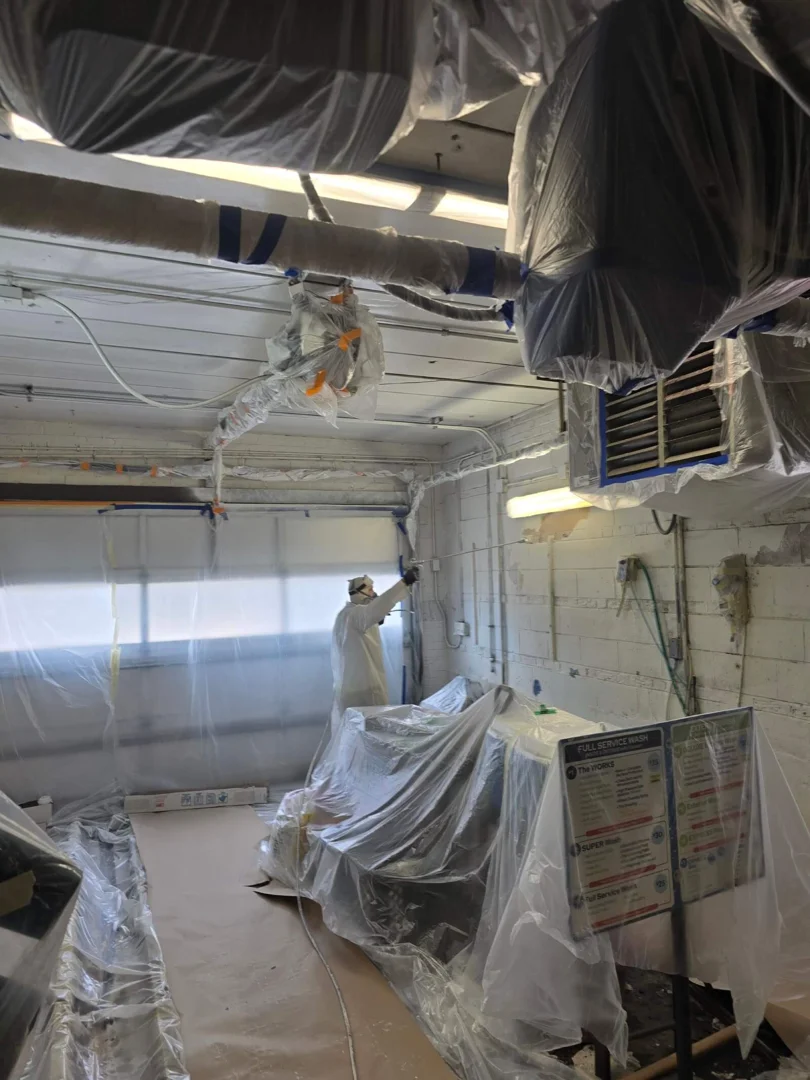
- Personal Protective Equipment (PPE): NIOSH-approved dual-cartridge respirator (rated for organic vapors and paint particulates), safety goggles, chemical-resistant gloves, and a lightweight spray hood or coverall suit.
- Spraying Hardware: Airless paint sprayer or high-volume low-pressure (HVLP) system, high-pressure fluid hose, spray gun, and a 12-inch gun extension wand.
- Spray Tips: A 515 tip for broad exterior coverage or a 311 fine-finish tip for precise control on detailed panels.
- Surface Preparation Supplies: Pressure washer with exterior degreaser, 120-grit to 220-grit sanding blocks, heavy-duty wire brush, paint scraper, and lint-free microfiber rags.
- Masking & Shielding: Medium-tack exterior painter’s tape, 0.31-mil painter’s plastic sheeting, masking paper, canvas drop cloths for driveways, and a 24-inch or 36-inch handheld aluminum spray shield.
- Coating Supplies: Paint strainer bags, 5-gallon work bucket for boxing paint, and exterior bonding primer or rust-inhibitive metal primer.
Equipment Setup and Pressure Calibration
Choosing the proper machine depends on the scope of your project. Airless paint sprayers draw paint directly from a bucket at high pressure (typically 1,500 to 2,500 PSI), making them ideal for heavy exterior acrylic latex paints. HVLP sprayers use higher air volume at lower fluid pressure (around 10 PSI), offering fine control with minimal overspray.
When setting up your sprayer, always start at the lowest pressure setting and gradually turn the pressure control knob up until the spray fan is fully atomized. If the spray pattern shows heavy lines at the edges (known as tails or fingers), increase the pressure slightly or check the tip for partial clogs. Review the Graco guide to garage door paint sprayer setup to fine-tune your pressure adjustments on scrap cardboard before directing the spray gun at your garage.
Paint and Primer Selection by Substrate
Matching your primer and paint to the garage door material prevents peeling, bubbling, and premature failure:
- Stamped Galvanized Steel: Requires a direct-to-metal (DTM) rust-inhibitive primer over any exposed bare metal spots, topped with a premium 100% acrylic exterior latex paint. Never apply oil-based coatings directly to galvanized steel, as the zinc reacts with alkyd resins, causing saponification and paint failure. Homeowners can review our flawless metal door painting techniques for specific insights on steel door coatings.
- Natural Wood: Demands an exterior oil-based or high-hide exterior acrylic stain-blocking primer to lock in wood tannins, followed by two topcoats of exterior acrylic satin or semi-gloss paint.
- Composite and Aluminum: Demands an exterior bonding primer designed for non-porous surfaces to ensure optimal topcoat adhesion.
Satin and semi-gloss sheens remain the most popular choices for garage doors because they resist road dust, shed rainwater easily, and handle periodic washings.
Step-by-Step Spray Painting Process
Applying a smooth finish requires careful attention to environmental conditions and mechanical preparation. Plan your project when outdoor temperatures range between 50°F and 85°F, with relative humidity below 70%. Never spray in direct sunlight, as hot metal panels dry the paint before it can level properly, leading to flashing and poor adhesion. Likewise, avoid windy days to keep airborne overspray from drifting onto neighboring properties or parked vehicles.
Before starting any physical work, disconnect the electric automatic garage door opener by pulling the red manual emergency release cord. This prevents accidental movement while you work around moving panel joints.
Step 1: Surface Cleaning and Masking Prep
- Pressure Wash the Door: Wash the door using a mild exterior cleaning solution or degreaser to remove road grime, dirt, and chalking residue. Rinse thoroughly with clean water and let the door dry completely.
- Scrape and Sand: Use a paint scraper and wire brush to remove any flaking or peeling paint. Sand the perimeter of scraped areas with 120-grit sandpaper to feather the edges smooth. Lightly scuff the remaining glossy areas with 220-grit paper to create a mechanical profile for the new coat.
- Wipe Down: Remove all sanding dust using a clean, damp microfiber cloth.
- Mask Surrounding Surfaces: Cover the exterior brick, siding, and door frame trim with painter’s plastic and tape. Secure canvas drop cloths across the driveway underneath the door. Cover glass windows, handles, and locks with painter’s tape and paper.
Step 2: Priming and Test Pattern Calibration
- Strain and Box the Paint: Pour all paint containers into a clean 5-gallon bucket through a fine-mesh paint strainer bag. Stir thoroughly to ensure color consistency across the entire batch.
- Prime Bare Areas: If your door has exposed bare steel or repaired patches, load your primer into the sprayer. Apply a smooth coat over the exposed areas, keeping the gun 12 inches away from the surface.
- Calibrate the Fan: Set up a large piece of scrap cardboard against a secure backstop. Test your trigger control, fluid flow, and pattern width. Ensure the spray fan is uniform and free of spatter. Consult Wagner instructions on spray pattern consistency for practical troubleshooting tips on nozzle adjustments.
Step 3: Executing Flawless Spray Painting Garage Door Passes
- Maintain Consistent Distance: Hold the spray gun perpendicular to the door surface at a strict 12-inch distance. Avoid arcing your wrist at the ends of strokes, which causes thin spots on edges and heavy paint buildup in the center.
- Master Trigger Control: Start moving your arm before pulling the trigger, and release the trigger before your stroke stops. This feathers the spray pass smoothly into the next section.
- Overlap Consecutive Passes: Overlap each horizontal pass by 50%, aiming the spray tip at the bottom edge of the previous pass to ensure uniform coverage.
- Spray Section by Section: For sectional roll-up doors, spray the recessed panel details first, then coat the broader horizontal stiles and rails. You can also manually raise the door section by section to keep your working area comfortably at eye level.
- Observe Recoat Windows: Allow the first topcoat to dry for two to four hours (or according to product instructions) before applying a second thin coat.
Step 4: Equipment Clean-Up and System Storage
- Flush the Sprayer: Immediately after completing your final coat, empty remaining paint back into your bucket. Run warm, soapy water (for acrylic latex) or mineral spirits (for oil-based coatings) through the fluid intake, pump, and hose until the discharge runs completely clear.
- Clean Tips and Gun: Remove the reversible spray tip and gun filter, scrubbing them gently with a soft nylon brush to remove wet paint particles.
- Protect the Pump: Run pump storage fluid or throat seal lubricant through the system to prevent corrosion and protect the packings from drying out during storage.
- Remove Masking: Pull painter’s tape away at a 45-degree angle while the final coat is dry to the touch but before the paint fully cures. Reattach exterior hardware and reconnect the automatic opener after 24 hours.
Avoiding Common Mistakes and Substrate-Specific Challenges
Even experienced DIYers can encounter obstacles during a spray project. Identifying common pitfalls helps you maintain a clean, professional finish. Homeowners weighing the scope of this project can consult our guide on hiring a garage door painting contractor to decide whether DIY spraying or professional service best matches their schedule.
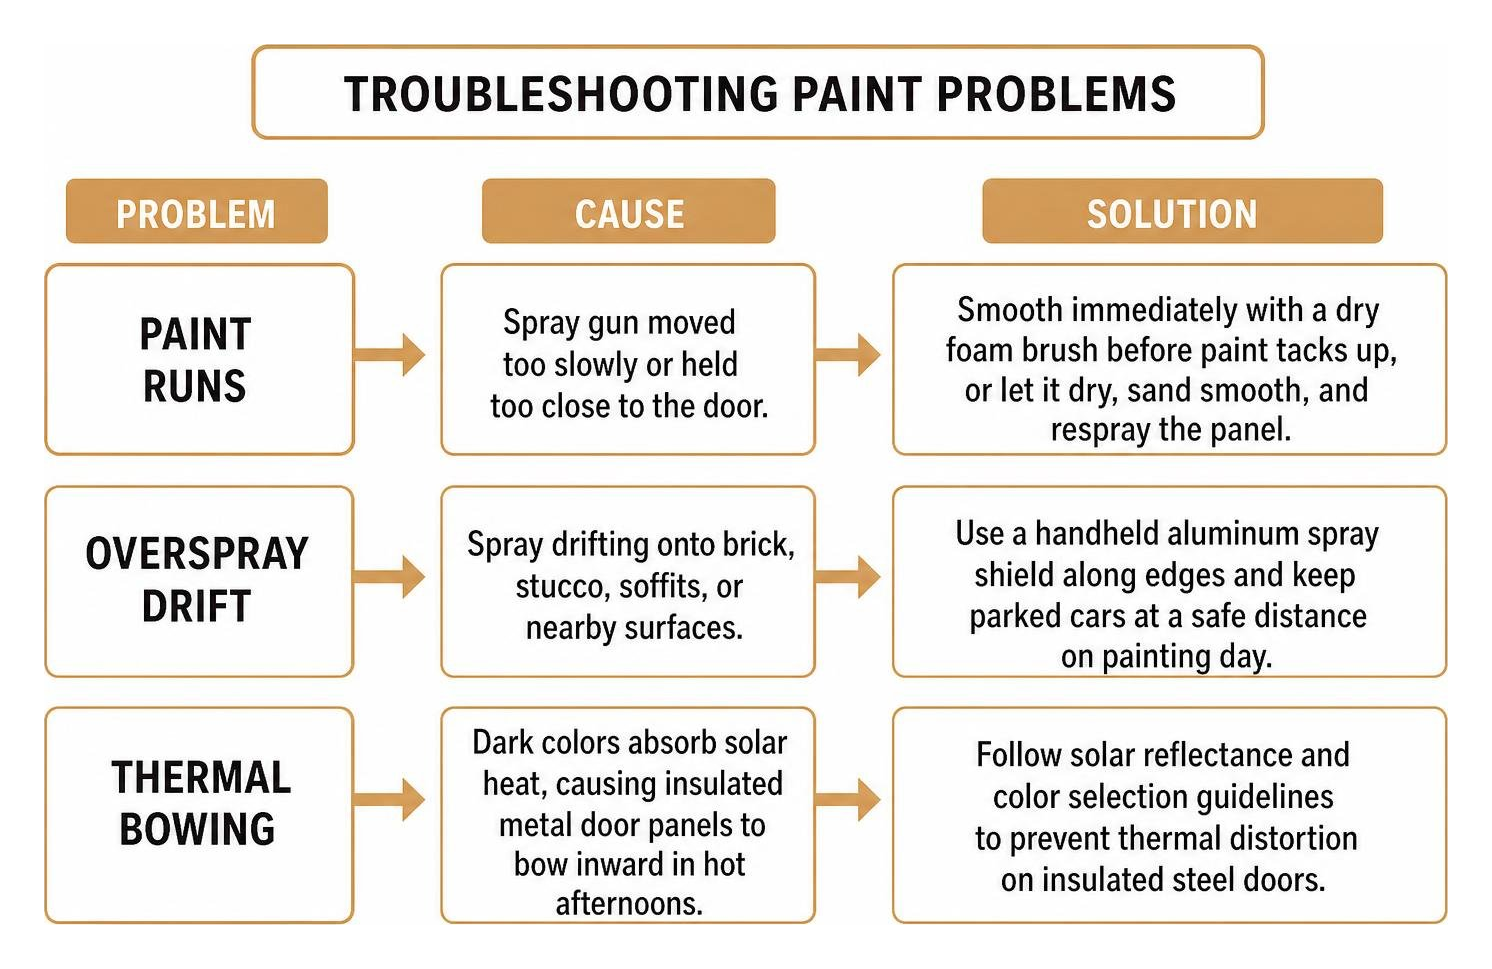
Preventing Overspray, Runs, and Thermal Bowing
- Eliminating Paint Runs: Runs occur when the spray gun is moved too slowly or held too close to the door. If a sag forms, smooth it out immediately with a dry foam brush before the paint tacks up, or wait for it to dry completely, sand it smooth, and respray the panel.
- Managing Overspray Drift: Always hold a handheld aluminum spray shield along the edges of the door when spraying near brick, stucco, or soffits. Keep parked cars at a safe distance away from the driveway on painting day.
- Mitigating Thermal Bowing: Dark paint colors absorb significantly more solar heat than light tones. On insulated metal doors, high heat on the exterior skin combined with a cooler interior core can cause the door panels to deflect or bow inward during hot afternoons. Check your garage door manufacturer’s substrate guidelines regarding solar reflectance and color selection to prevent thermal distortion on insulated steel doors.
Adapting Techniques for Spray Painting Garage Door Substrates
- Stamped Steel Panels: Steel doors respond well to fast, horizontal sweeping passes. Be sure to address any rust spots down to bare metal with a wire wheel before applying a zinc-rich primer.
- Wood and Timber Doors: Wood expands and contracts significantly with moisture changes. All six sides of each wood panel (front, back, and all four edges) should be sealed to prevent water absorption, rot, and panel warping.
- Aluminum and Composite Panels: Aluminum oxidizes over time, leaving a powdery white chalk residue. This oxidation must be scrubbed off completely with a scotch-brite pad and detergent before spraying an exterior bonding primer.
Frequently Asked Questions About Garage Door Painting
How long does a spray-painted garage door last?
A properly prepped and spray-painted garage door typically lasts between five and seven years. Longevity depends on sun exposure, local climate, and regular maintenance. Washing the door annually with clean water and a mild car wash detergent helps remove corrosive road salts and airborne pollutants, extending the lifespan of the acrylic paint film.
What is the best temperature and weather for spraying an exterior garage door?
The ideal conditions for spraying an exterior garage door are dry, calm days with temperatures between 50°F and 85°F and relative humidity below 70%. Avoid painting in direct sunlight or on windy days, as wind scatters atomized paint droplets and accelerates drying before the coating can settle evenly.
Can you spray paint both steel and wood garage doors?
Yes. Both steel and wood garage doors can be spray-painted successfully when using compatible materials. Steel doors require rust-inhibitive metal primers and 100% acrylic exterior latex topcoats. Wood garage doors require tannin-blocking primers and multi-sided sealing to prevent moisture penetration and rot.
Conclusion
Spray painting is one of the most effective ways to refresh your home’s exterior curb appeal while extending the operational life of your garage door. With thorough cleaning, scuff sanding, proper masking, and steady spray gun technique, you can achieve a durable, factory-smooth finish that protects your home for years.
When you prefer to leave large exterior painting projects to a team of experienced professionals, T&Z Interior And Exterior Painting is here to help. Founded in 2009 by Tomasz Niemotko, our local team brings over 15 years of hands-on painting experience to homeowners throughout the western suburbs. We are fully licensed and insured, BBB accredited, maintain a 5.0 Google rating with 85+ reviews, and back our work with a 2-year warranty. We proudly serve homeowners across Lombard, Glen Ellyn, Villa Park, Oak Brook, Oakbrook Terrace, Downers Grove, Wheaton, Elmhurst, Addison, Itasca, Roselle, Bloomingdale, Carol Stream, Wood Dale, Westmont, Bensenville, Berkeley, Hillside, Schiller Park, Glendale Heights, Schaumburg, and Chicago.
Ready to refresh your home’s exterior? Explore our professional spray painting services or contact us today to get started. Request a free estimate at tandzpainting.com or call us directly at (224) 240-0054 to discuss your upcoming project.