
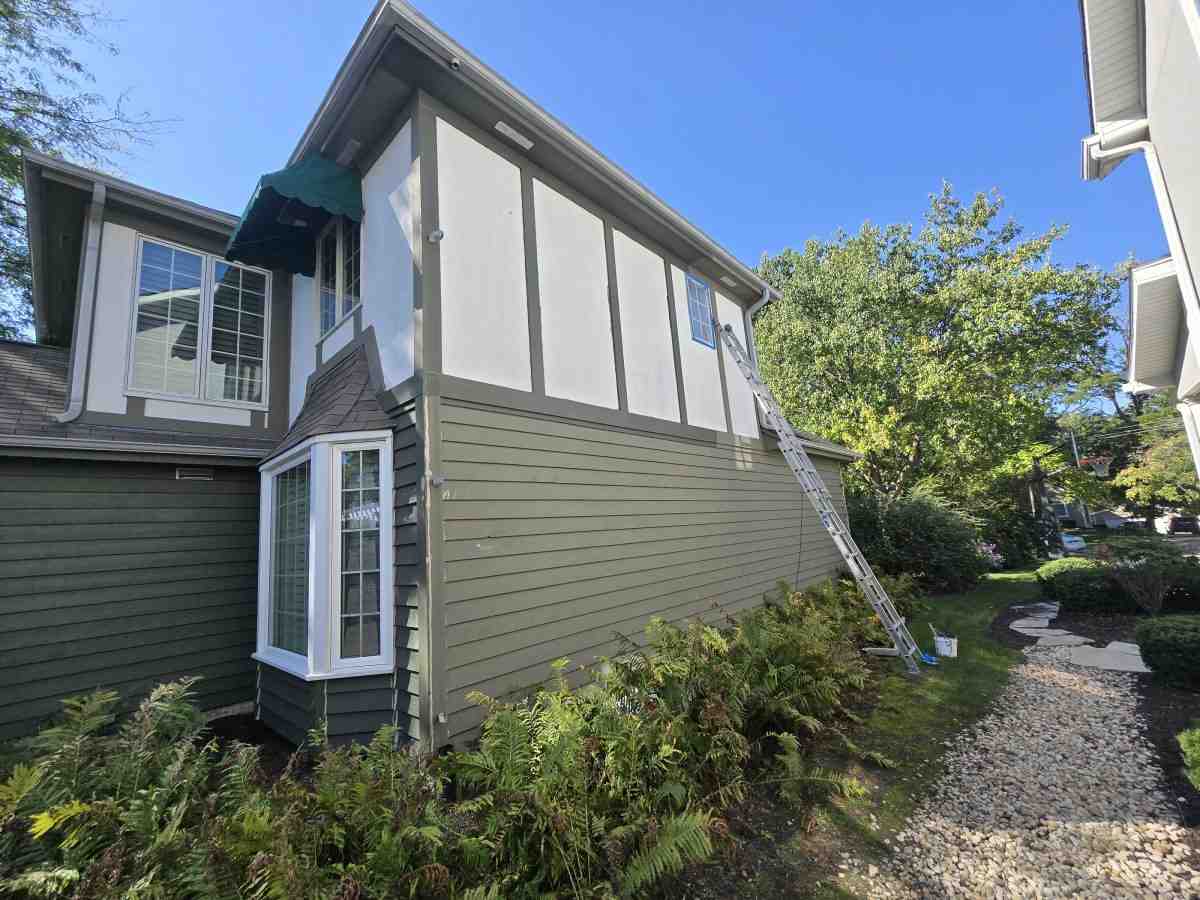
Home Front Painting That Improves Curb Appeal
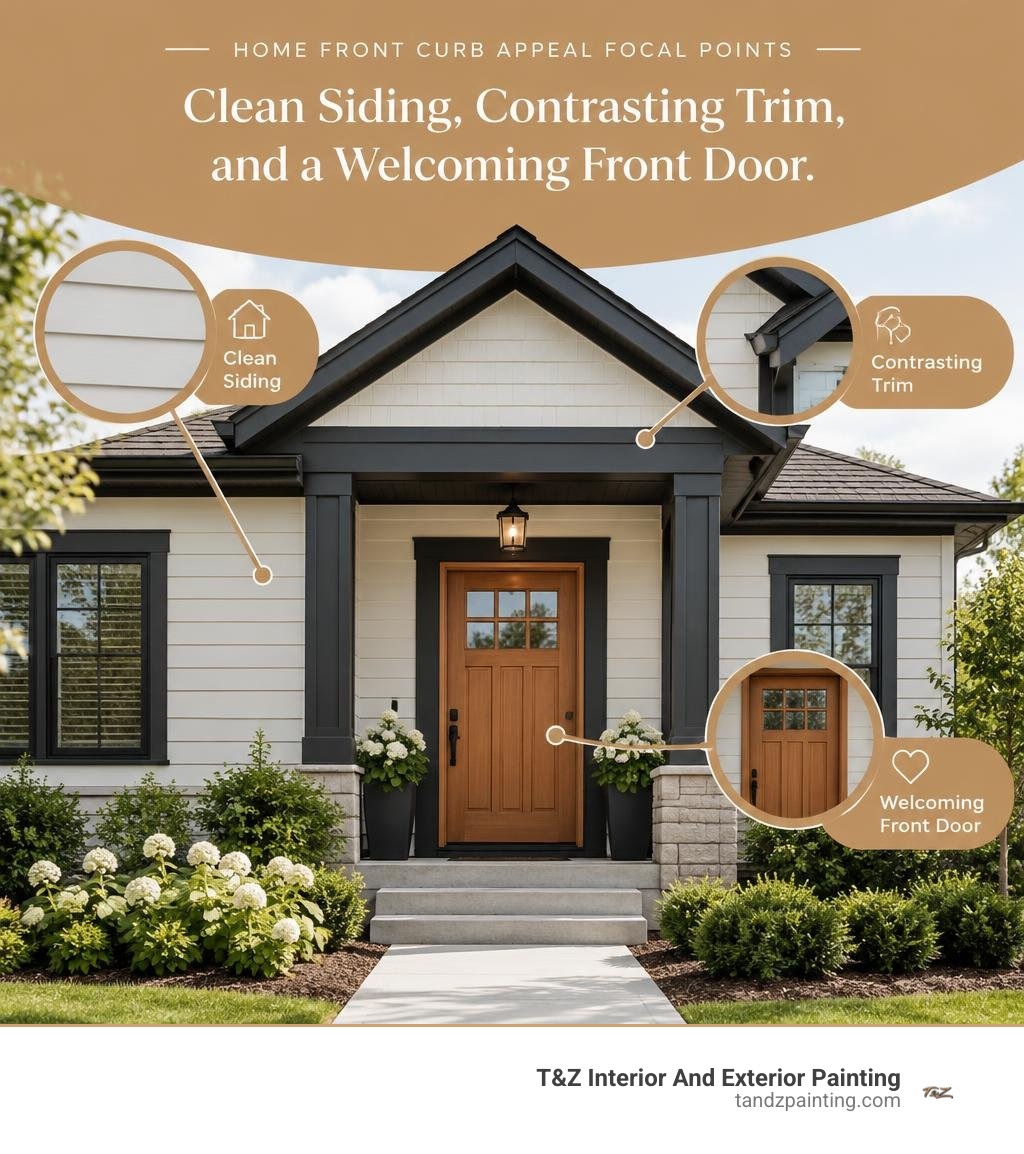
For home front painting that looks good and lasts, start with clean, dry surfaces. Remove loose paint, repair damaged spots, and prime bare areas before applying exterior paint. Choose a main color that works with your roof and brick or stone, then use trim and the front door to add contrast. Test colors outside in morning and afternoon light before you commit.
I’m Tomasz Niemotko, owner and founder of T&Z Interior And Exterior Painting, a licensed and insured painting contractor founded in 2009 and based at 1101 S Columbine Ave, Lombard, IL 60148. My over 15 years of experience with home front painting have shown me how much careful prep and well-chosen colors matter.
Relevant articles related to home front painting:
Essential Preparation Steps for Home Front Painting
A great paint job never begins with a brush or sprayer in hand. It begins with thorough, methodical preparation. When undertaking a home front painting project, the longevity and appearance of your finish depend entirely on the condition of the substrate beneath it. Exterior coatings face punishing sun, wind, rain, and freezing winter temperatures. If dirt, mildew, chalking residue, or failing coatings remain on the wall, the fresh paint cannot establish a mechanical bond.

Start by washing the entire front facade. A pressure washer clears away seasonal grime, spiderwebs, and loose chalking, but keep pressure moderate to avoid gouging wood or forcing moisture behind siding panels. For stubborn mildew or oily pollution stains around front entryways, scrub the surface using a mixture of warm water and trisodium phosphate (TSP) or an eco-friendly detergent substitute. Rinse everything thoroughly with clean water and allow the exterior to dry completely for 24 to 48 hours before proceeding.
Mask all areas that should stay paint-free. Protect light fixtures, house numbers, door hardware, and porch lighting using painter’s tape and plastic sheeting. Shield foundation plantings, front landscaping, and concrete walkways with heavy-duty canvas drop cloths. Canvas absorbs accidental paint drips without creating slippery footing.
Inspecting Surfaces and Managing Lead Paint Safety
Before disturbing any existing layers on homes built before 1978, you must account for the presence of lead-based paint. Lead paint was standard in residential construction across older Chicagoland neighborhoods until its ban in 1978. When disturbed through dry scraping or power sanding, lead creates microscopic dust particles that present serious health hazards to children, pets, and adults.
Homeowners planning a DIY project should test existing paint layers using an EPA-recognized lead test kit before beginning any abrasive prep. If lead is present, avoid open flame burning, heat guns operating above 1,100 degrees Fahrenheit, and power tools without specialized containment. For general safe handling practices, consult comprehensive guidance like the Painting Guide – Green Home Remodel Series. Essential personal safety gear includes an N95 or N100 respirator mask, eye protection, and durable work gloves. Lay heavy plastic sheeting on the ground extending 10 feet out from the work area to capture all scraped paint chips, mist surfaces with water before scraping to suppress dust, and use a HEPA-vacuum for complete cleanup.
Scraping, Sanding, Caulking, and Priming
Once surfaces are clean and dry, address mechanical failures. Use a sturdy carbide scraper or wire brush to remove every flake of loose, cracking, or peeling paint. Feather the hard ridges where old paint meets bare wood by sanding with 80-to-120-grit sandpaper so the transition will not show through the new topcoat.
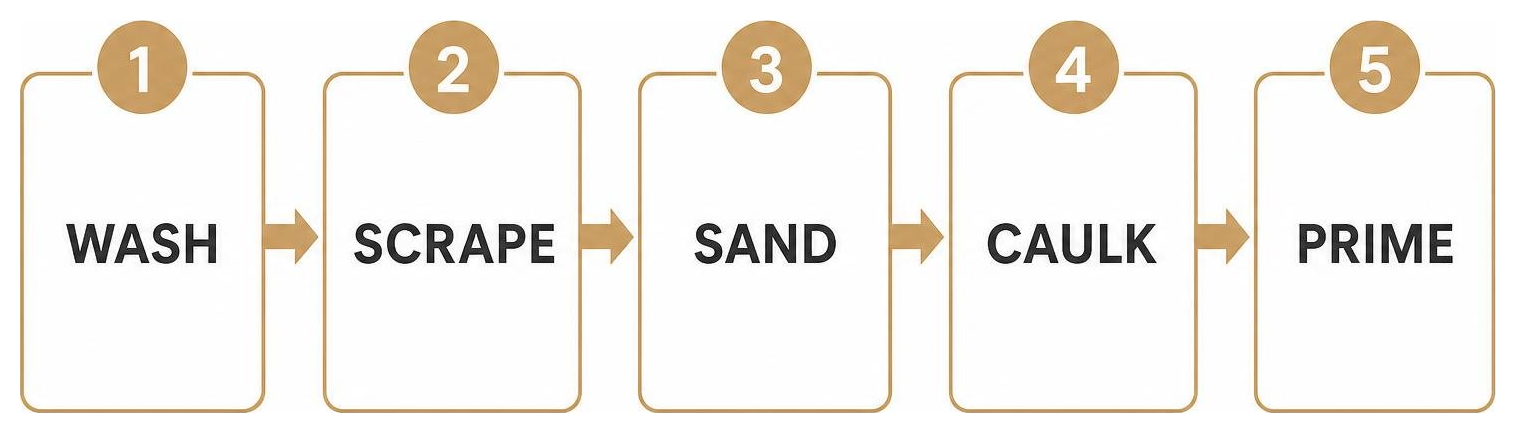
After sanding, blow away all residual dust and inspect every joint, seam, and corner. Fill deep gouges in wood with exterior-grade wood filler or exterior spackle, then apply a premium exterior acrylic latex caulk along:
- Trim joints and window casing perimeters
- Door frames and corner boards
- Siding seams where boards meet vertical trim
Never caulk the horizontal bottom laps of wood or vinyl siding, as these gaps allow natural condensation to escape.
Finish preparation by spot priming all bare wood, patched repairs, and exposed masonry using a dedicated exterior primer. Primer creates a uniform moisture barrier, locks down tannins in wood, and gives the topcoat an ideal surface to grip. For a deeper look at these initial phases, read our detailed guide on how to prepare a house for painting.
Selecting Exterior Colors, Finishes, and Paint Quantities
Color selection is where your home front transformation takes shape. The architecture of your house, surrounding greenery, and neighboring homes all influence which palettes look natural and balanced. As a general design rule, limit your home’s exterior palette to three or four colors: a primary body color for the main siding or masonry, a secondary trim color for casings and eaves, a distinct front door color, and an optional fourth accent for shutters or porch railings.
Choosing Curb-Appealing Color Schemes and Sheens for Home Front Painting
When choosing a palette, look closely at fixed materials like stone foundations, brick walkways, and roof shingles. Gray roofs pair well with cool grays, deep blues, and crisp whites. Warm brown roofs harmonize best with warm neutrals, creams, beige, and earthy sage greens.
For siding, classic neutrals like warm pewter, oyster white, and subtle olive provide enduring curb appeal without overwhelming the streetscape. The front door is your focal opportunity. A bold accent door in classic ruby red, deep navy, rich forest green, or modern charcoal instantly pulls the eye toward the entryway. You can explore curated palette ideas through Exterior Paint Colors | Benjamin Moore or browse extensive collections at Sherwin-Williams Exterior Color Palettes.
Selecting the proper sheen is just as critical as the shade. Flat and matte finishes absorb light, making them exceptional at hiding surface imperfections on older siding, stucco, and brick. Low-lustre, satin, and semi-gloss finishes reflect light, repel dirt, and withstand regular scrubbing, making them the standard choice for window frames, trim, and doors. Learn more about transforming your exterior with proper paint sheens to ensure your surfaces hold up over time.
| Paint Sheen | Reflectivity Level | Best Home Front Application | Main Advantage |
|---|---|---|---|
| Flat / Matte | Non-reflective (0–5%) | Siding, stucco, older wood, exterior brick | Hides dents, rough textures, and surface flaws |
| Low-Lustre / Eggshell | Soft glow (10–20%) | Modern wood siding, vinyl, fiber cement | Easy to clean with low glare |
| Satin | Medium sheen (25–35%) | Soffits, fascia, window trim, porch ceilings | Balances moisture resistance with smooth washability |
| Semi-Gloss | High sheen (40–60%) | Front doors, window sashes, architectural trim | Maximum scrub resistance, highlights architectural lines |
Accurately Calculating Paint and Minimizing Environmental Waste
Paint represents a significant portion of project materials, and buying the exact volume needed saves money while preventing unnecessary chemical disposal. Architectural paint accounts for 600 million gallons used nationwide every year, making waste reduction a smart environmental priority.
To calculate paint needs accurately:
- Measure the height and width of each exterior wall section to determine total square footage.
- Calculate the area of doors and windows, then subtract those numbers from the total wall area.
- Divide the final net square footage by the paint’s rated coverage. A typical gallon of exterior paint covers 250 to 400 square feet per coat depending on surface porosity.
- Multiply by two to account for the necessary two-coat application.
For example, a front facade measuring 800 square feet with 100 square feet of windows leaves 700 square feet of net wall area. Applying two coats over 700 square feet equals 1,400 square feet of total coverage. If your chosen paint covers 350 square feet per gallon, you will need 4 gallons of body paint. Always round up slightly to have touch-up material on hand. Select low-VOC, 100% acrylic-latex formulations that resist UV fading and mildew. Discover more considerations by selecting high quality exterior house paints for long-term protection.
Professional Painting Techniques for Trim, Siding, and Entryways
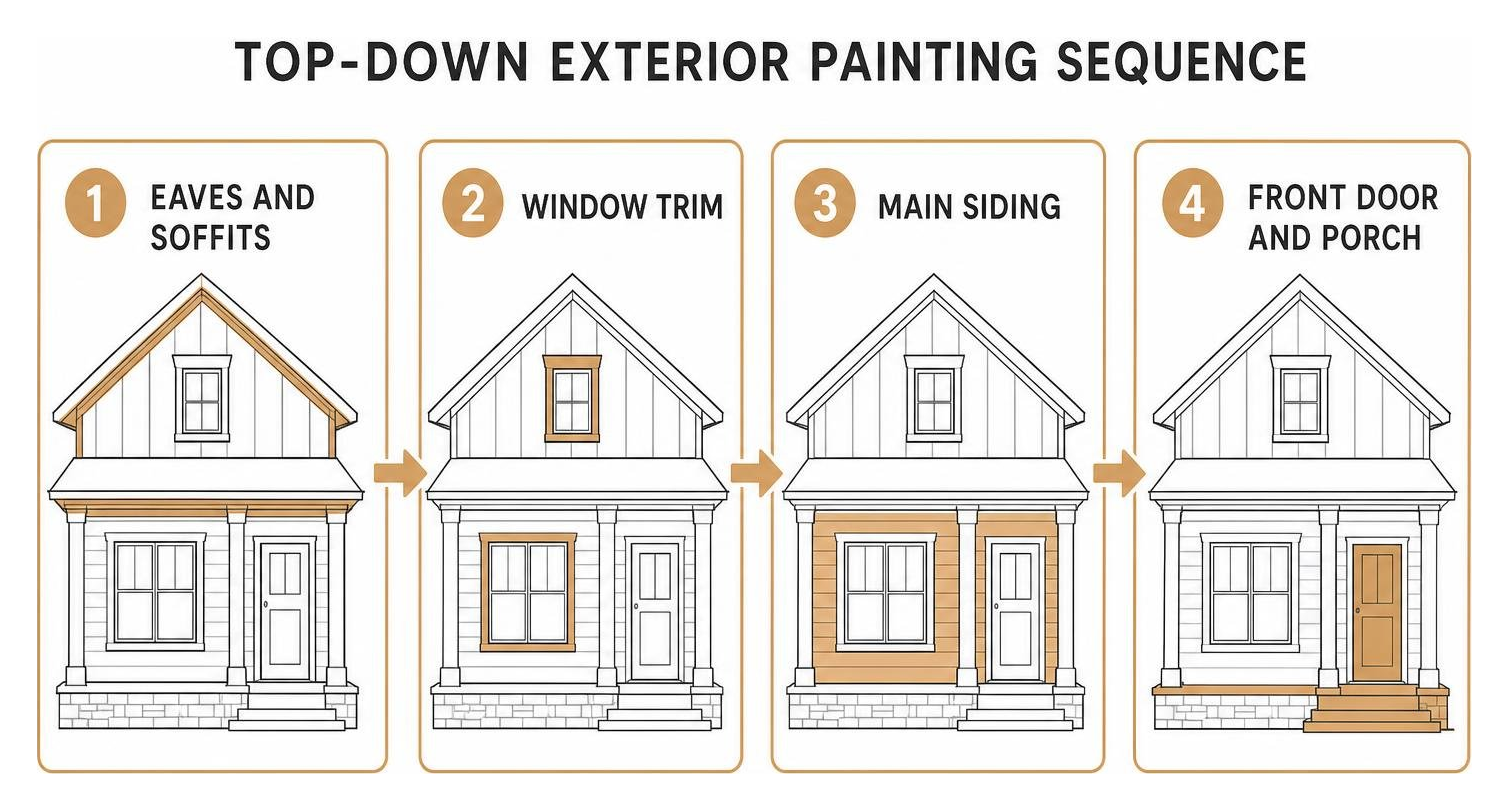
Order of operations determines how clean and professional your home front looks. Always work from the top down. Painting eaves, soffits, and upper trim first prevents accidental drips from landing on freshly finished siding below.
Equip yourself with the right tools. Use high-density nylon/polyester blend angle sash brushes for detailed trim work, high-capacity woven roller covers for siding (use a 3/8-inch nap for smooth wood and 3/4-inch to 1-inch nap for rough masonry or stucco), and professional-grade airless sprayers for expansive siding spans.
Precision Painting on Windows, Front Doors, and Architectural Trim
Window frames and architectural entryways demand precise brushwork. When painting multi-pane or double-hung windows, follow the standard order: paint the interior grid and moving sashes first, move outward to the side jambs and stops, and finish with the exterior casing and sill. Never paint over tracks where window sashes slide, and keep moving sashes slightly cracked open while drying so they do not seal shut. For clear visuals on managing complex window woodwork, review the step-by-step process outlined in How to Paint Exterior Windows | This Old House.
When tackling the front door, remove hardware such as knockers and locksets whenever possible instead of taping around them. If working on a paneled door:
- Paint the recessed panel moldings first using an angled sash brush.
- Paint the flat inner panel faces.
- Paint the horizontal rails (top, middle, and bottom).
- Paint the vertical stiles from top to bottom.
- Finish by painting the door frame and outer edges.
For lasting results on these high-touch focal points, read through our recommendations on choosing top rated paints for exterior trim.
Best Practices for Home Front Painting on Main Siding and Masonry
Applying paint across wide siding or brick surfaces requires maintaining a “wet edge” to avoid visible lap marks. A lap mark occurs when wet paint is applied over a section that has already begun to dry, creating a darker, thicker band.
When working by hand with a brush or roller, work in manageable sections from left to right (or along individual siding boards from end to end), blending each stroke into wet paint. When working on large siding facades, the spray-and-backroll method delivers both speed and uniform adhesion. One person applies paint using an airless paint sprayer while a second person immediately follows with a roller to push the coating deep into wood pores, masonry texture, and hairline joints.
Learn how these methods streamline large projects in our guides covering modern house exterior spray painting techniques and applying durable stucco painting exterior finishes.
Troubleshooting Exterior Paint Problems and Weather Challenges
Even high-grade paints can fail prematurely if applied under the wrong conditions or over unaddressed moisture problems. Recognizing common paint defects early helps you correct the root cause rather than repeatedly covering up surface symptoms.
Diagnosing and Fixing Peeling, Blistering, and Mildew
The most common exterior paint failures include:
- Blistering and Bubbling: Heat blisters occur when paint is applied in direct, hot sun, causing the surface film to dry before solvents underneath evaporate. Moisture blisters occur when trapped interior humidity or structural leaks force their way out through exterior wood siding. Remedy this by scraping the bubbles flat, locating the moisture source (such as leaking gutters or poor attic venting), and repainting during shaded hours.
- Peeling and Flaking: This occurs when paint loses adhesion due to dirt, improper priming, or applying latex paint directly over glossy, unsanded oil-based paint. Scrape back to sound material, feather all edges, apply a dedicated bonding primer, and recoat.
- Mildew and Algae Growth: Shaded porch alcoves and north-facing facades frequently collect black or green biological growth. Never paint over mildew; it will grow through the new coating. Wash affected areas with a diluted bleach solution (1 part bleach to 3 parts water), rinse thoroughly, and apply a 100% acrylic paint containing anti-microbial mildewcides.
Review our proven tips for successfully painting over exterior paint to ensure smooth recoats on challenging surfaces.
Navigating Weather Conditions, Drying Times, and Paint Longevity
Weather dictates the success of exterior painting. The ideal temperature range for applying exterior acrylic latex paint is between 50°F and 90°F with relative humidity levels between 40% and 70%. Never apply exterior paint in direct, blazing midday sun; work around the house by following the shade.
Drying times vary significantly based on paint chemistry:
- Latex/Water-Based Paints: Dry to the touch in 1 to 2 hours, ready for a second coat in 4 hours under moderate conditions.
- Oil-Based/Alkyd Paints: Take 6 to 8 hours to dry and require a full 24 hours before recoating.
Regardless of initial dry times, all exterior paints require at least 24 hours to cure before facing heavy rainfall. If rain hits uncured paint, the water can wash away pigments, cause streakiness, or destroy film integrity. High-quality exterior paint applied correctly typically lasts between 7 and 10 years, though heavy sun exposure, coastal moisture, and severe freeze-thaw cycles can shorten that lifespan. Plan your project timing carefully by choosing the best time to paint your exterior.
Frequently Asked Questions About Exterior Painting
How long does exterior paint need to dry before it rains?
Exterior latex paint dries to the touch within 1 to 2 hours, but it needs at least 24 hours of dry, mild weather to cure thoroughly before being exposed to rain. If unexpected rain falls on freshly applied paint that has dried for only an hour or two, inspect the surface the following day for water spots, softening, or streaking.
How often should a home front be repainted?
A professionally prepared and applied exterior paint job lasts 7 to 10 years on average. Front-facing facades exposed to intense southern or western sun may show signs of chalking or fading after 5 to 7 years. Wood siding and decorative trim usually require repainting sooner than durable fiber cement, brick, or stucco.
How do I make my exterior painting project eco-friendly?
Choose zero- or low-VOC (volatile organic compound) paints certified by standards like Green Seal to reduce airborne toxins and atmospheric pollution. Accurately measure your square footage using the 250 to 400 square feet per gallon standard to avoid buying excess paint. Donate leftover paint to local community reuse centers or dry out small remnants before disposal according to local environmental regulations.
Conclusion: Transform Your Home’s Curb Appeal with Professional Results
A refreshed front facade elevates curb appeal, creates an inviting entryway for guests, and provides your siding and trim with essential defense against the elements. While home front painting requires patience, careful safety measures, and systematic prep work, the clean, lasting transformation makes every step worthwhile.
When you want flawless results without spending your weekends on ladders, our local team at T&Z Interior And Exterior Painting is here to help. Based at 1101 S Columbine Ave in Lombard, IL, we bring over 15 years of dedicated exterior craftsmanship to homes across the western suburbs and Chicagoland, including Lombard, Glen Ellyn, Villa Park, Oak Brook, Oakbrook Terrace, Downers Grove, Wheaton, Elmhurst, Addison, Itasca, Roselle, Bloomingdale, Carol Stream, Wood Dale, Westmont, Bensenville, Berkeley, Hillside, Schiller Park, Glendale Heights, Schaumburg, and Chicago.
Founded in 2009 by Tomasz Niemotko, our company is licensed and insured, BBB accredited, maintains a 5.0 Google rating with 85+ reviews, and backs all completed work with a 2-year warranty.
Ready to transform your home front? Explore our expert exterior painting services and contact T&Z Interior And Exterior Painting today. Visit tandzpainting.com to request your free estimate, or call us directly at (224) 240-0054 during our regular business hours (Monday–Friday 8 AM–7 PM, Saturday 8 AM–3 PM).